The Magic of Soft Christmas Peppermints
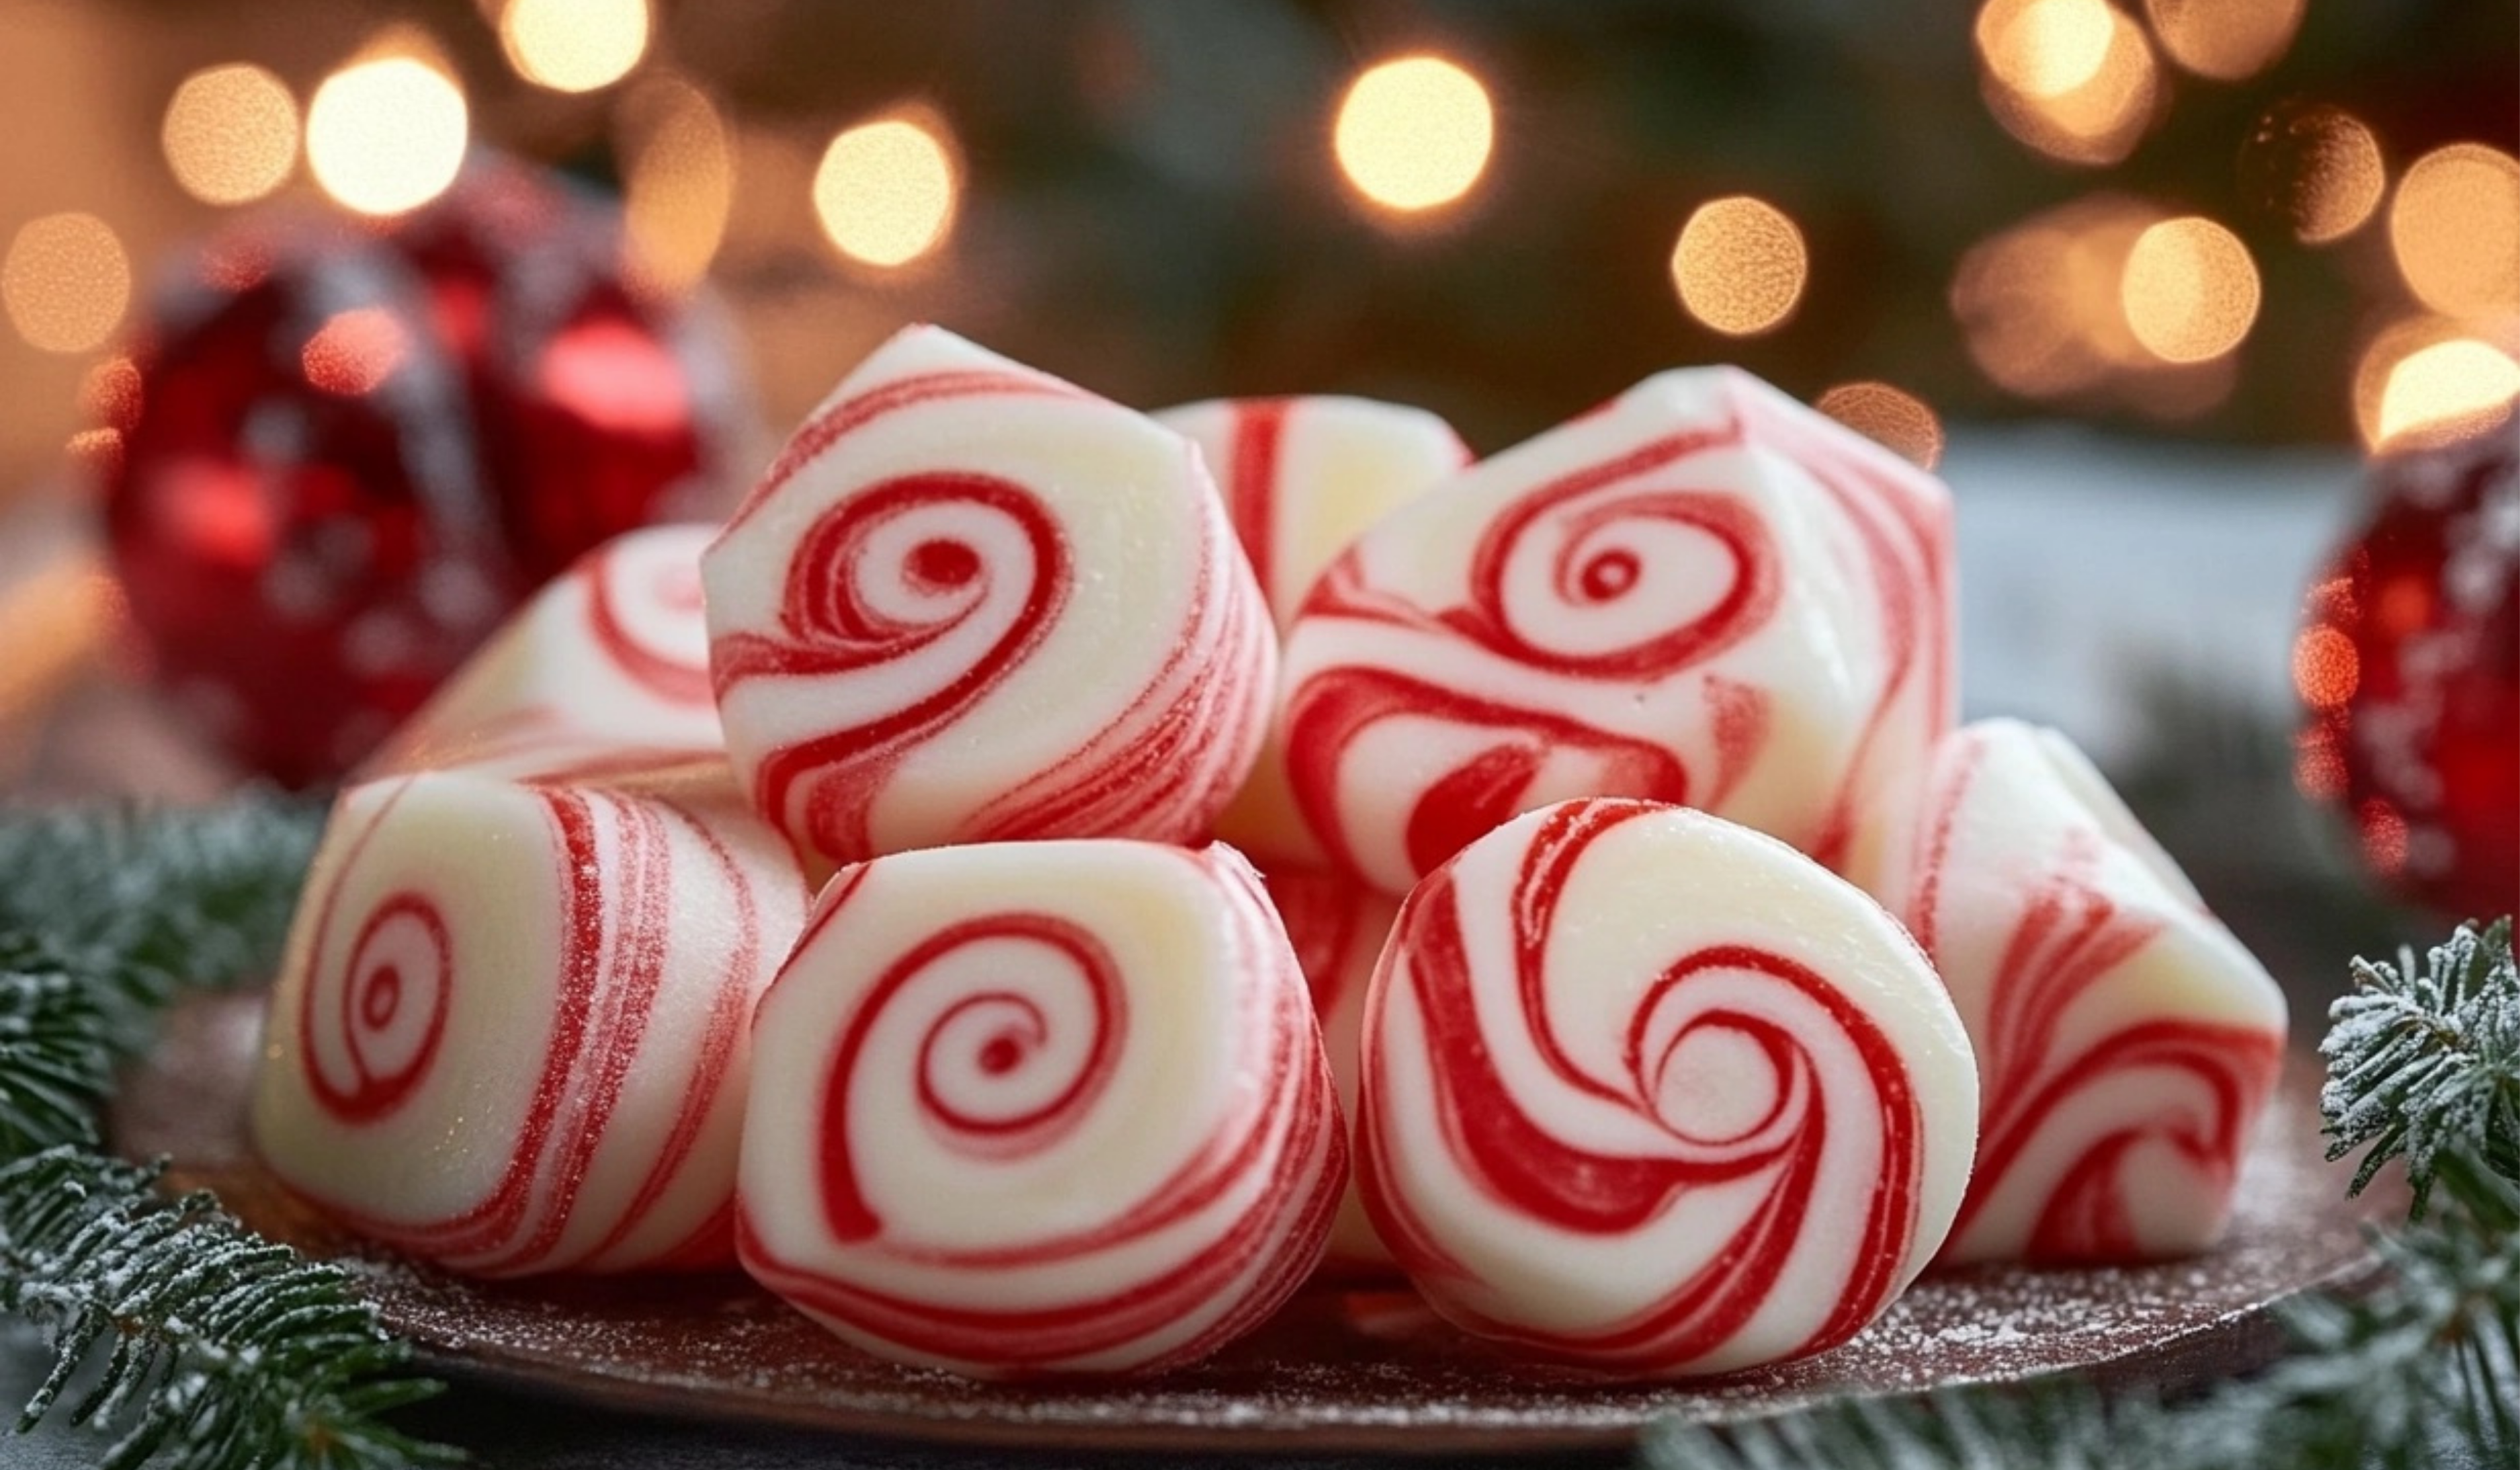
The holidays are a time for tradition, warmth, and indulgence, and nothing brings festive cheer quite like the classic, old-fashioned butter mints. These soft and creamy Christmas treats evoke memories of family gatherings, gift exchanges, and laughter around the dinner table. With their delicate peppermint flavor and melt-in-your-mouth texture, they’re the perfect way to add a touch of sweetness to your holiday celebrations.
Print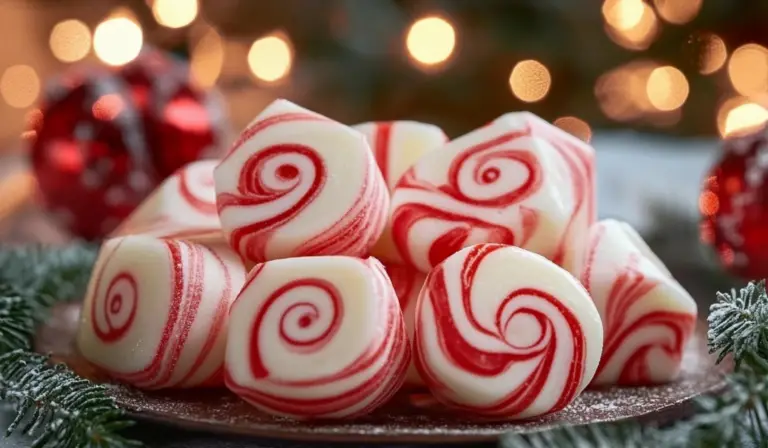
The Magic of Soft Christmas Peppermints
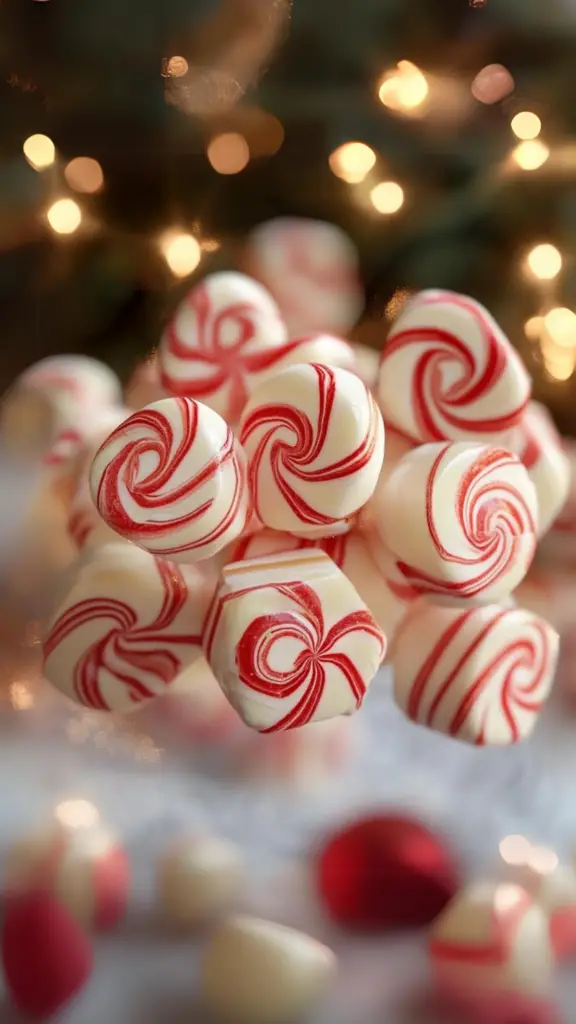
These Soft Christmas Peppermints are the ultimate holiday treat! With their buttery texture and festive red swirl, they’ll bring sweet joy to your gatherings. Perfect for gifts or simply to indulge in the Christmas spirit! 🎅🎄✨
- Total Time: 15 minutes + 24 hours drying time
Ingredients
- ½ cup butter, softened 🧈
The richness of the butter is what gives these mints their soft, melt-in-your-mouth texture. Make sure it’s softened to room temperature for easy blending. - 3 cups powdered sugar 🍚
Powdered sugar is the key to that smooth, creamy sweetness. It dissolves beautifully into the butter and creates the perfect dough for these mints. - 2 tbsp heavy whipping cream 🥛
A touch of cream adds extra richness and makes the mints even more velvety. - ¼ tsp peppermint extract 🍬
This is where the magic happens. Peppermint extract brings that signature, cool mint flavor. Adjust the amount based on how minty you like your mints. - Red gel food coloring 🎨
For that festive, holiday look! You’ll use this to create beautiful red-and-white swirls that evoke the spirit of Christmas.
Instructions
1️⃣ Beat the Butter
Start by beating the softened butter in a mixing bowl. Use a hand mixer or stand mixer to whip the butter until it becomes light and fluffy. The air you incorporate during this step will give the mints their delicate, creamy texture.
2️⃣ Mix in the Rest
Gradually add in the heavy whipping cream, powdered sugar, and peppermint extract. Continue beating the mixture until the dough becomes firm and smooth. At this stage, the dough will be thick, but easy to shape. The key is to find the right balance between softness and firmness, so you can easily roll the dough without it sticking to your hands.
3️⃣ Divide and Color
Next, divide the dough into two parts. Leave about ¾ of the dough white, and color the remaining ¼ with red gel food coloring. Use as much or as little food coloring as you like, depending on how vibrant you want your red mints to be.
4️⃣ Roll and Twist
Now, it’s time to create those iconic peppermint twists! Take small portions of each dough color and roll them into thin ropes. Then, gently twist a red and a white rope together to create a beautiful swirl effect. Pinch off small sections to form individual mints. The process of rolling and twisting the dough is not only fun but also allows you to create custom shapes and sizes.
5️⃣ Dry and Set
Once all the mints are shaped, let them air dry for 1-2 hours. This will help them firm up slightly. Afterward, cut them into bite-sized pieces. For the best texture, allow the mints to dry for a full 24 hours before serving. The drying process helps the outside firm up while keeping the inside soft and creamy.
Notes
- Softened Butter is Key: Make sure the butter is softened before you begin. If the butter is too hard, it won’t blend properly with the sugar and cream, and the dough will be difficult to work with.
- Adjust Peppermint Flavor: Start with ¼ teaspoon of peppermint extract and taste the dough. If you want a stronger mint flavor, add a few more drops, but be careful not to overdo it. Peppermint extract can quickly become overpowering.
- Use Gel Food Coloring: Gel food coloring is more concentrated than liquid food coloring, which means you’ll need less of it to achieve vibrant colors without altering the dough’s texture.
- Air Dry for Best Texture: While it’s tempting to eat these mints right away, it’s best to let them dry for the full 24 hours. This ensures the outside is firm while the inside stays soft and buttery.
- Prep Time: 15minutes
Soft Christmas Peppermints, also known as butter mints, are a nostalgic treat that many of us associate with Christmas parties and holiday gift baskets. Their pastel colors, smooth texture, and gentle sweetness make them a favorite, and they’re incredibly easy to make at home. Whether you’re creating them for a family gathering, gifting them to friends, or simply enjoying them by the fire with a warm drink, these festive mints are bound to become a cherished holiday tradition.
Let’s dive into the recipe and discover why these soft Christmas butter mints are a must-have addition to your holiday treat repertoire!
A Festive Introduction to Butter Mints
What makes these butter mints so special? It’s their simplicity and elegance. The recipe requires just a handful of basic ingredients, but the end result is nothing short of magical. The creamy richness of the butter blends beautifully with the coolness of the peppermint, creating a mint that’s smooth, flavorful, and completely irresistible. These are not the hard peppermints you might find in a restaurant; instead, they’re soft and buttery, with a texture that practically melts as soon as they hit your tongue.
Plus, the addition of red gel food coloring allows you to add a festive, holiday twist to your butter mints. You can create the iconic red-and-white twisted mints that look as good as they taste, or you can experiment with different colors to suit your holiday theme.
🍬 The Ingredients for Christmas Peppermint Bliss
This recipe is wonderfully simple, and all the ingredients are easy to find, especially during the holiday season.
Here’s what you’ll need:
- ½ cup butter, softened 🧈
The richness of the butter is what gives these mints their soft, melt-in-your-mouth texture. Make sure it’s softened to room temperature for easy blending. - 3 cups powdered sugar 🍚
Powdered sugar is the key to that smooth, creamy sweetness. It dissolves beautifully into the butter and creates the perfect dough for these mints. - 2 tbsp heavy whipping cream 🥛
A touch of cream adds extra richness and makes the mints even more velvety. - ¼ tsp peppermint extract 🍬
This is where the magic happens. Peppermint extract brings that signature, cool mint flavor. Adjust the amount based on how minty you like your mints. - Red gel food coloring 🎨
For that festive, holiday look! You’ll use this to create beautiful red-and-white swirls that evoke the spirit of Christmas.
🎨 Step-by-Step Instructions
This recipe is so easy that even beginner bakers or little ones can help out. Follow these simple steps for delicious, homemade butter mints.
1️⃣ Beat the Butter
Start by beating the softened butter in a mixing bowl. Use a hand mixer or stand mixer to whip the butter until it becomes light and fluffy. The air you incorporate during this step will give the mints their delicate, creamy texture.
2️⃣ Mix in the Rest
Gradually add in the heavy whipping cream, powdered sugar, and peppermint extract. Continue beating the mixture until the dough becomes firm and smooth. At this stage, the dough will be thick, but easy to shape. The key is to find the right balance between softness and firmness, so you can easily roll the dough without it sticking to your hands.
3️⃣ Divide and Color
Next, divide the dough into two parts. Leave about ¾ of the dough white, and color the remaining ¼ with red gel food coloring. Use as much or as little food coloring as you like, depending on how vibrant you want your red mints to be.
4️⃣ Roll and Twist
Now, it’s time to create those iconic peppermint twists! Take small portions of each dough color and roll them into thin ropes. Then, gently twist a red and a white rope together to create a beautiful swirl effect. Pinch off small sections to form individual mints. The process of rolling and twisting the dough is not only fun but also allows you to create custom shapes and sizes.
5️⃣ Dry and Set
Once all the mints are shaped, let them air dry for 1-2 hours. This will help them firm up slightly. Afterward, cut them into bite-sized pieces. For the best texture, allow the mints to dry for a full 24 hours before serving. The drying process helps the outside firm up while keeping the inside soft and creamy.
🎁 Variations and Substitutions
One of the great things about this recipe is how versatile it is. You can tweak it to fit your preferences or experiment with different flavors and colors. Here are a few ideas to inspire you:
- Flavor Variations: While peppermint is classic, you can easily swap it for other extracts, like vanilla, almond, or lemon. Orange or cinnamon extract would add a festive twist!
- Color Customization: Don’t limit yourself to red and white. You can create butter mints in any color combination. Green and white would be lovely for Christmas, while pastels could work for spring holidays.
- Chocolate Butter Mints: For a decadent variation, you could dip half of each mint in melted chocolate. The combination of smooth butter mints and rich chocolate would be divine.
- Add Sprinkles: For an extra touch of holiday sparkle, roll the mints in festive sprinkles or edible glitter before letting them dry.
🍽️ Serving Suggestions
Butter mints are incredibly versatile and can be served in many ways:
- Holiday Parties: Serve these mints at your next holiday gathering in a decorative bowl or tray. They make for a light and refreshing dessert after a rich meal.
- Gift Baskets: Butter mints are perfect for gifting! Package them in clear cellophane bags or decorative tins, tied with a festive ribbon. They’re a thoughtful and delicious addition to any holiday gift basket.
- After-Dinner Treats: These mints are also ideal as an after-dinner refreshment. Place a bowl of butter mints on the table for guests to enjoy with coffee or tea.
- Decorative Centerpiece: Use these colorful mints as part of your holiday decor! Arrange them in a pretty jar or bowl as a centerpiece for your holiday table.
👩🍳 Pro Tips for Perfect Butter Mints
To make your butter mints turn out perfectly every time, keep these tips in mind:
- Softened Butter is Key: Make sure the butter is softened before you begin. If the butter is too hard, it won’t blend properly with the sugar and cream, and the dough will be difficult to work with.
- Adjust Peppermint Flavor: Start with ¼ teaspoon of peppermint extract and taste the dough. If you want a stronger mint flavor, add a few more drops, but be careful not to overdo it. Peppermint extract can quickly become overpowering.
- Use Gel Food Coloring: Gel food coloring is more concentrated than liquid food coloring, which means you’ll need less of it to achieve vibrant colors without altering the dough’s texture.
- Air Dry for Best Texture: While it’s tempting to eat these mints right away, it’s best to let them dry for the full 24 hours. This ensures the outside is firm while the inside stays soft and buttery.
🎄 In Conclusion: A Festive Treat Worth Sharing
Soft Christmas Peppermints, or Old-Fashioned Butter Mints, are the kind of nostalgic holiday treat that never goes out of style. They’re easy to make, delicious to eat, and perfect for spreading holiday cheer. Whether you’re serving them at a party, giving them as gifts, or just enjoying them with loved ones, these mints will add a touch of sweetness to your holiday season.
With their beautiful red-and-white swirls, creamy texture, and refreshing peppermint flavor, these mints are bound to become a new holiday tradition in your home. So why not whip up a batch this year and share the joy of these delightful Christmas treats with family and friends? They’re simple, festive, and oh-so-irresistible—just what the holidays are all about!