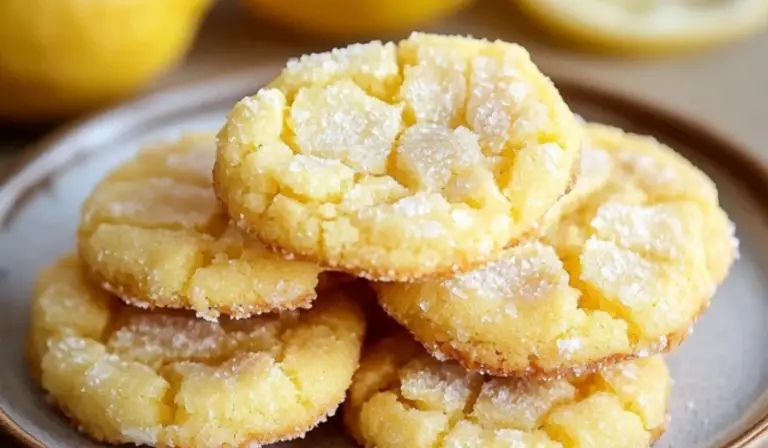
Raspberry Hazelnut Thumbprint Cookies: A Delightful Classic

Raspberry Hazelnut Thumbprint Cookies are an absolute treat that combine the delicate flavor of hazelnuts with the tangy sweetness of raspberry jam. This recipe has been a cherished family favorite for years, and it’s easy to see why. These thumbprint cookies have a soft, buttery texture and a perfect balance of flavors that will transport you to a cozy kitchen, filled with the delicious aromas of baking.
Print
Raspberry Hazelnut Thumbprint Cookies: A Delightful Classic
🍪💫 Indulge in the delightful flavors of Raspberry Hazelnut Thumbprint Cookies! 🌰 Filled with tangy raspberry jam and topped with crunchy hazelnuts, these cookies offer the perfect sweet and nutty combination. Perfect for any occasion or simply as a cozy treat! 😋
#RaspberryDelight 🍓 #HazelnutLove 🌰 #ThumbprintMagic ✨ #ClassicCookies 🍪 #NuttyAndSweet 💛 #BakingBliss 🏡 #CozyTreats ☕ #JamFilledGoodness 😍 #CookieCravings 🍴 #DeliciouslyIrresistible 💫
- Total Time: 2 hours 40 minutes (including refrigeration)
- Yield: 18 cookies 1x
Ingredients
For the Cookie Dough:
- 1/2 Cup Unsalted Butter (softened): The base of the cookie dough. Unsalted butter provides richness and a soft, tender texture to the cookies.
- 1/2 Cup Granulated Sugar (plus 2 tbsp extra for coating): The sugar sweetens the dough and helps create a lovely golden crust when the cookies bake. The extra sugar is used to coat the dough balls for a sweet, crispy exterior.
- 1 Egg (separated): The egg yolk enriches the dough, while the egg white is used to coat the dough balls before rolling in the hazelnut mixture. It helps the hazelnuts adhere to the dough.
- 1 Tsp Vanilla Extract: Adds depth and warmth to the flavor of the cookies.
- 1 1/4 Cups All-Purpose Flour: The foundation of the dough, providing structure and balance to the soft texture of the cookies.
- 1/2 Cup Hazelnuts (toasted and finely chopped): These provide the delicious nutty flavor and crunchy texture that pairs so beautifully with the soft, buttery dough.
For the Raspberry Jam Filling:
- 1 Cup Raspberry Jam: The star of the show, giving the cookies their signature fruity flavor. The jam adds the perfect amount of sweetness and tartness to balance the richness of the cookie.
Instructions
Step 1: Preparing the Dough
- Preheat your oven to 325°F (163°C) and line your baking sheets with parchment paper. This will prevent the cookies from sticking and make for easy cleanup later.
- In a large mixing bowl, combine the softened butter and 1/2 cup granulated sugar. Use an electric mixer fitted with the paddle attachment to mix these ingredients on medium speed. Continue mixing until the dough becomes pale and fluffy—this will take about 2-3 minutes.
- Add the egg yolk and vanilla extract into the butter-sugar mixture. Mix until everything is well combined.
- Reduce the mixer speed to low and gradually add the all-purpose flour, mixing until the dough just comes together. Avoid over-mixing to ensure your cookies stay tender.
Step 2: Chilling the Dough
Once the dough has come together, it’s time to refrigerate the dough for 2 hours. This step is crucial for achieving the perfect texture. Chilling the dough allows the butter to firm up, which makes the cookies easier to shape and helps them maintain their shape during baking.
Step 3: Preparing the Hazelnut Coating
While the dough chills, prepare the coating for the dough balls. In a small bowl, combine the toasted hazelnuts with the remaining 2 tablespoons of granulated sugar. Stir until the mixture is well combined. Set aside.
Step 4: Shaping the Cookies
Once the dough is chilled, it’s time to shape the cookies:
- Roll the dough into 1-inch balls, using your hands. If you find the dough is a bit sticky, you can dust your hands with a little flour.
- Dip each dough ball into the lightly beaten egg white, ensuring that the entire surface is coated. Then roll the ball in the hazelnut-sugar mixture, pressing gently to help the nuts adhere to the dough.
Step 5: Baking the Cookies
- Place the coated dough balls 1 inch apart on the prepared baking sheets.
- Press down the center of each ball with your thumb, creating a small indentation for the jam filling.
- Bake the cookies in the preheated oven for 10 minutes. After the initial baking time, remove them from the oven and gently press down the centers again using the end of a wooden spoon or a small spoon. This helps deepen the indentation for the raspberry jam.
- Return the cookies to the oven and bake for an additional 7-10 minutes, or until the cookies are golden brown. Keep an eye on them, as the exact time may vary depending on your oven.
Step 6: Adding the Jam Filling
Once the cookies are done baking, remove them from the oven and allow them to cool slightly on the baking sheets. When they are cool enough to handle, fill the thumbprints with raspberry jam. Use a small spoon or a piping bag to carefully fill the center of each cookie with a generous dollop of jam.
Allow the cookies to cool completely on wire racks before serving. This step ensures that the jam sets and prevents it from running when the cookies are handled.
Notes
- Butter: If you’re looking for a dairy-free option, you can replace the unsalted butter with a dairy-free margarine or a vegan butter substitute.
- Flour: For a gluten-free version, use a gluten-free all-purpose flour blend.
- Hazelnuts: If hazelnuts aren’t available, you can substitute them with other nuts like almonds, walnuts, or pecans for a slightly different but still delicious flavor.
- Jam: While raspberry jam is a classic choice, feel free to experiment with other flavors like strawberry, apricot, or even blueberry.
- Prep Time: 20 minutes
- Cook Time: 20 minutes
The Appeal of Raspberry Hazelnut Thumbprint Cookies
Thumbprint cookies are an iconic and timeless dessert that have graced many homes, especially during holidays and gatherings. What makes these raspberry hazelnut thumbprint cookies stand out is the combination of two classic ingredients—raspberry jam and hazelnuts—that take this simple cookie to new heights.
The crunch from the finely chopped hazelnuts offers a delightful contrast to the rich and buttery cookie base. Meanwhile, the raspberry jam filling adds a vibrant burst of sweetness, giving the cookies a touch of tartness that balances the richness. It’s the perfect combination that makes each bite irresistible.
Whether you are preparing them for a special occasion, a gift, or simply as a cozy treat to enjoy with your afternoon tea or coffee, these raspberry hazelnut thumbprint cookies are guaranteed to be a hit. Their visually appealing, delicate thumbprint design, filled with luscious raspberry jam, is not only beautiful but also easy to make.
Ingredients Breakdown
The ingredients for Raspberry Hazelnut Thumbprint Cookies are simple yet full of flavor. Let’s take a closer look at each of them to understand what makes this cookie so special.
For the Cookie Dough:
- 1/2 Cup Unsalted Butter (softened): The base of the cookie dough. Unsalted butter provides richness and a soft, tender texture to the cookies.
- 1/2 Cup Granulated Sugar (plus 2 tbsp extra for coating): The sugar sweetens the dough and helps create a lovely golden crust when the cookies bake. The extra sugar is used to coat the dough balls for a sweet, crispy exterior.
- 1 Egg (separated): The egg yolk enriches the dough, while the egg white is used to coat the dough balls before rolling in the hazelnut mixture. It helps the hazelnuts adhere to the dough.
- 1 Tsp Vanilla Extract: Adds depth and warmth to the flavor of the cookies.
- 1 1/4 Cups All-Purpose Flour: The foundation of the dough, providing structure and balance to the soft texture of the cookies.
- 1/2 Cup Hazelnuts (toasted and finely chopped): These provide the delicious nutty flavor and crunchy texture that pairs so beautifully with the soft, buttery dough.
For the Raspberry Jam Filling:
- 1 Cup Raspberry Jam: The star of the show, giving the cookies their signature fruity flavor. The jam adds the perfect amount of sweetness and tartness to balance the richness of the cookie.
Step-by-Step InstructionsNow that we’ve got all the ingredients ready, let’s dive into the detailed process of making these irresistible raspberry hazelnut thumbprint cookies.Step 1: Preparing the Dough
- Preheat your oven to 325°F (163°C) and line your baking sheets with parchment paper. This will prevent the cookies from sticking and make for easy cleanup later.
- In a large mixing bowl, combine the softened butter and 1/2 cup granulated sugar. Use an electric mixer fitted with the paddle attachment to mix these ingredients on medium speed. Continue mixing until the dough becomes pale and fluffy—this will take about 2-3 minutes.
- Add the egg yolk and vanilla extract into the butter-sugar mixture. Mix until everything is well combined.
- Reduce the mixer speed to low and gradually add the all-purpose flour, mixing until the dough just comes together. Avoid over-mixing to ensure your cookies stay tender.
Step 2: Chilling the Dough
Once the dough has come together, it’s time to refrigerate the dough for 2 hours. This step is crucial for achieving the perfect texture. Chilling the dough allows the butter to firm up, which makes the cookies easier to shape and helps them maintain their shape during baking.Step 3: Preparing the Hazelnut Coating
While the dough chills, prepare the coating for the dough balls. In a small bowl, combine the toasted hazelnuts with the remaining 2 tablespoons of granulated sugar. Stir until the mixture is well combined. Set aside.Step 4: Shaping the Cookies
Once the dough is chilled, it’s time to shape the cookies:
- Roll the dough into 1-inch balls, using your hands. If you find the dough is a bit sticky, you can dust your hands with a little flour.
- Dip each dough ball into the lightly beaten egg white, ensuring that the entire surface is coated. Then roll the ball in the hazelnut-sugar mixture, pressing gently to help the nuts adhere to the dough.
Step 5: Baking the Cookies
- Place the coated dough balls 1 inch apart on the prepared baking sheets.
- Press down the center of each ball with your thumb, creating a small indentation for the jam filling.
- Bake the cookies in the preheated oven for 10 minutes. After the initial baking time, remove them from the oven and gently press down the centers again using the end of a wooden spoon or a small spoon. This helps deepen the indentation for the raspberry jam.
- Return the cookies to the oven and bake for an additional 7-10 minutes, or until the cookies are golden brown. Keep an eye on them, as the exact time may vary depending on your oven.
Step 6: Adding the Jam Filling
Once the cookies are done baking, remove them from the oven and allow them to cool slightly on the baking sheets. When they are cool enough to handle, fill the thumbprints with raspberry jam. Use a small spoon or a piping bag to carefully fill the center of each cookie with a generous dollop of jam.
Allow the cookies to cool completely on wire racks before serving. This step ensures that the jam sets and prevents it from running when the cookies are handled.
Tips for Success and Variations
Ingredient Substitutions:
- Butter: If you’re looking for a dairy-free option, you can replace the unsalted butter with a dairy-free margarine or a vegan butter substitute.
- Flour: For a gluten-free version, use a gluten-free all-purpose flour blend.
- Hazelnuts: If hazelnuts aren’t available, you can substitute them with other nuts like almonds, walnuts, or pecans for a slightly different but still delicious flavor.
- Jam: While raspberry jam is a classic choice, feel free to experiment with other flavors like strawberry, apricot, or even blueberry.

Storing and Serving Suggestions:
- Storage: Store these thumbprint cookies in an airtight container at room temperature for up to 5 days. They also freeze well. Simply place them in a single layer in a freezer-safe container and store for up to 3 months.
- Serving: Serve these cookies with a cup of hot tea, coffee, or milk for the ultimate indulgence. They also make a lovely gift when packaged in decorative boxes or tins.
Why You’ll Love Raspberry Hazelnut Thumbprint Cookies
Raspberry Hazelnut Thumbprint Cookies are not only a delight to taste but also a joy to make. Their rich buttery flavor, combined with the crunch of hazelnuts and the tangy sweetness of raspberry jam, makes them the perfect balance of flavors and textures. Whether you’re an experienced baker or a beginner, this recipe is easy to follow and guaranteed to impress your friends and family.
These cookies are versatile enough for any occasion—be it a festive holiday, a special celebration, or just an everyday treat. And with their gorgeous appearance, they are sure to be a standout at any gathering.
So, preheat your oven, gather your ingredients, and get ready to enjoy these delightful raspberry hazelnut thumbprint cookies. Happy baking!