Colorful Thumbprint Cookies: A Festive and Flavorful Treat

The holiday season is a time for indulging in delicious, homemade treats that warm the heart and bring people together. Among the many delightful cookies that appear on our holiday tables, Colorful Thumbprint Cookies stand out for their charm, flavor, and festive appeal. With their tender, buttery texture, vibrant fruit preserves, and snowy dusting of powdered sugar, these cookies are a treat for both the eyes and the taste buds. Whether you’re preparing for a holiday gathering, cookie exchange, or simply a family afternoon of baking, Colorful Thumbprint Cookies are the perfect addition to your festive spread.
Print
Colorful Thumbprint Cookies: A Festive and Flavorful Treat
🎨✨ Add a pop of color to your celebrations with Colorful Thumbprint Cookies! 🍪 Soft, buttery, and filled with sweet, vibrant jams, these cookies are as fun to make as they are to eat. Perfect for parties or holiday cheer! 🌟
#ColorfulThumbprints 🌈 #FestiveAndFun 🎉 #CookiePerfection 🍪 #SweetBites ✨ #HolidayBakingVibes 🎄 #CreativeTreats 🎨 #BakingJoy 🏡 #SweetAndColorful 💛 #DessertLovers 😍 #FoodieHappiness 💫
- Total Time: 30 minutes
- Yield: About 24 cookies 1x
Ingredients
For the Cookie Dough:
- 1 cup unsalted butter, softened
- 1/2 cup granulated sugar
- 2 large egg yolks
- 1 teaspoon vanilla extract
- 2 cups all-purpose flour
- 1/4 teaspoon salt
For the Filling:
- Assorted fruit preserves or jam (e.g., strawberry, apricot, raspberry)
- Powdered sugar, for dusting
Instructions
Step 1: Prepare the Dough
The first step in making these Colorful Thumbprint Cookies is preparing the dough. Start by beating the softened butter and sugar in a mixing bowl until light and fluffy. This usually takes about 2-3 minutes with a hand mixer or stand mixer on medium speed. The butter should be soft but not melted, allowing it to cream together with the sugar for a smooth, airy texture.
Once the butter and sugar are well combined, add the egg yolks and vanilla extract to the bowl. Beat until everything is fully incorporated. The egg yolks will add richness to the dough, while the vanilla extract infuses the cookies with a warm, aromatic flavor.
Next, gradually add the all-purpose flour and salt, mixing until a soft dough forms. You may need to scrape down the sides of the bowl once or twice to ensure everything is evenly combined. The dough should be soft and pliable but not sticky.
Step 2: Shape the Cookies
Now that your dough is ready, it’s time to shape the cookies. Preheat your oven to 350°F (175°C) and line two baking sheets with parchment paper. This will prevent the cookies from sticking and make cleanup easier.
Using your hands, roll the dough into 1-inch balls and place them on the prepared baking sheets, spacing them about 2 inches apart. This will give the cookies enough room to spread as they bake.
Once the dough is rolled into balls, it’s time to make the signature “thumbprint” indentation. Use your thumb (or the back of a spoon) to gently press an indentation into the center of each dough ball. Be careful not to press too hard—you’re looking for a shallow well that will hold the jam without the dough breaking.
Step 3: Fill and Bake
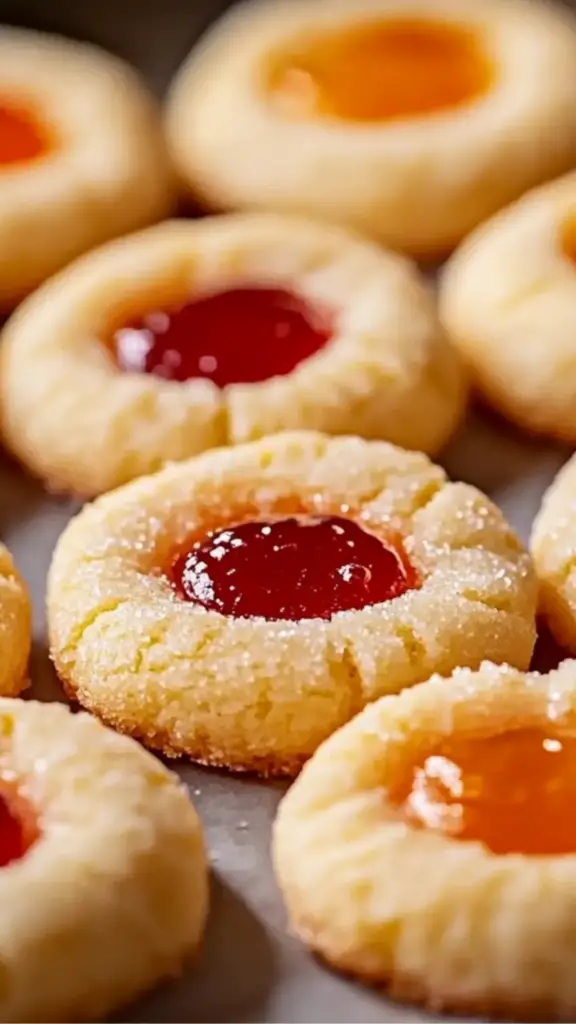
The next step is to fill the thumbprint cookies with your choice of fruit preserves. Spoon about 1/2 teaspoon of jam into the indentation of each cookie. You can use a variety of jam flavors, such as strawberry, apricot, raspberry, or even blueberry for a fun twist. The bright colors of the jam will create a stunning contrast against the buttery cookie dough, making these treats both visually appealing and delicious.
Once the cookies are filled, it’s time to bake. Place the baking sheets in the preheated oven and bake the cookies for 12-15 minutes, or until the edges are lightly golden. The baking time may vary slightly depending on your oven, so be sure to check the cookies around the 12-minute mark.
As the cookies bake, the aroma of buttery dough and fruity jam will fill your kitchen, creating a festive atmosphere. Once the cookies are golden around the edges, remove them from the oven and let them cool on the baking sheets for a few minutes before transferring them to a wire rack to cool completely.
Step 4: Dust with Powdered Sugar
Once the cookies have cooled completely, it’s time for the final touch—a light dusting of powdered sugar. This step adds a festive, snowy finish to the cookies, making them perfect for holiday celebrations.
Simply sift a small amount of powdered sugar over the cooled cookies, being careful not to overdo it. A light dusting is all that’s needed to enhance the appearance of the cookies without overwhelming their delicate flavors.
Notes
- Jam Varieties: The beauty of these thumbprint cookies lies in their versatility. Feel free to experiment with different fruit jams to create a colorful assortment. Strawberry, apricot, and raspberry are classic choices, but other options like blackberry, blueberry, or even orange marmalade can add unique flavor combinations. Choose jams with a thicker consistency to ensure they hold their shape during baking.
- Chill the Dough: If your dough feels too soft or sticky to shape, refrigerate it for 10-15 minutes before rolling it into balls. This will make the dough easier to handle and help the cookies maintain their shape while baking.
- Storage: These cookies are best enjoyed fresh, but they can be stored in an airtight container at room temperature for up to a week. If you’re making them in advance for a holiday gathering, store them in layers, separating each layer with parchment paper to prevent them from sticking together.
- Freezing Option: If you’d like to prepare the cookies ahead of time, you can freeze the dough. Roll the dough into balls, then freeze them on a baking sheet. Once frozen, transfer the dough balls to a freezer-safe container or bag. When you’re ready to bake, simply thaw the dough, make the thumbprint indentations, fill with jam, and bake as directed.
- Prep Time: 15 minutes
- Cook Time: 15 minutes
In this article, we’ll dive into the step-by-step process of making these delightful cookies, offer tips for customizing flavors, and explore serving suggestions that will make these treats the star of any holiday celebration.
Ingredients for Colorful Thumbprint Cookies
To create these delicious thumbprint cookies, you’ll need a few key ingredients, most of which are likely already in your kitchen. Here’s a breakdown of what you’ll need:
For the Cookie Dough:
- 1 cup unsalted butter, softened
- 1/2 cup granulated sugar
- 2 large egg yolks
- 1 teaspoon vanilla extract
- 2 cups all-purpose flour
- 1/4 teaspoon salt
For the Filling:
- Assorted fruit preserves or jam (e.g., strawberry, apricot, raspberry)
- Powdered sugar, for dusting
These ingredients come together to form a tender, melt-in-your-mouth cookie with a bright and flavorful jam center.
How to Make Colorful Thumbprint Cookies
Step 1: Prepare the Dough
The first step in making these Colorful Thumbprint Cookies is preparing the dough. Start by beating the softened butter and sugar in a mixing bowl until light and fluffy. This usually takes about 2-3 minutes with a hand mixer or stand mixer on medium speed. The butter should be soft but not melted, allowing it to cream together with the sugar for a smooth, airy texture.
Once the butter and sugar are well combined, add the egg yolks and vanilla extract to the bowl. Beat until everything is fully incorporated. The egg yolks will add richness to the dough, while the vanilla extract infuses the cookies with a warm, aromatic flavor.
Next, gradually add the all-purpose flour and salt, mixing until a soft dough forms. You may need to scrape down the sides of the bowl once or twice to ensure everything is evenly combined. The dough should be soft and pliable but not sticky.
Step 2: Shape the Cookies
Now that your dough is ready, it’s time to shape the cookies. Preheat your oven to 350°F (175°C) and line two baking sheets with parchment paper. This will prevent the cookies from sticking and make cleanup easier.
Using your hands, roll the dough into 1-inch balls and place them on the prepared baking sheets, spacing them about 2 inches apart. This will give the cookies enough room to spread as they bake.
Once the dough is rolled into balls, it’s time to make the signature “thumbprint” indentation. Use your thumb (or the back of a spoon) to gently press an indentation into the center of each dough ball. Be careful not to press too hard—you’re looking for a shallow well that will hold the jam without the dough breaking.
Step 3: Fill and Bake
The next step is to fill the thumbprint cookies with your choice of fruit preserves. Spoon about 1/2 teaspoon of jam into the indentation of each cookie. You can use a variety of jam flavors, such as strawberry, apricot, raspberry, or even blueberry for a fun twist. The bright colors of the jam will create a stunning contrast against the buttery cookie dough, making these treats both visually appealing and delicious.
Once the cookies are filled, it’s time to bake. Place the baking sheets in the preheated oven and bake the cookies for 12-15 minutes, or until the edges are lightly golden. The baking time may vary slightly depending on your oven, so be sure to check the cookies around the 12-minute mark.
As the cookies bake, the aroma of buttery dough and fruity jam will fill your kitchen, creating a festive atmosphere. Once the cookies are golden around the edges, remove them from the oven and let them cool on the baking sheets for a few minutes before transferring them to a wire rack to cool completely.
Step 4: Dust with Powdered Sugar
Once the cookies have cooled completely, it’s time for the final touch—a light dusting of powdered sugar. This step adds a festive, snowy finish to the cookies, making them perfect for holiday celebrations.
Simply sift a small amount of powdered sugar over the cooled cookies, being careful not to overdo it. A light dusting is all that’s needed to enhance the appearance of the cookies without overwhelming their delicate flavors.
Tips for Success
- Jam Varieties: The beauty of these thumbprint cookies lies in their versatility. Feel free to experiment with different fruit jams to create a colorful assortment. Strawberry, apricot, and raspberry are classic choices, but other options like blackberry, blueberry, or even orange marmalade can add unique flavor combinations. Choose jams with a thicker consistency to ensure they hold their shape during baking.
- Chill the Dough: If your dough feels too soft or sticky to shape, refrigerate it for 10-15 minutes before rolling it into balls. This will make the dough easier to handle and help the cookies maintain their shape while baking.
- Storage: These cookies are best enjoyed fresh, but they can be stored in an airtight container at room temperature for up to a week. If you’re making them in advance for a holiday gathering, store them in layers, separating each layer with parchment paper to prevent them from sticking together.
- Freezing Option: If you’d like to prepare the cookies ahead of time, you can freeze the dough. Roll the dough into balls, then freeze them on a baking sheet. Once frozen, transfer the dough balls to a freezer-safe container or bag. When you’re ready to bake, simply thaw the dough, make the thumbprint indentations, fill with jam, and bake as directed.
Variations and Substitutions
While the classic Colorful Thumbprint Cookies are made with fruit preserves, there are many ways to customize them to suit your taste. Here are a few ideas to make these cookies your own:
- Nutty Twist: Add a handful of chopped nuts to the dough for extra texture and flavor. Walnuts, pecans, or almonds would pair well with the buttery cookies and jam.
- Chocolate Lovers’ Delight: Instead of jam, try filling the thumbprint with a spoonful of chocolate ganache or Nutella for a decadent variation. You can also drizzle melted chocolate over the cooled cookies for an extra touch of sweetness.
- Citrusy Kick: For a refreshing twist, add a teaspoon of lemon or orange zest to the dough. This will give the cookies a bright, zesty flavor that pairs beautifully with fruit preserves.
- Vegan Variation: To make these cookies vegan, substitute the butter with a plant-based butter alternative and replace the egg yolks with a flax egg (1 tablespoon ground flaxseed mixed with 2.5 tablespoons water, left to sit for 5 minutes).
Serving Suggestions
Colorful Thumbprint Cookies are perfect for a wide range of occasions, and they make an excellent gift for friends and family during the holiday season. Here are some serving suggestions to elevate your cookie experience:
- Holiday Cookie Platter: Arrange these cookies on a festive platter alongside other holiday treats like gingerbread, sugar cookies, and shortbread. The colorful variety of jams will add a cheerful touch to your spread.
- Afternoon Tea: Serve these cookies with a pot of hot tea for a cozy afternoon treat. A cup of Earl Grey or chamomile pairs beautifully with the buttery cookies and sweet jam filling.
- Giftable Treats: Package the cookies in a decorative box or tin for a thoughtful and homemade gift. Add a personal touch with a ribbon or holiday card to make the gift even more special.
Final Thoughts
Colorful Thumbprint Cookies are a delightful, festive treat that will bring smiles to everyone who tries them. With their buttery texture, sweet jam filling, and simple elegance, these cookies are perfect for any holiday gathering or special occasion. Whether you stick with traditional jam flavors or experiment with new combinations, you’re sure to create a batch of cookies that will be loved by all.
So gather your ingredients, preheat your oven, and start baking these delicious cookies today. The holidays just wouldn’t be the same without them!


