Raspberry Cheesecake Danish – A Puff Pastry Delight for All Skill Levels

Few things in life are as satisfying as biting into a flaky, golden pastry filled with a luscious, creamy center. If you’ve ever admired the elegant braiding of a Danish pastry but felt too intimidated to try making it at home, you’re in for a treat. This Raspberry Cheesecake Danish is the perfect beginner-friendly dessert that requires minimal effort yet delivers bakery-quality results. With a crisp, buttery puff pastry encasing a rich cream cheese filling and bursts of fresh raspberries, this dessert is a showstopper.
Print
Raspberry Cheesecake Danish – A Puff Pastry Delight for All Skill Levels
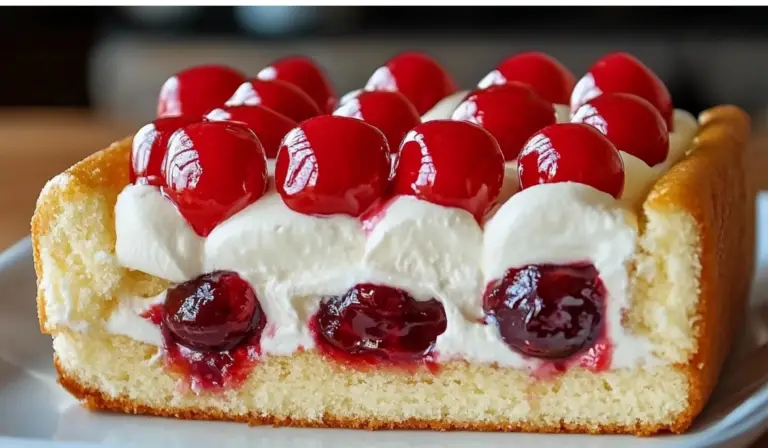
Craving a bakery-style treat without the hassle? This Raspberry Cheesecake Danish is the answer! With a crispy puff pastry shell, a creamy cheesecake filling, and juicy raspberries, each bite is pure bliss. Perfect for beginners and experienced bakers alike, this easy recipe brings gourmet flavor to your kitchen with minimal effort. Whether served with coffee or as a special dessert, these danishes will have everyone asking for more!
#EasyDessert #PuffPastryGoodness #RaspberryCheesecake #FlakyAndSweet #HomemadePastries #BakingMadeEasy #SweetToothFix #BrunchPerfection #CreamyAndDelicious #BerryLovers
- Total Time: 25 minutes
- Yield: 6 servings 1x
Ingredients
- 1 sheet puff pastry (thawed if frozen)
- 6 oz cream cheese (softened to room temperature)
- 1/2 cup fresh raspberries
- 3 tbsp SPLENDA® No Calorie Sweetener Granulated OR 1/4 cup granulated sugar
- 1 tsp vanilla extract
- 1 egg
Instructions
Step 1: Preheat and Prepare
- Preheat your oven to 400°F (200°C).
- Line a baking sheet with parchment paper or foil for easy cleanup.
- In a small bowl, whisk the egg with a pinch of salt. This will be used as an egg wash to give the Danish a beautiful golden color.
Step 2: Make the Cheesecake Filling
- In a mixing bowl, combine:
- 6 oz softened cream cheese
- 3 tbsp SPLENDA® or 1/4 cup sugar
- 1 tsp vanilla extract
- 2 tbsp of the beaten egg
- Whisk or mix until smooth and creamy. A hand mixer works best, but you can also use a spoon or spatula.
Step 3: Prepare the Puff Pastry
- Unfold the puff pastry sheet onto the lined baking sheet.
- Lightly roll it out if needed to remove any creases, but do not make it too thin.
- Spread the cream cheese mixture down the center third of the pastry, leaving about 1 inch at both ends for sealing.
Step 4: Add the Raspberries
- Evenly distribute 1/2 cup of fresh raspberries over the cheesecake filling.
Step 5: Create the Braid
- Using a sharp knife or scissors, cut 1-inch-wide strips on both sides of the dough, making sure they are even in number.
- Starting from the top, fold one strip over the filling from the left, then a strip from the right, forming a braid. Continue this pattern until the entire pastry is braided.
- Press the first and last strips firmly into the unfilled dough underneath to seal the ends.
Step 6: Egg Wash and Bake
- Brush the top of the Danish with the remaining beaten egg for a golden, glossy finish.
- Bake at 400°F for 20 minutes, rotating the baking sheet halfway through for even browning.
- Once golden brown and puffed up, remove from the oven and transfer to a cooling rack.
Step 7: Finishing Touches
- Let the Danish cool slightly before dusting with powdered sugar.
- Slice and serve warm or at room temperature.
Notes
- Preventing a Soggy Bottom: If you find that your puff pastry gets too soft from the filling, you can lightly dust the bottom with flour or brush a thin layer of melted butter before adding the filling.
- Even Braiding: If you’re new to braiding pastry, practice by folding an empty piece of dough first. It doesn’t have to be perfect—just ensure the strips are overlapping securely.
- Crispier Pastry: For extra crispness, bake the Danish on the lower oven rack for the last 5 minutes.
- Prep Time: 5 minutes
- Cook Time: 20 minutes
A Sweet Morning Surprise
I remember the first time I attempted a Danish pastry at home. It was a chilly morning, and I wanted to surprise my family with a special breakfast. I had always assumed that making a pastry this beautiful would take hours of preparation, but I was delighted to find out that using store-bought puff pastry makes the process incredibly simple. As the Danish baked, my kitchen filled with the warm aroma of vanilla, butter, and raspberries, signaling that something delicious was about to come out of the oven. Within 25 minutes, I had a golden, flaky braid that looked like it came straight from a pastry shop. The best part? My family devoured it, and I felt like a baking pro!
This recipe is designed with beginner bakers in mind, using minimal ingredients, straightforward techniques, and a foolproof method that ensures success every time. Whether you’re making it for a weekend brunch, an afternoon treat, or a holiday breakfast, this Raspberry Cheesecake Danish will quickly become a favorite in your home.
Why This Recipe is Perfect for Beginners
- Quick and Easy: With only five minutes of prep and 20 minutes of baking, this is one of the easiest pastries you’ll ever make.
- Minimal Ingredients: You only need six simple ingredients, most of which you probably already have in your kitchen.
- Foolproof Puff Pastry: No need to make your own dough—store-bought puff pastry saves time and effort while delivering a flaky, buttery crust.
- Customizable: This recipe allows for easy substitutions and variations, so you can tweak it to your liking.
Ingredients and Preparation
To make this Raspberry Cheesecake Danish, you’ll need the following ingredients:
Main Ingredients:
- 1 sheet puff pastry (thawed if frozen)
- 6 oz cream cheese (softened to room temperature)
- 1/2 cup fresh raspberries
- 3 tbsp SPLENDA® No Calorie Sweetener Granulated OR 1/4 cup granulated sugar
- 1 tsp vanilla extract
- 1 egg
For Garnishing:
- Powdered sugar (for dusting)
Ingredient Substitutions and Variations:
- Puff Pastry Alternatives: If you don’t have puff pastry, you can use crescent roll dough or pie crust, though the texture will be slightly different.
- Sweetener Options: Swap out SPLENDA® for honey, maple syrup, or brown sugar for a deeper flavor.
- Berries: Fresh raspberries work best, but you can also use blueberries, strawberries, or blackberries. If using frozen berries, do not thaw them before adding to the pastry.
- Flavored Cream Cheese: Add a teaspoon of lemon zest, almond extract, or cinnamon to enhance the flavor of the filling.
Step-by-Step Instructions for Success
Step 1: Preheat and Prepare
- Preheat your oven to 400°F (200°C).
- Line a baking sheet with parchment paper or foil for easy cleanup.
- In a small bowl, whisk the egg with a pinch of salt. This will be used as an egg wash to give the Danish a beautiful golden color.
Step 2: Make the Cheesecake Filling
- In a mixing bowl, combine:
- 6 oz softened cream cheese
- 3 tbsp SPLENDA® or 1/4 cup sugar
- 1 tsp vanilla extract
- 2 tbsp of the beaten egg
- Whisk or mix until smooth and creamy. A hand mixer works best, but you can also use a spoon or spatula.
Step 3: Prepare the Puff Pastry
- Unfold the puff pastry sheet onto the lined baking sheet.
- Lightly roll it out if needed to remove any creases, but do not make it too thin.
- Spread the cream cheese mixture down the center third of the pastry, leaving about 1 inch at both ends for sealing.
Step 4: Add the Raspberries
- Evenly distribute 1/2 cup of fresh raspberries over the cheesecake filling.
Step 5: Create the Braid
- Using a sharp knife or scissors, cut 1-inch-wide strips on both sides of the dough, making sure they are even in number.
- Starting from the top, fold one strip over the filling from the left, then a strip from the right, forming a braid. Continue this pattern until the entire pastry is braided.
- Press the first and last strips firmly into the unfilled dough underneath to seal the ends.
Step 6: Egg Wash and Bake
- Brush the top of the Danish with the remaining beaten egg for a golden, glossy finish.
- Bake at 400°F for 20 minutes, rotating the baking sheet halfway through for even browning.
- Once golden brown and puffed up, remove from the oven and transfer to a cooling rack.
Step 7: Finishing Touches
- Let the Danish cool slightly before dusting with powdered sugar.
- Slice and serve warm or at room temperature.
Beginner Tips and Troubleshooting
- Preventing a Soggy Bottom: If you find that your puff pastry gets too soft from the filling, you can lightly dust the bottom with flour or brush a thin layer of melted butter before adding the filling.
- Even Braiding: If you’re new to braiding pastry, practice by folding an empty piece of dough first. It doesn’t have to be perfect—just ensure the strips are overlapping securely.
- Crispier Pastry: For extra crispness, bake the Danish on the lower oven rack for the last 5 minutes.

Serving Suggestions
This Raspberry Cheesecake Danish pairs beautifully with:
- Coffee or Tea: The richness of the cream cheese balances well with a hot cup of coffee or tea.
- Whipped Cream: A dollop of freshly whipped cream makes for an extra indulgent treat.
- Fruit Compote: Serve with a side of warm raspberry or blueberry compote for added flavor.
Storage and Make-Ahead Tips
- Refrigeration: Store leftover Danish in an airtight container in the refrigerator for up to 3 days.
- Reheating: Warm it in the oven at 350°F for 5-7 minutes to restore crispiness. Avoid the microwave, as it can make the pastry soft.
- Freezing: You can freeze the unbaked, braided Danish and bake it fresh when needed. Wrap it tightly in plastic wrap and foil, then store for up to 1 month. Bake straight from frozen, adding 5 extra minutes to the baking time.
Final Thoughts – Why You Should Try This Recipe
If you’ve never made a braided Danish before, this Raspberry Cheesecake Danish is the perfect place to start. It’s one of those recipes that looks impressive but is incredibly simple to put together. Whether you’re treating yourself, hosting a brunch, or bringing something sweet to a gathering, this pastry is guaranteed to impress without stress.
Have you tried this recipe? Let me know your thoughts in the comments below. Happy baking!