Mastering Homemade Chocolate Pudding: A Beginner’s Guide to a Classic Dessert

There is something special about making a dessert from scratch, especially when it’s as simple and satisfying as homemade chocolate pudding. For many, pudding is a nostalgic treat, reminding them of childhood lunches or family gatherings. The rich, creamy texture and deep chocolate flavor make it a comforting dessert that never goes out of style.
Print
Mastering Homemade Chocolate Pudding: A Beginner’s Guide to a Classic Dessert
Indulge in the rich, velvety goodness of Homemade Chocolate Pudding! This beginner-friendly recipe is easy to whip up and delivers a creamy, decadent treat that chocolate lovers will adore. One bite, and you’ll never go back to boxed pudding!
- Total Time: 1 hour 15 minutes (including chilling time)
- Yield: 2 servings 1x
Ingredients
- 3 tablespoons cornstarch – Acts as a thickening agent to give the pudding its smooth and creamy consistency.
- ¼ cup cocoa powder – Provides deep chocolate flavor. Use unsweetened cocoa powder for the best results.
- ⅓ cup granulated sugar – Sweetens the pudding. You can adjust the amount to taste or use alternatives like honey or maple syrup.
- ⅛ teaspoon salt – Enhances the chocolate flavor and balances the sweetness.
- 2 cups milk – Whole milk works best for a rich texture, but you can also use low-fat milk or a dairy-free alternative like almond or oat milk.
- 2 tablespoons unsalted butter – Adds richness and smoothness. If using salted butter, reduce the added salt.
- 1 teaspoon vanilla extract – Rounds out the flavors with a warm, aromatic touch.
Instructions
1. Mix the Dry Ingredients
In a medium saucepan, whisk together the cornstarch, cocoa powder, sugar, and salt. This step ensures that the dry ingredients are evenly distributed before adding the liquid.
2. Add the Milk and Heat the Mixture
Slowly pour in the cold milk while whisking continuously. Make sure the mixture is smooth and free of lumps.
Turn the heat to medium and continue whisking constantly, scraping the sides and bottom of the pan to prevent burning. Keep stirring as the mixture heats up.
3. Bring to a Boil and Thicken
Once the pudding begins to boil, continue whisking for another minute. You will notice the mixture thickening to a pudding-like consistency. At this stage, remove the pot from the heat.
4. Add the Butter and Vanilla
Stir in the butter and vanilla extract while the pudding is still warm. The butter will melt, making the pudding extra smooth and silky.
5. Cool and Set the Pudding
Divide the pudding into two heat-safe bowls or glasses. To prevent a skin from forming on the surface, press a piece of plastic wrap directly onto the pudding.
Refrigerate for 1–2 hours or until fully chilled and set.
Notes
1. Avoid Lumps
Whisking continuously while adding the milk prevents clumps from forming. If you notice lumps, strain the mixture through a fine-mesh sieve before chilling.
2. Prevent a Skin from Forming
Pressing plastic wrap directly onto the surface of the pudding while it cools prevents an unpleasant skin from developing. If you don’t mind the skin, you can skip this step.
3. Control the Thickness
If you prefer a thicker pudding, add an extra half tablespoon of cornstarch. If you want it slightly thinner, reduce the cornstarch slightly or add a little more milk.
4. Make It Dairy-Free
Use plant-based milk and substitute the butter with a dairy-free alternative like coconut oil or vegan butter.
5. How to Fix Overcooked Pudding
If the pudding becomes too thick or grainy, it may have been overcooked. To fix this, whisk in a tablespoon of warm milk at a time until the texture becomes smooth again.
- Prep Time: 10 minutes
- Cook Time: 5 minutes
If you have only ever had store-bought pudding, you are in for a treat. This recipe uses staple ingredients you likely already have in your kitchen and comes together in just a few minutes. It’s perfect for beginners because it requires minimal effort, yet delivers a luxurious result. You do not need fancy equipment or expert skills—just a saucepan, a whisk, and a love for chocolate.
Making homemade chocolate pudding is also a great way to control what goes into your dessert. Many pre-packaged versions contain artificial flavors, excessive sugar, and preservatives. By making it yourself, you can create a healthier, more natural alternative while adjusting the sweetness and richness to your preference.
Let’s dive into this foolproof recipe and discover how to make the best homemade chocolate pudding step by step.
Ingredients and Substitutions
This recipe is made with basic pantry staples, making it accessible and easy to prepare. Here is what you need:
Main Ingredients
- 3 tablespoons cornstarch – Acts as a thickening agent to give the pudding its smooth and creamy consistency.
- ¼ cup cocoa powder – Provides deep chocolate flavor. Use unsweetened cocoa powder for the best results.
- ⅓ cup granulated sugar – Sweetens the pudding. You can adjust the amount to taste or use alternatives like honey or maple syrup.
- ⅛ teaspoon salt – Enhances the chocolate flavor and balances the sweetness.
- 2 cups milk – Whole milk works best for a rich texture, but you can also use low-fat milk or a dairy-free alternative like almond or oat milk.
- 2 tablespoons unsalted butter – Adds richness and smoothness. If using salted butter, reduce the added salt.
- 1 teaspoon vanilla extract – Rounds out the flavors with a warm, aromatic touch.
Alternative Ingredient Suggestions
- Sweetener Alternatives – Replace granulated sugar with coconut sugar, honey, or a sugar substitute if you prefer a lower-sugar version.
- Milk Substitutes – If you are lactose-intolerant or prefer a dairy-free version, almond, coconut, or oat milk work well.
- Flavor Enhancements – A pinch of cinnamon or espresso powder can intensify the chocolate flavor.
Now that we have the ingredients ready, let’s go through the step-by-step process of making this delicious chocolate pudding.
Step-by-Step Instructions for Perfect Chocolate Pudding
1. Mix the Dry Ingredients
In a medium saucepan, whisk together the cornstarch, cocoa powder, sugar, and salt. This step ensures that the dry ingredients are evenly distributed before adding the liquid.
2. Add the Milk and Heat the Mixture
Slowly pour in the cold milk while whisking continuously. Make sure the mixture is smooth and free of lumps.
Turn the heat to medium and continue whisking constantly, scraping the sides and bottom of the pan to prevent burning. Keep stirring as the mixture heats up.
3. Bring to a Boil and Thicken
Once the pudding begins to boil, continue whisking for another minute. You will notice the mixture thickening to a pudding-like consistency. At this stage, remove the pot from the heat.
4. Add the Butter and Vanilla
Stir in the butter and vanilla extract while the pudding is still warm. The butter will melt, making the pudding extra smooth and silky.
5. Cool and Set the Pudding
Divide the pudding into two heat-safe bowls or glasses. To prevent a skin from forming on the surface, press a piece of plastic wrap directly onto the pudding.
Refrigerate for 1–2 hours or until fully chilled and set.
Beginner Tips for the Best Chocolate Pudding
Making pudding from scratch is simple, but a few key tips can help ensure perfect results every time.
1. Avoid Lumps
Whisking continuously while adding the milk prevents clumps from forming. If you notice lumps, strain the mixture through a fine-mesh sieve before chilling.
2. Prevent a Skin from Forming
Pressing plastic wrap directly onto the surface of the pudding while it cools prevents an unpleasant skin from developing. If you don’t mind the skin, you can skip this step.
3. Control the Thickness
If you prefer a thicker pudding, add an extra half tablespoon of cornstarch. If you want it slightly thinner, reduce the cornstarch slightly or add a little more milk.
4. Make It Dairy-Free
Use plant-based milk and substitute the butter with a dairy-free alternative like coconut oil or vegan butter.
5. How to Fix Overcooked Pudding
If the pudding becomes too thick or grainy, it may have been overcooked. To fix this, whisk in a tablespoon of warm milk at a time until the texture becomes smooth again.
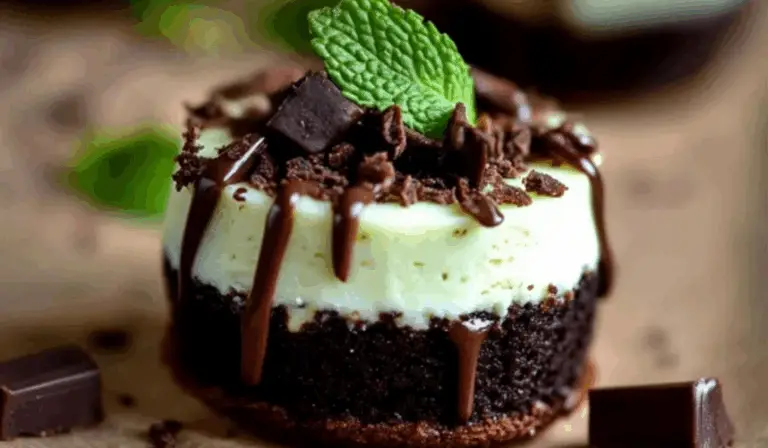
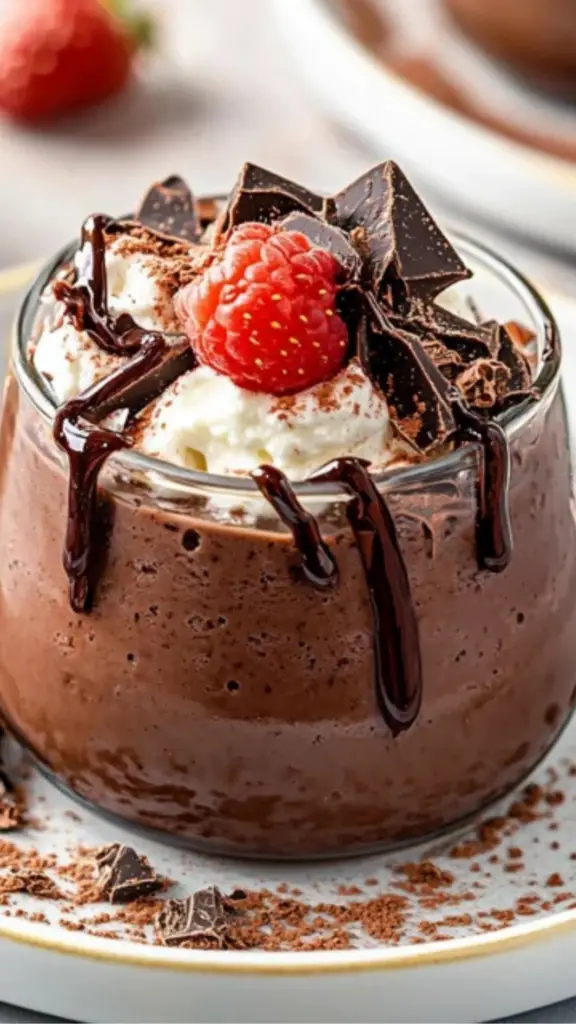
Serving Suggestions: Making Chocolate Pudding Extra Special
Chocolate pudding is delicious on its own, but you can elevate it with a few creative serving ideas.
Classic Toppings
- Whipped cream – Adds a light, airy contrast to the rich pudding.
- Chocolate shavings – A sprinkle of dark or milk chocolate shavings makes for a gourmet touch.
- Berries – Fresh strawberries, raspberries, or blueberries add natural sweetness and a pop of color.
- Nuts – Toasted almonds, hazelnuts, or pecans provide crunch and a nutty depth.
Layered Desserts
Use the pudding as a layer in parfaits or trifles. Alternate layers of pudding with crushed cookies, fruit, or whipped cream for a stunning presentation.
Warm vs. Chilled
While pudding is traditionally served chilled, it can also be enjoyed warm, straight from the stovetop. If serving warm, pair it with a scoop of vanilla ice cream for a contrast of temperatures.
Pairing with Other Desserts
Chocolate pudding makes a great accompaniment to cakes, brownies, or cookies. Serve it as a side to a simple vanilla sponge cake or drizzle it over fresh-baked brownies for extra indulgence.
Storage Tips for Leftovers
Homemade chocolate pudding stays fresh for up to 4 days when stored properly. Here’s how to store it:
Refrigeration
- Keep the pudding in an airtight container or cover the bowls with plastic wrap.
- Make sure the wrap touches the surface of the pudding to prevent a skin from forming.
Freezing (Optional)
- You can freeze pudding in individual portions for up to 2 months.
- Thaw overnight in the refrigerator and stir well before serving.
Conclusion: Enjoy the Simplicity of Homemade Chocolate Pudding
Making chocolate pudding from scratch is a rewarding experience, especially for beginner cooks. It is a simple, foolproof dessert that requires minimal ingredients but delivers maximum satisfaction. Whether you enjoy it as a quick treat or dress it up for a special occasion, this pudding is sure to become a favorite.
Now that you have mastered this recipe, I encourage you to try it and share your experience. Did you add a special twist? Did you enjoy it warm or chilled? Leave a comment below and let’s talk about all things chocolate pudding.
Happy cooking!