Chocolate Covered Strawberry Cookies: A Beginner’s Guide to a Decadent Treat
There is something undeniably special about the combination of chocolate and strawberries. The contrast between the deep, rich flavor of chocolate and the natural sweetness of strawberries has made this duo a classic in desserts worldwide. Chocolate-covered strawberries have long been a favorite for romantic occasions, celebrations, and indulgent snacking, but what if that same experience could be transformed into a soft, chewy cookie?
Print
Chocolate Covered Strawberry Cookies: A Beginner’s Guide to a Decadent Treat
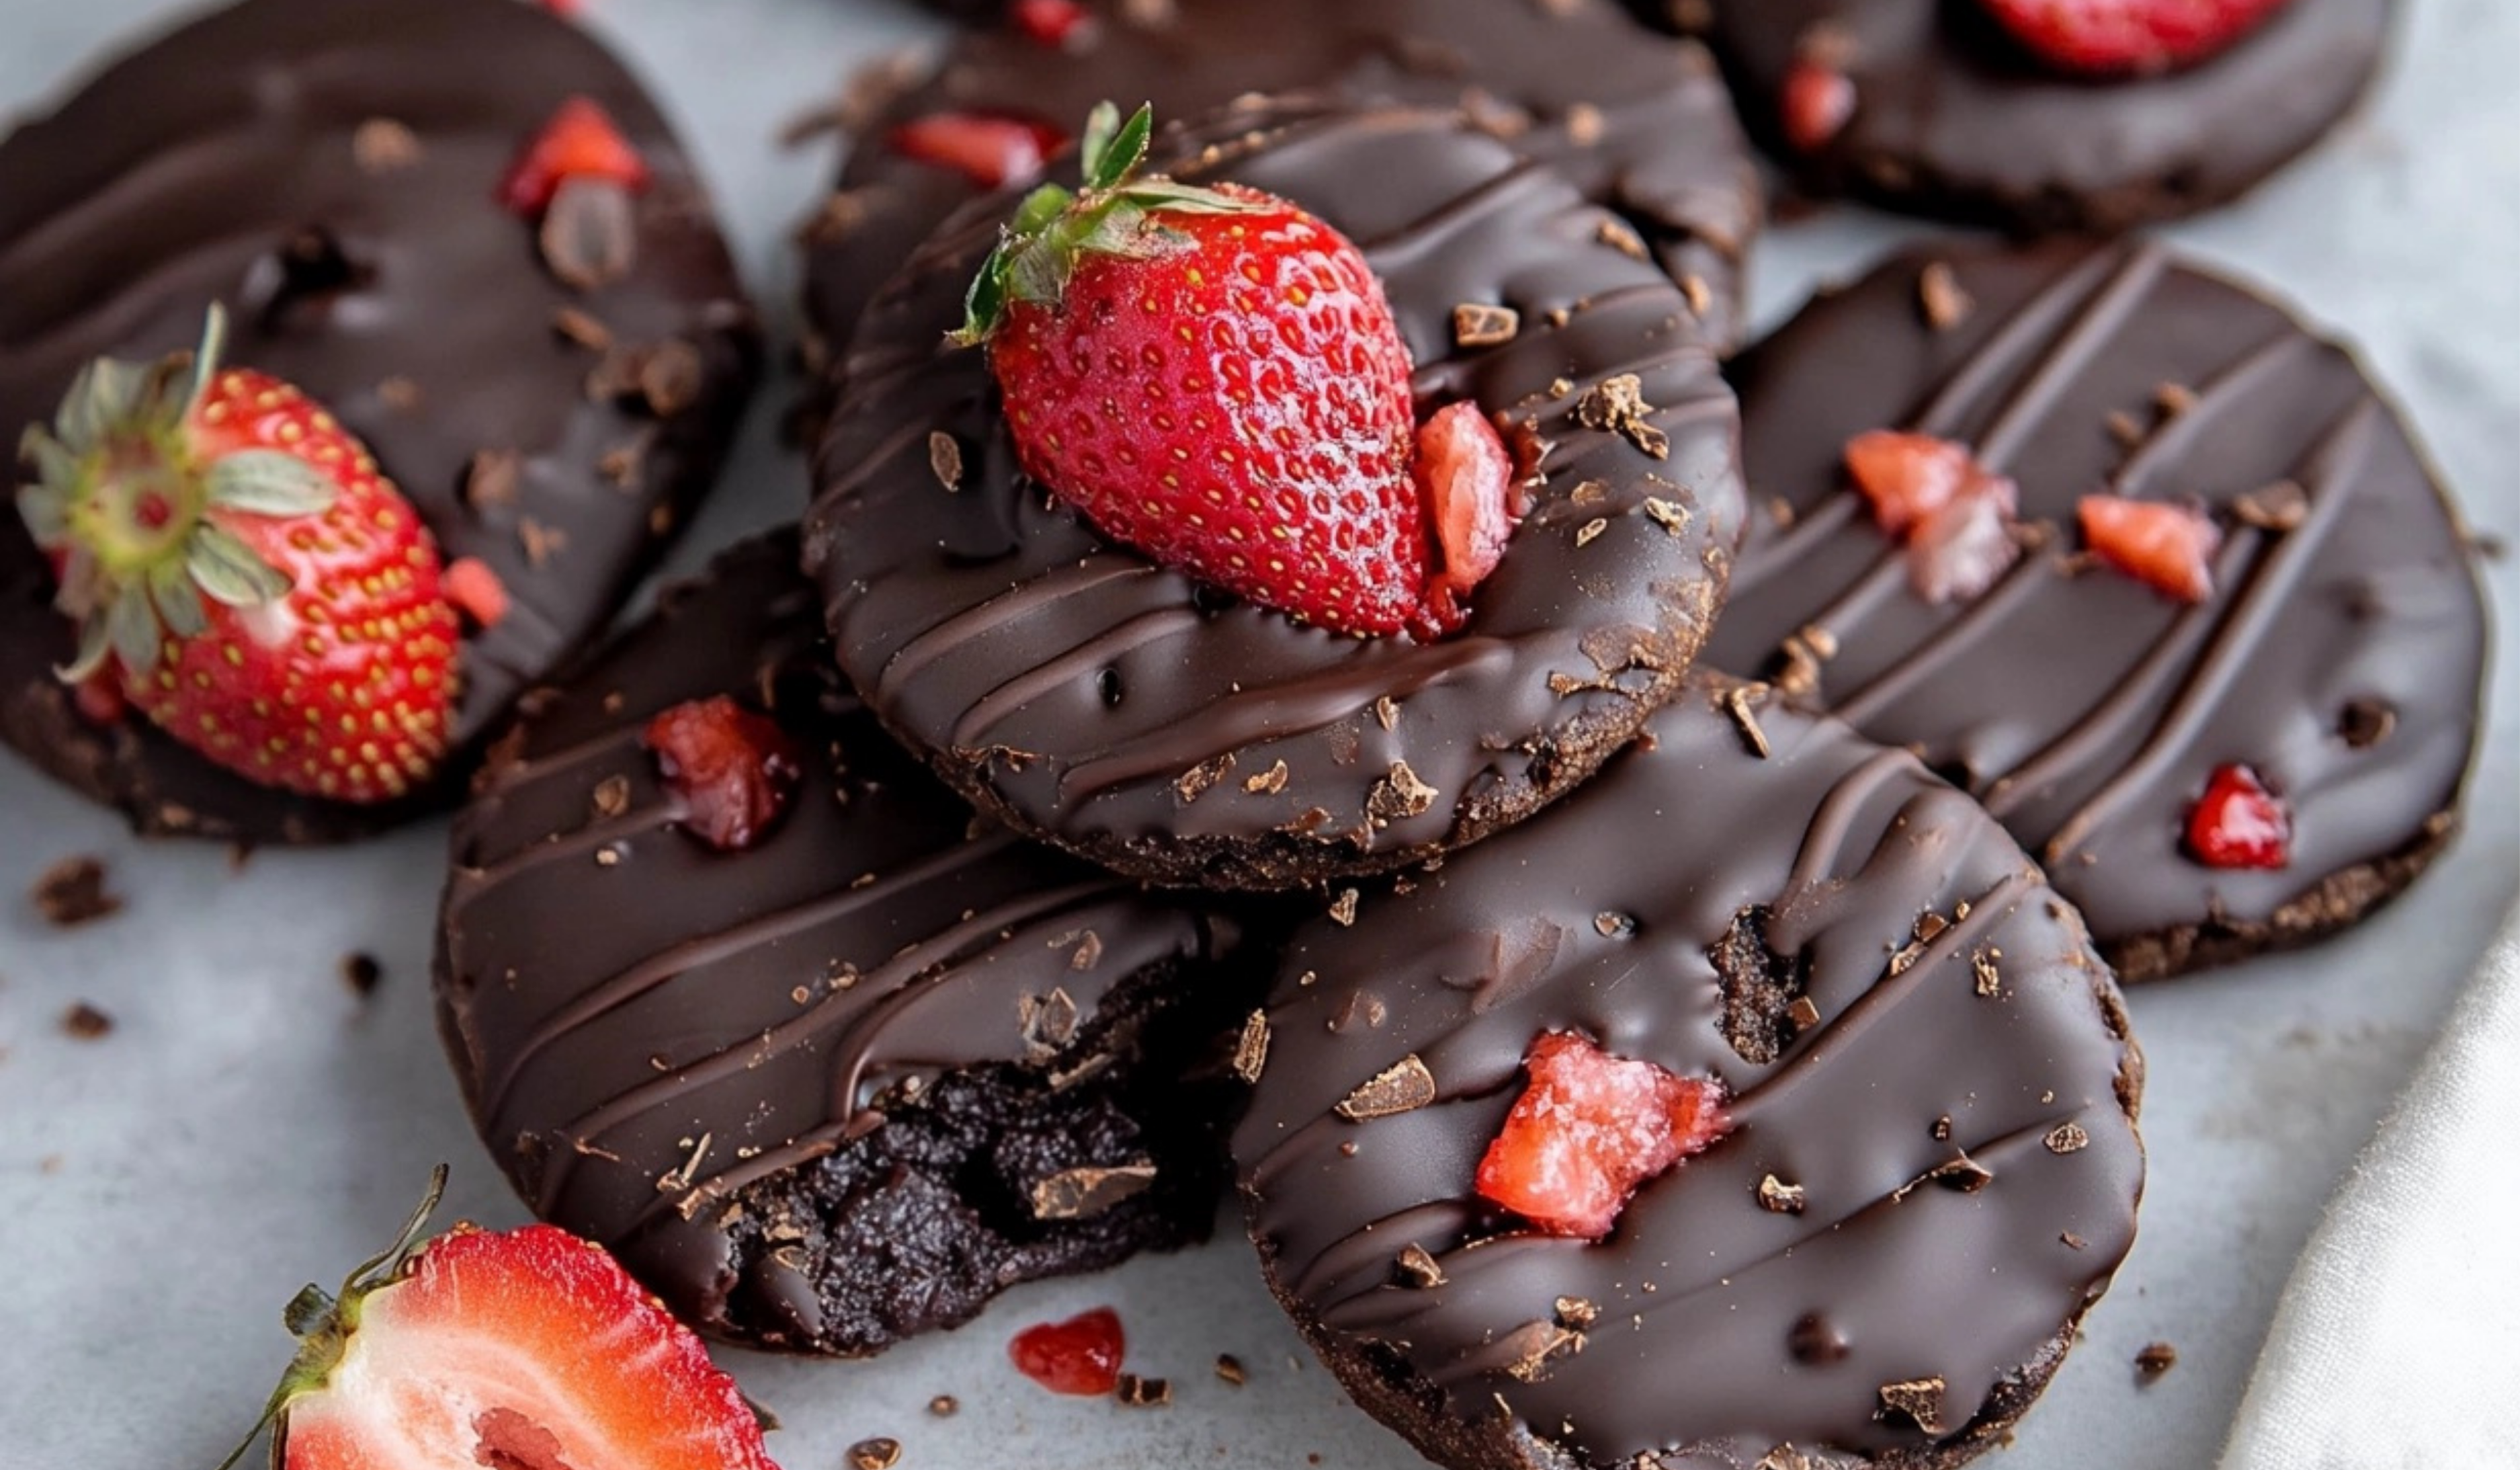
The perfect blend of rich chocolate and sweet strawberries in one bite! 🍓🍫 These Chocolate Covered Strawberry Cookies are soft, decadent, and bursting with flavor—a beginner-friendly treat that feels gourmet but is oh-so-easy to make! Perfect for any occasion! ✨
- Total Time: 32 minutes
- Yield: 12 cookies
Ingredients
Essential Ingredients
To create these cookies, the following ingredients are needed:
- ½ cup (1 stick) unsalted butter, at room temperature
- 1 cup packed light brown sugar
- 1 large egg, at room temperature
- 2 teaspoons vanilla extract
- 1 ¼ cups all-purpose flour
- ⅓ cup Dutch-processed cocoa powder
- ½ teaspoon baking soda
- ¼ teaspoon baking powder
- ½ teaspoon salt
- 1 cup freeze-dried strawberries
- 1 cup semisweet chocolate chips
For the Chocolate Coating
- 1 cup semisweet chocolate chips
- 1 teaspoon coconut oil
Instructions
- Preheat the Oven and Prepare the Baking Sheets
Preheat the oven to 350°F (175°C). Line two baking sheets with parchment paper and set them aside. This ensures the cookies do not stick and makes cleanup easier. - Cream the Butter and Sugar
In a stand mixer fitted with the paddle attachment, beat the butter and brown sugar on medium-high speed for about 2 minutes until the mixture becomes light and fluffy. This process incorporates air into the dough, making the cookies softer. - Add the Egg and Vanilla
Use a rubber spatula to scrape down the sides of the mixing bowl. Add the egg and vanilla extract, then continue beating on medium-high speed for another 2 minutes. The mixture should appear pale and creamy. - Combine Dry Ingredients
In a separate bowl, whisk together the flour, cocoa powder, baking soda, baking powder, and salt. Gradually add these dry ingredients to the wet mixture, beating on low speed until just combined. Do not overmix, as this can result in tough cookies. - Incorporate the Strawberries and Chocolate Chips
Gently fold in the freeze-dried strawberries and chocolate chips using a rubber spatula. This ensures that the add-ins are evenly distributed without breaking them down too much. - Portion the Cookie Dough
Use a cookie scoop or a large spoon to portion out dough balls that are approximately 3 tablespoons in size. Place them on the prepared baking sheets, spacing them at least 2 inches apart to allow for spreading. - Bake the Cookies
Bake the cookies for 10 to 12 minutes, or until they have puffed up and the edges appear set but the centers remain slightly soft. This ensures they retain a chewy texture. - Cool the Cookies
Remove the baking sheets from the oven and let the cookies cool for about 15 minutes before transferring them to a wire rack. Allowing them to cool prevents breakage and helps them set properly. - Melt the Chocolate for Coating
In a small microwave-safe bowl, combine the chocolate chips and coconut oil. Microwave in 30-second increments, stirring between each, until fully melted. - Dip the Cookies in Chocolate
Dip the bottom of each cooled cookie into the melted chocolate, scraping off any excess. Place the cookies back on the parchment-lined baking sheet. If desired, drizzle additional melted chocolate over the tops for decoration. - Set the Chocolate
Let the cookies sit for about 30 minutes, or until the chocolate coating is fully set. For faster results, place them in the refrigerator for 10 to 15 minutes.
Notes
Troubleshooting Common Issues
- If the cookies spread too much, try chilling the dough for 15 to 20 minutes before baking. This helps the butter firm up, preventing excessive spreading.
- If the dough is too dry, a teaspoon of milk or an extra egg yolk can be added to improve moisture.
- If the chocolate seizes (becomes grainy) while melting, add a small amount of coconut oil or butter and stir vigorously until smooth.
Efficient Kitchen Tips
- Measure all ingredients before starting to ensure a smooth baking process.
- Use a cookie scoop for uniform sizes, which helps the cookies bake evenly.
- Line baking sheets with parchment paper for easy cleanup and non-stick baking.
Serving Suggestions
Chocolate-covered strawberry cookies are delicious on their own, but they can be paired with various complementary treats:
- Served with a glass of milk or a warm cup of coffee for a classic pairing.
- Paired with vanilla or strawberry ice cream for an indulgent dessert.
- Used as a base for ice cream sandwiches by placing a scoop of ice cream between two cookies.
For storage, keep the cookies in an airtight container at room temperature for up to five days. To extend their freshness, they can be stored in the refrigerator for up to a week or frozen for up to two months.
- Prep Time: 20 minutes
- Cook Time: 12 minutes
Chocolate-covered strawberry cookies offer all the best parts of this beloved pairing but in a more convenient and satisfying form. These cookies are rich, fudgy, and packed with bits of freeze-dried strawberries that add a tangy contrast to the deep cocoa flavor. They are then finished with a chocolate coating, elevating them to the perfect balance of texture and taste.
For beginners in the kitchen, this recipe is an excellent introduction to baking. It does not require advanced techniques, and each step is straightforward, making it approachable even for those with little experience. The dough is easy to handle, and the final result is impressive without requiring complicated decorations or precise measurements beyond the basics.
This recipe also allows for flexibility, as it can be adapted to different tastes and dietary preferences. With simple ingredient swaps and helpful baking tips, these cookies can be made successfully with whatever is available in the kitchen. Whether you are making them for a special occasion or simply as a treat to enjoy with a cup of tea or coffee, these chocolate-covered strawberry cookies are sure to be a hit.
Ingredients and Preparation
Essential Ingredients
To create these cookies, the following ingredients are needed:
- ½ cup (1 stick) unsalted butter, at room temperature
- 1 cup packed light brown sugar
- 1 large egg, at room temperature
- 2 teaspoons vanilla extract
- 1 ¼ cups all-purpose flour
- ⅓ cup Dutch-processed cocoa powder
- ½ teaspoon baking soda
- ¼ teaspoon baking powder
- ½ teaspoon salt
- 1 cup freeze-dried strawberries
- 1 cup semisweet chocolate chips
For the Chocolate Coating
- 1 cup semisweet chocolate chips
- 1 teaspoon coconut oil
Alternative Ingredient Suggestions
For those who may not have access to certain ingredients or prefer variations, here are some alternatives:
- Butter Substitute: If unsalted butter is unavailable, salted butter can be used with a slight reduction in the amount of added salt. Dairy-free margarine or coconut oil can also be used.
- Sugar Variations: Light brown sugar gives the cookies a soft, chewy texture, but dark brown sugar can be used for a deeper molasses flavor. White granulated sugar can work, but the cookies may not be as moist.
- Flour Options: All-purpose flour is ideal, but a one-to-one gluten-free flour blend can be used for those avoiding gluten.
- Cocoa Powder Choices: Dutch-processed cocoa powder provides a rich, smooth chocolate flavor, but natural cocoa powder can be used as well. If using natural cocoa, consider adding ¼ teaspoon of baking soda to balance acidity.
- Chocolate Chips: Dark chocolate chips can replace semisweet chocolate for a more intense flavor, while milk chocolate can be used for a sweeter taste.
- Strawberry Alternatives: Freeze-dried strawberries provide a concentrated flavor and crisp texture, but dried strawberries or even small fresh strawberry pieces can be used. If using fresh strawberries, reduce the baking time slightly to prevent excess moisture.
Step-by-Step Instructions
- Preheat the Oven and Prepare the Baking SheetsPreheat the oven to 350°F (175°C). Line two baking sheets with parchment paper and set them aside. This ensures the cookies do not stick and makes cleanup easier.
- Cream the Butter and SugarIn a stand mixer fitted with the paddle attachment, beat the butter and brown sugar on medium-high speed for about 2 minutes until the mixture becomes light and fluffy. This process incorporates air into the dough, making the cookies softer.
- Add the Egg and VanillaUse a rubber spatula to scrape down the sides of the mixing bowl. Add the egg and vanilla extract, then continue beating on medium-high speed for another 2 minutes. The mixture should appear pale and creamy.
- Combine Dry IngredientsIn a separate bowl, whisk together the flour, cocoa powder, baking soda, baking powder, and salt. Gradually add these dry ingredients to the wet mixture, beating on low speed until just combined. Do not overmix, as this can result in tough cookies.
- Incorporate the Strawberries and Chocolate ChipsGently fold in the freeze-dried strawberries and chocolate chips using a rubber spatula. This ensures that the add-ins are evenly distributed without breaking them down too much.
- Portion the Cookie DoughUse a cookie scoop or a large spoon to portion out dough balls that are approximately 3 tablespoons in size. Place them on the prepared baking sheets, spacing them at least 2 inches apart to allow for spreading.
- Bake the CookiesBake the cookies for 10 to 12 minutes, or until they have puffed up and the edges appear set but the centers remain slightly soft. This ensures they retain a chewy texture.
- Cool the CookiesRemove the baking sheets from the oven and let the cookies cool for about 15 minutes before transferring them to a wire rack. Allowing them to cool prevents breakage and helps them set properly.
- Melt the Chocolate for CoatingIn a small microwave-safe bowl, combine the chocolate chips and coconut oil. Microwave in 30-second increments, stirring between each, until fully melted.
- Dip the Cookies in ChocolateDip the bottom of each cooled cookie into the melted chocolate, scraping off any excess. Place the cookies back on the parchment-lined baking sheet. If desired, drizzle additional melted chocolate over the tops for decoration.
- Set the ChocolateLet the cookies sit for about 30 minutes, or until the chocolate coating is fully set. For faster results, place them in the refrigerator for 10 to 15 minutes.
Beginner Tips and Notes
Troubleshooting Common Issues
- If the cookies spread too much, try chilling the dough for 15 to 20 minutes before baking. This helps the butter firm up, preventing excessive spreading.
- If the dough is too dry, a teaspoon of milk or an extra egg yolk can be added to improve moisture.
- If the chocolate seizes (becomes grainy) while melting, add a small amount of coconut oil or butter and stir vigorously until smooth.
Efficient Kitchen Tips
- Measure all ingredients before starting to ensure a smooth baking process.
- Use a cookie scoop for uniform sizes, which helps the cookies bake evenly.
- Line baking sheets with parchment paper for easy cleanup and non-stick baking.

Serving Suggestions
Chocolate-covered strawberry cookies are delicious on their own, but they can be paired with various complementary treats:
- Served with a glass of milk or a warm cup of coffee for a classic pairing.
- Paired with vanilla or strawberry ice cream for an indulgent dessert.
- Used as a base for ice cream sandwiches by placing a scoop of ice cream between two cookies.
For storage, keep the cookies in an airtight container at room temperature for up to five days. To extend their freshness, they can be stored in the refrigerator for up to a week or frozen for up to two months.
Conclusion
Baking does not have to be complicated, and these chocolate-covered strawberry cookies are proof of that. They offer an easy yet impressive dessert option for beginners, combining simple techniques with delicious flavors. The combination of rich chocolate, sweet strawberries, and a glossy chocolate coating makes them a treat worth making again and again.
For those just starting their baking journey, this recipe provides a perfect foundation. It is forgiving, adaptable, and results in a batch of cookies that looks as good as it tastes. If you try this recipe, be sure to share your experience and any creative variations you discover.