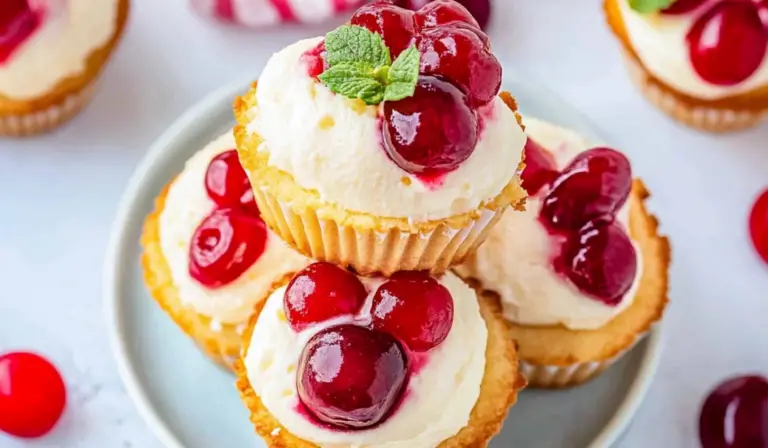
Black Forest Cookies: A Perfect Beginner-Friendly Recipe for Sweet Indulgence

There’s a special kind of joy that comes from baking fresh cookies from scratch. The warmth of the oven, the sweet aroma filling the kitchen, and the anticipation of that first bite are all part of the experience. For many, baking can feel intimidating, especially if you’re just starting out in the kitchen. But don’t worry, this Black Forest Cookies recipe is here to change that. With simple ingredients, straightforward steps, and minimal prep time, these cookies are a perfect introduction to the world of baking.
Print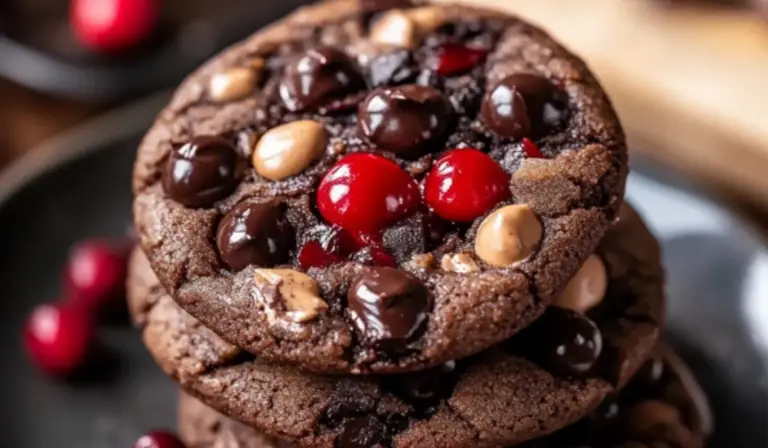
Black Forest Cookies: A Perfect Beginner-Friendly Recipe for Sweet Indulgence
Rich chocolate, sweet cherries, and a hint of indulgence—these Black Forest Cookies are everything you love in cookie form! Simple to bake, impossible to resist. 🍒🍪✨
- Total Time: 25 minutes
- Yield: 24 cookies 1x
Ingredients
- 1 cup (½ lb) unsalted butter, softened
- 1 cup (½ lb) brown sugar
- ½ cup (¼ lb) granulated sugar
- 2 large eggs
- 2 teaspoons vanilla extract
- 1 ¾ cups (⅞ lb) all-purpose flour
- ¾ cup (⅜ lb) unsweetened cocoa powder
- 1 teaspoon baking soda
- ½ teaspoon salt
- 1 cup (½ lb) dark or semi-sweet chocolate chips or chunks
- ¾ cup (⅜ lb) dried cherries (or chopped maraschino cherries, well-drained)
- Optional: ½ cup (¼ lb) white chocolate chips or drizzle, or melted cherry preserves for finishing
Instructions
- Preheat the Oven: Start by preheating your oven to 350°F (175°C). This ensures that the cookies bake evenly once the dough is ready. Line two baking sheets with parchment paper or a silicone baking mat to make cleanup easy and prevent sticking.
- Cream the Butter and Sugars: In a large mixing bowl, beat the softened butter, brown sugar, and granulated sugar together until the mixture is light and fluffy. This usually takes about 2-3 minutes with an electric hand mixer or stand mixer. If you don’t have a mixer, you can use a whisk and some elbow grease — just make sure the mixture is smooth and airy.
- Add the Eggs and Vanilla: Beat in the eggs, one at a time. Make sure each egg is fully incorporated before adding the next one. Once the eggs are mixed in, add the vanilla extract and continue mixing until everything is smooth and well-blended.
- Mix the Dry Ingredients: In a separate bowl, whisk together the all-purpose flour, cocoa powder, baking soda, and salt. This ensures that the dry ingredients are evenly distributed throughout the dough and helps prevent clumps of cocoa powder or baking soda.
- Combine Wet and Dry Mixtures: Gradually add the dry ingredients to the wet mixture. Use a spatula or spoon to stir until everything is just combined. Be careful not to overmix the dough, as this can result in tougher cookies.
- Fold in the Chocolate Chips and Dried Cherries: Now comes the fun part! Gently fold in the chocolate chips and dried cherries. Make sure they are evenly distributed throughout the dough, but try not to overwork the dough. The dough should be soft and slightly sticky.
- Scoop the Dough: Using a spoon or cookie scoop, drop heaping tablespoons of dough onto the prepared baking sheets. Space the dough balls about 2 inches apart to allow for spreading as they bake. If you prefer larger or smaller cookies, feel free to adjust the size of the dough balls.
- Bake the Cookies: Bake the cookies in the preheated oven for 9-11 minutes. The cookies are done when the edges are set and the centers are still soft. Remember, they will continue to cook on the baking sheet once you take them out of the oven, so don’t worry if the centers look slightly underdone. This will give you a chewy, soft texture.
- Cool and Serve: Let the cookies cool on the baking sheets for about 5 minutes before transferring them to a wire rack to cool completely. If you’re using the optional finishing touches, now is the time to drizzle with melted white chocolate or cherry preserves. These optional additions add a lovely visual appeal and extra flavor.
Notes
- Soften the Butter: It’s important to use softened butter for this recipe. If your butter is too cold, it won’t cream properly with the sugar, and the dough will be harder to work with. To soften butter quickly, cut it into small cubes and let it sit at room temperature for 10-15 minutes before using.
- Check for Doneness: If you’re unsure whether the cookies are done, gently touch the edges of a cookie with a finger. If they feel set and firm, they’re ready to come out of the oven. The centers should remain soft, but don’t worry — they’ll firm up as they cool.
- Don’t Overmix the Dough: Once you add the dry ingredients to the wet mixture, mix just until combined. Overmixing the dough can cause the cookies to be dense and tough. The key to chewy cookies is handling the dough gently.
- Use Parchment Paper or a Silicone Mat: For the best results, use parchment paper or a silicone baking mat to line your baking sheets. These prevent the cookies from sticking and make cleanup a breeze.
- Adjust Baking Time for Different Sizes: If you make larger cookies, you may need to bake them for a few extra minutes. Similarly, smaller cookies may only need 7-8 minutes in the oven. Just keep an eye on them as they bake to prevent overcooking.
- Prep Time: 15 minutes
- Cook Time: 10 minutes
Black Forest Cookies are a delightful blend of rich chocolate, tart cherries, and a touch of sweetness from the vanilla extract. They have the decadent feel of a dessert but the ease of a home-baked snack. You don’t need any advanced skills to create them, just follow the instructions step by step, and you’ll have a batch of cookies that will impress your family, friends, or even just satisfy your own sweet cravings. Let’s dive into how you can make these delicious treats with ease!
Ingredients and Preparation
Before you get started, gather all your ingredients. This recipe is perfect for beginners because it doesn’t require anything too complicated — just staple pantry items that are easy to find.
Ingredients:
- 1 cup (½ lb) unsalted butter, softened
- 1 cup (½ lb) brown sugar
- ½ cup (¼ lb) granulated sugar
- 2 large eggs
- 2 teaspoons vanilla extract
- 1 ¾ cups (⅞ lb) all-purpose flour
- ¾ cup (⅜ lb) unsweetened cocoa powder
- 1 teaspoon baking soda
- ½ teaspoon salt
- 1 cup (½ lb) dark or semi-sweet chocolate chips or chunks
- ¾ cup (⅜ lb) dried cherries (or chopped maraschino cherries, well-drained)
- Optional: ½ cup (¼ lb) white chocolate chips or drizzle, or melted cherry preserves for finishing
Ingredient Substitutes:
This recipe is flexible, and you can easily adjust it to fit your preferences or dietary needs. If you prefer a different type of chocolate, you can swap the dark or semi-sweet chocolate chips for milk chocolate or even white chocolate chips for a sweeter flavor. If cherries aren’t your thing, you can try dried cranberries, raisins, or even chopped dried apricots.
For those who don’t have unsweetened cocoa powder, you can substitute it with sweetened cocoa powder, but just be mindful that this will add some extra sugar to your recipe. Similarly, if you’re out of baking soda, a small amount of baking powder can work as a substitute, though the cookies might be slightly less chewy.
Now that you’ve got your ingredients ready, let’s jump into the preparation process!
Step-by-Step Instructions
Baking can seem a bit overwhelming at first, but once you break it down into manageable steps, it becomes a fun and rewarding experience. Follow these simple steps, and soon you’ll be savoring your very own homemade Black Forest Cookies.
- Preheat the Oven: Start by preheating your oven to 350°F (175°C). This ensures that the cookies bake evenly once the dough is ready. Line two baking sheets with parchment paper or a silicone baking mat to make cleanup easy and prevent sticking.
- Cream the Butter and Sugars: In a large mixing bowl, beat the softened butter, brown sugar, and granulated sugar together until the mixture is light and fluffy. This usually takes about 2-3 minutes with an electric hand mixer or stand mixer. If you don’t have a mixer, you can use a whisk and some elbow grease — just make sure the mixture is smooth and airy.
- Add the Eggs and Vanilla: Beat in the eggs, one at a time. Make sure each egg is fully incorporated before adding the next one. Once the eggs are mixed in, add the vanilla extract and continue mixing until everything is smooth and well-blended.
- Mix the Dry Ingredients: In a separate bowl, whisk together the all-purpose flour, cocoa powder, baking soda, and salt. This ensures that the dry ingredients are evenly distributed throughout the dough and helps prevent clumps of cocoa powder or baking soda.
- Combine Wet and Dry Mixtures: Gradually add the dry ingredients to the wet mixture. Use a spatula or spoon to stir until everything is just combined. Be careful not to overmix the dough, as this can result in tougher cookies.
- Fold in the Chocolate Chips and Dried Cherries: Now comes the fun part! Gently fold in the chocolate chips and dried cherries. Make sure they are evenly distributed throughout the dough, but try not to overwork the dough. The dough should be soft and slightly sticky.
- Scoop the Dough: Using a spoon or cookie scoop, drop heaping tablespoons of dough onto the prepared baking sheets. Space the dough balls about 2 inches apart to allow for spreading as they bake. If you prefer larger or smaller cookies, feel free to adjust the size of the dough balls.
- Bake the Cookies: Bake the cookies in the preheated oven for 9-11 minutes. The cookies are done when the edges are set and the centers are still soft. Remember, they will continue to cook on the baking sheet once you take them out of the oven, so don’t worry if the centers look slightly underdone. This will give you a chewy, soft texture.
- Cool and Serve: Let the cookies cool on the baking sheets for about 5 minutes before transferring them to a wire rack to cool completely. If you’re using the optional finishing touches, now is the time to drizzle with melted white chocolate or cherry preserves. These optional additions add a lovely visual appeal and extra flavor.
Beginner Tips and Notes
Baking is a science, and while it’s forgiving, there are a few tips and tricks that will help ensure your cookies turn out perfectly every time.
- Soften the Butter: It’s important to use softened butter for this recipe. If your butter is too cold, it won’t cream properly with the sugar, and the dough will be harder to work with. To soften butter quickly, cut it into small cubes and let it sit at room temperature for 10-15 minutes before using.
- Check for Doneness: If you’re unsure whether the cookies are done, gently touch the edges of a cookie with a finger. If they feel set and firm, they’re ready to come out of the oven. The centers should remain soft, but don’t worry — they’ll firm up as they cool.
- Don’t Overmix the Dough: Once you add the dry ingredients to the wet mixture, mix just until combined. Overmixing the dough can cause the cookies to be dense and tough. The key to chewy cookies is handling the dough gently.
- Use Parchment Paper or a Silicone Mat: For the best results, use parchment paper or a silicone baking mat to line your baking sheets. These prevent the cookies from sticking and make cleanup a breeze.
- Adjust Baking Time for Different Sizes: If you make larger cookies, you may need to bake them for a few extra minutes. Similarly, smaller cookies may only need 7-8 minutes in the oven. Just keep an eye on them as they bake to prevent overcooking.

Serving Suggestions
These Black Forest Cookies are perfect on their own, but if you’re looking to make them even more special, here are a few ideas:
- Pair with Ice Cream: Serve these warm cookies with a scoop of vanilla or cherry ice cream for an indulgent dessert.
- Create a Cookie Sandwich: Spread a little whipped cream or more cherry preserves between two cookies for a fun twist.
- Serve with Hot Chocolate or Coffee: These cookies pair perfectly with a warm mug of hot chocolate or a cup of coffee, making them an ideal treat for cozy afternoons.
Storage Tips:
If you have leftovers (which may be a big “if”!), store the cookies in an airtight container at room temperature for up to 4 days. For longer storage, you can freeze the cookies by placing them in a freezer-safe container or bag. To thaw, simply leave them at room temperature for a few hours or warm them in the microwave for a few seconds.
Engagement Features
Making Black Forest Cookies is a fun and rewarding experience, especially when you see the smiles on the faces of those who get to enjoy your creation. I hope this recipe helps build your confidence in the kitchen and inspires you to try more baking projects in the future. It’s a great way to practice new techniques and learn how to balance flavors and textures.
Have you tried making Black Forest Cookies? I’d love to hear about your experience! Drop a comment below and let me know how your cookies turned out. Was there a twist you added to make them your own? Or maybe you’ve got tips and tricks to share with other beginner bakers. Your feedback could help someone else feel confident enough to give this recipe a try. Happy baking, and enjoy your sweet treats!