The Ultimate Beginner’s Guide to Making Lemon Cheesecake Cookies
There’s something truly special about baking cookies from scratch. The warm aroma filling the kitchen, the anticipation of that first bite, and the satisfaction of creating something delicious with your own hands make it an experience worth savoring. One of the best recipes for beginner bakers is Lemon Cheesecake Cookies—a delightful combination of tangy lemon, rich cream cheese, and a sweet glaze that melts in your mouth.
Print
The Ultimate Beginner’s Guide to Making Lemon Cheesecake Cookies
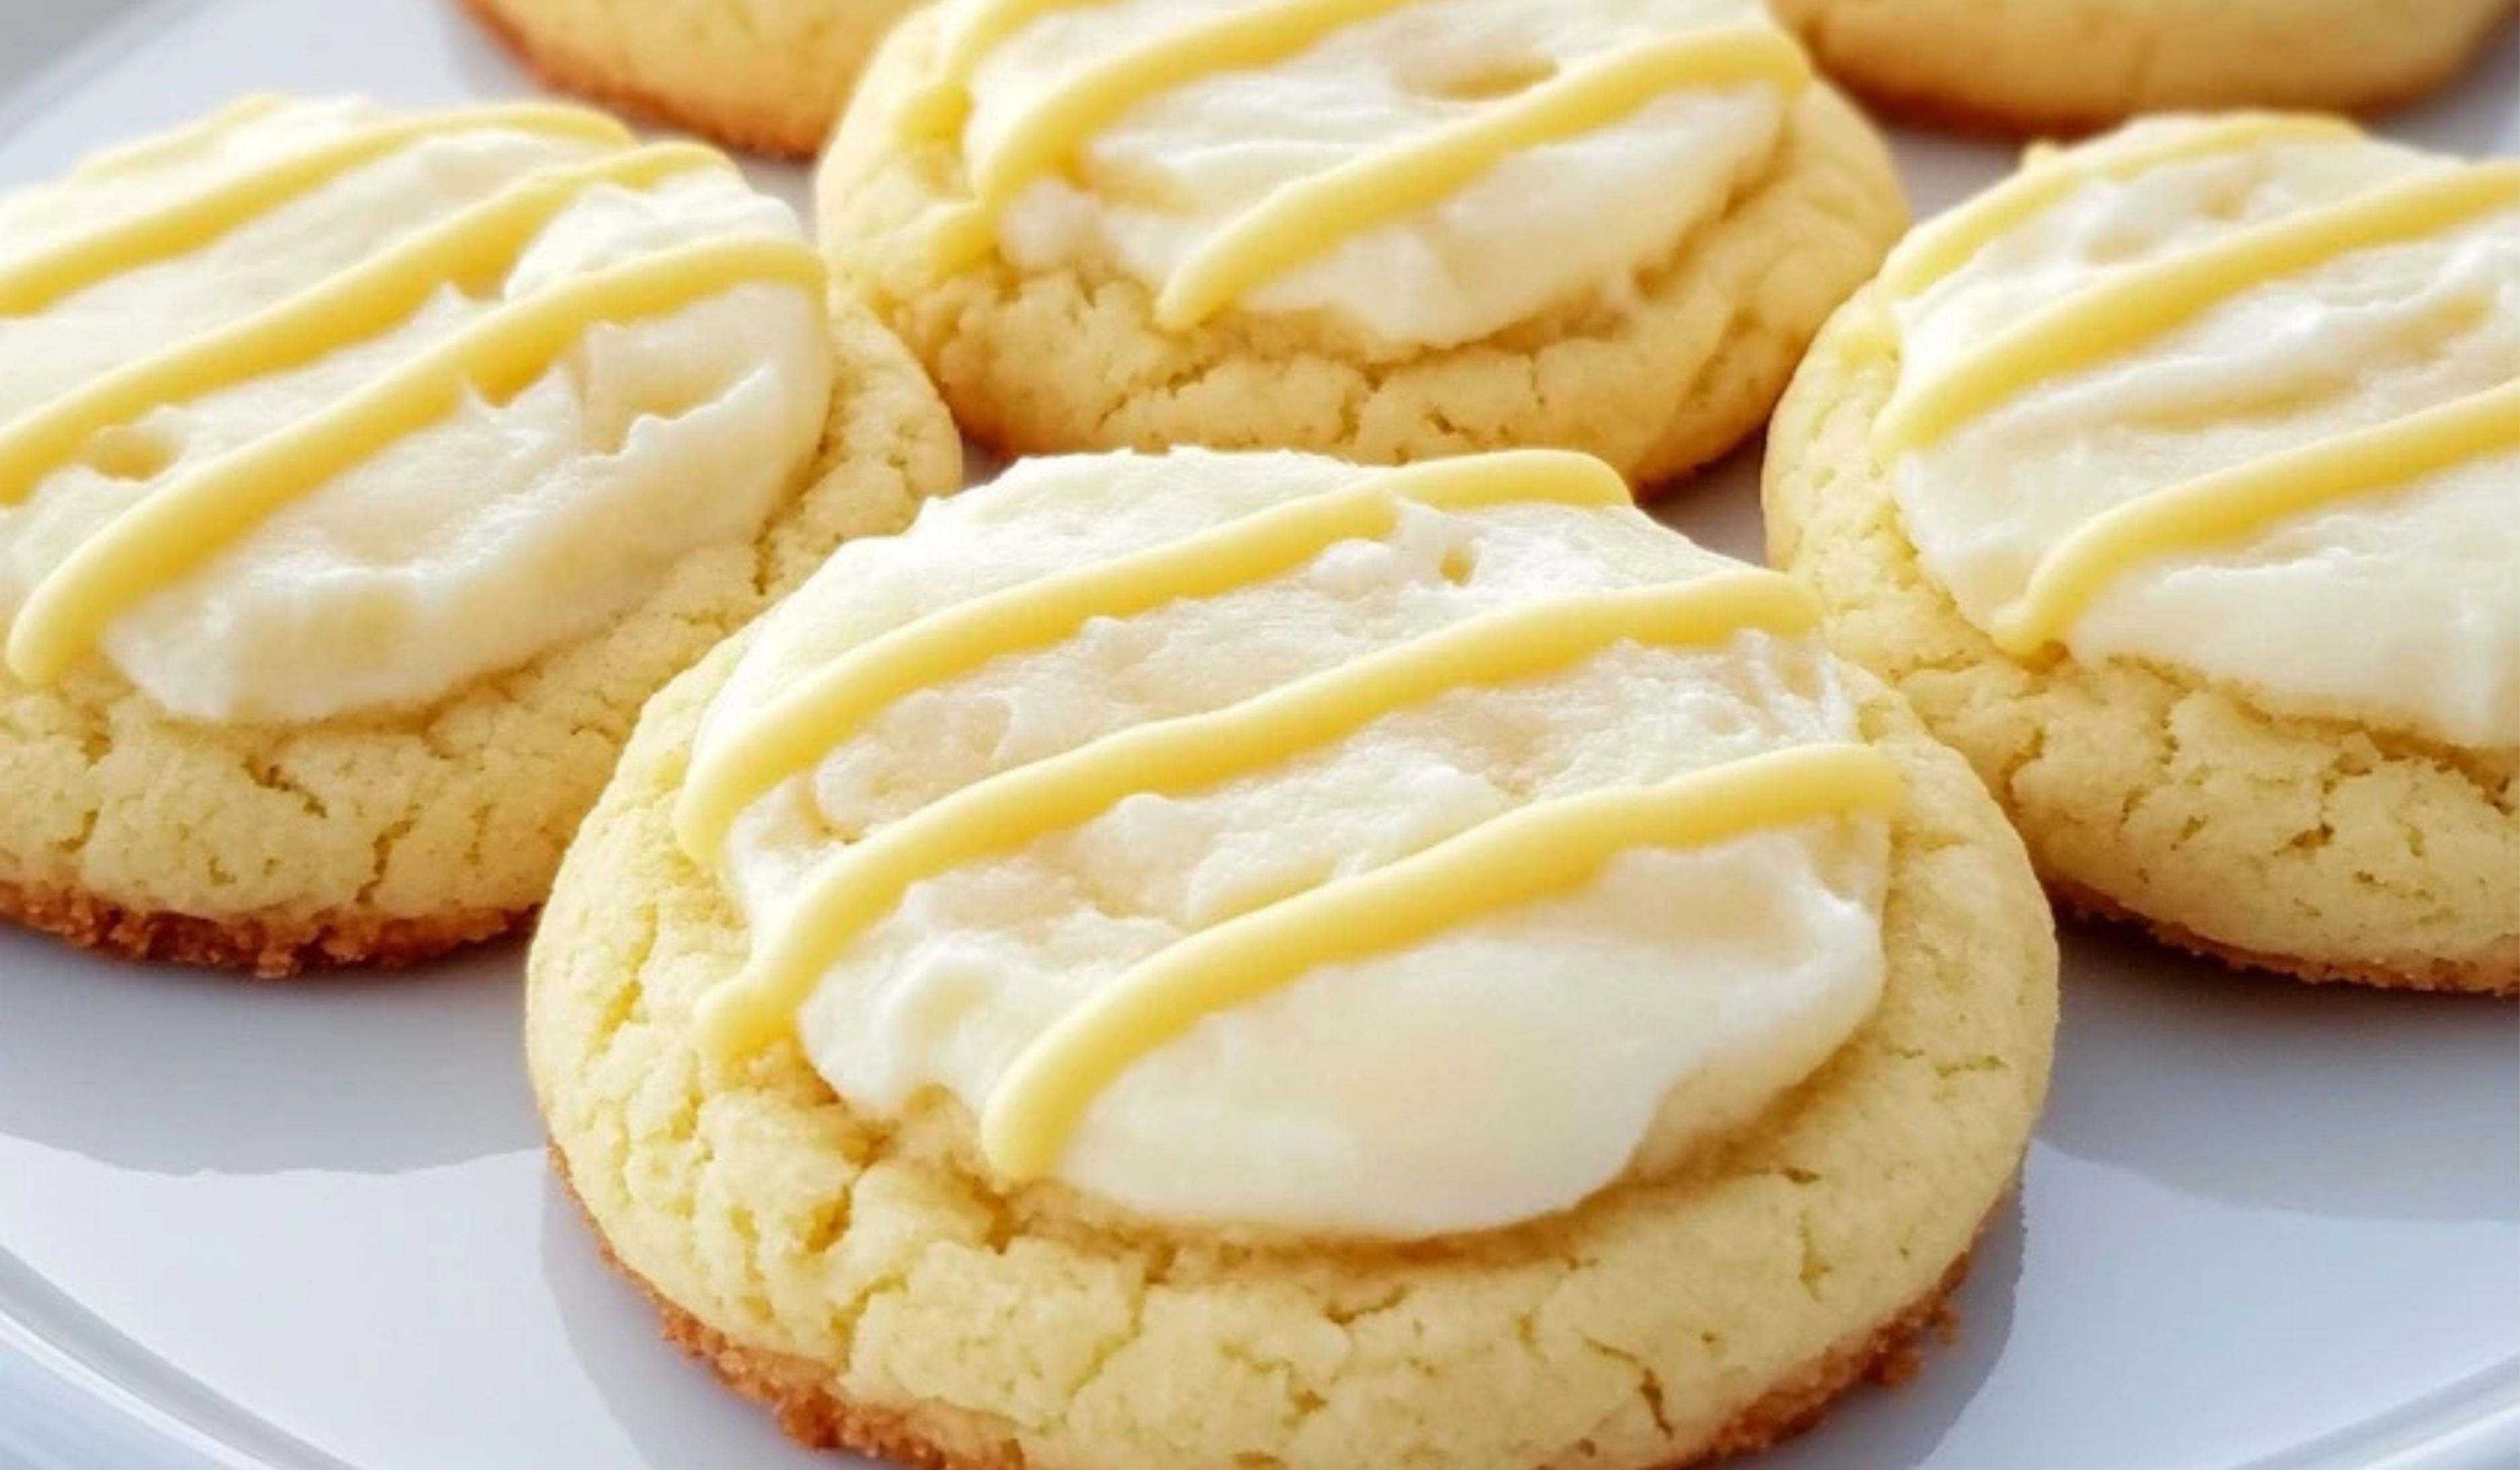
These Lemon Cheesecake Cookies are the perfect blend of buttery softness, creamy cheesecake filling, and a bright lemony zing! 🍋🍪 Every bite melts in your mouth with a perfect balance of sweet and tangy flavors. Beginner-friendly and bursting with citrus goodness! ✨
- Total Time: 55 minutes
- Yield: 18 cookies 1x
Ingredients
For the Cookies
- ⅔ cup White Sugar – Adds sweetness and helps create a tender cookie texture.
- 4 oz. Cream Cheese (softened) – Provides creaminess and a slight tang that enhances the lemon flavor.
- ½ cup Butter (softened) – Adds richness and keeps the cookies soft.
- 1 Egg – Helps bind the ingredients together and adds structure.
- 2 tablespoons Lemon Juice – Gives the cookies their signature citrus flavor.
- 2 teaspoons Lemon Zest – Intensifies the lemony aroma and taste.
- 1 ½ cups All-Purpose Flour – The base ingredient that forms the cookie dough.
- 1 teaspoon Cornstarch – Contributes to the cookies’ light and fluffy texture.
- ½ teaspoon Baking Soda – Helps the cookies rise and gives them a soft chewiness.
- ¼ teaspoon Salt – Balances the flavors and enhances the sweetness.
For the Lemon Glaze
- ½ cup Powdered Sugar – Creates a smooth, sweet topping.
- 1 teaspoon Milk – Helps achieve the perfect glaze consistency.
- 1 teaspoon Lemon Juice – Adds an extra burst of lemon flavor to the glaze.
Instructions
Step 1: Cream the Butter, Sugar, and Cream Cheese
In a large mixing bowl or the bowl of a stand mixer, combine the softened cream cheese, butter, and granulated sugar. Beat on medium speed until the mixture becomes smooth and creamy. This step is important because it ensures that the cookies will have a consistent texture. If using a hand mixer, beat for about 2-3 minutes until no lumps remain.
Step 2: Add the Egg and Lemon Flavoring
Once the butter and cream cheese mixture is well combined, add the egg, lemon juice, and lemon zest. Mix until smooth. The egg acts as a binder, while the lemon juice and zest provide a refreshing citrus flavor. Be sure to scrape down the sides of the bowl to incorporate all the ingredients evenly.
Step 3: Mix the Dry Ingredients
In a separate bowl, whisk together the all-purpose flour, cornstarch, baking soda, and salt. Whisking these ingredients helps distribute them evenly, preventing clumps in the dough.
Step 4: Combine Wet and Dry Ingredients
Gradually add the dry ingredients to the wet mixture, mixing on low speed until just combined. The dough will be sticky, which is normal. Avoid overmixing, as this can result in dense cookies instead of light and fluffy ones.
Step 5: Chill the Dough
Cover the bowl with plastic wrap and refrigerate for 45 minutes to an hour. Chilling the dough is crucial because it allows the flavors to meld and prevents the cookies from spreading too much while baking.
Step 6: Preheat the Oven and Prepare the Baking Sheet
Preheat your oven to 350°F (175°C). Line a baking sheet with parchment paper to prevent sticking and ensure even baking.
Step 7: Shape and Bake the Cookies
Using a spoon or cookie scoop, portion out about 1.5 tablespoons of dough per cookie. Roll into balls and place them on the baking sheet, leaving space between each cookie.
Bake for 11-13 minutes, or until the edges are slightly golden and a toothpick inserted into a cookie comes out clean. Avoid overbaking, as the cookies should remain soft and slightly chewy.
Step 8: Cool the Cookies
Transfer the cookies to a wire rack to cool completely before adding the glaze. This step is important because applying the glaze while the cookies are warm can cause it to melt and become too thin.
Step 9: Prepare the Lemon Glaze
In a small bowl, whisk together the powdered sugar, lemon juice, and milk until smooth. The glaze should have a drizzle-like consistency. If it is too thick, add a few extra drops of milk. If it is too thin, add a little more powdered sugar.
Step 10: Drizzle the Glaze Over the Cookies
Using a spoon or a piping bag, drizzle the glaze over the completely cooled cookies. Allow the glaze to set for about 10 minutes before serving.
Notes
- If the dough is too sticky to handle, lightly coat your hands with flour before rolling the cookies.
- For a stronger lemon flavor, increase the lemon zest to 3 teaspoons.
- If your cookies brown too quickly, try reducing the oven temperature by 5-10 degrees and baking for a couple of extra minutes.
- Store leftover cookies in an airtight container at room temperature for up to three days or in the refrigerator for up to a week.
- Prep Time: 45 minutes
- Cook Time: 10 minutes
I still remember the first time I made these cookies. I was looking for a simple yet impressive dessert to bring to a family gathering. The idea of lemon-flavored treats had always appealed to me, but I wanted something unique—something that blended the freshness of citrus with the comforting texture of soft, chewy cookies. After some experimentation, I discovered this recipe, and it quickly became a household favorite. The cookies were light, fluffy, and had the perfect balance of tartness and sweetness. They were easy to make, even for someone with minimal baking experience, and they disappeared within minutes of being served.
This recipe is perfect for beginners because it requires simple ingredients, straightforward techniques, and minimal equipment. The dough comes together effortlessly, and the glaze adds a finishing touch that makes the cookies look as good as they taste. If you are new to baking or just looking for a foolproof dessert, these Lemon Cheesecake Cookies are a great place to start.
Ingredients and Preparation
Before getting started, it’s important to gather all the ingredients. This not only makes the baking process smoother but also ensures that you won’t miss a crucial step.
Ingredients
For the Cookies
- ⅔ cup White Sugar – Adds sweetness and helps create a tender cookie texture.
- 4 oz. Cream Cheese (softened) – Provides creaminess and a slight tang that enhances the lemon flavor.
- ½ cup Butter (softened) – Adds richness and keeps the cookies soft.
- 1 Egg – Helps bind the ingredients together and adds structure.
- 2 tablespoons Lemon Juice – Gives the cookies their signature citrus flavor.
- 2 teaspoons Lemon Zest – Intensifies the lemony aroma and taste.
- 1 ½ cups All-Purpose Flour – The base ingredient that forms the cookie dough.
- 1 teaspoon Cornstarch – Contributes to the cookies’ light and fluffy texture.
- ½ teaspoon Baking Soda – Helps the cookies rise and gives them a soft chewiness.
- ¼ teaspoon Salt – Balances the flavors and enhances the sweetness.
For the Lemon Glaze
- ½ cup Powdered Sugar – Creates a smooth, sweet topping.
- 1 teaspoon Milk – Helps achieve the perfect glaze consistency.
- 1 teaspoon Lemon Juice – Adds an extra burst of lemon flavor to the glaze.
Preparation Tips
- Use fresh lemons for both the juice and zest to maximize flavor.
- Soften the butter and cream cheese at room temperature for easy mixing.
- Chill the dough before baking to prevent the cookies from spreading too much.
Step-by-Step Instructions
Step 1: Cream the Butter, Sugar, and Cream Cheese
In a large mixing bowl or the bowl of a stand mixer, combine the softened cream cheese, butter, and granulated sugar. Beat on medium speed until the mixture becomes smooth and creamy. This step is important because it ensures that the cookies will have a consistent texture. If using a hand mixer, beat for about 2-3 minutes until no lumps remain.
Step 2: Add the Egg and Lemon Flavoring
Once the butter and cream cheese mixture is well combined, add the egg, lemon juice, and lemon zest. Mix until smooth. The egg acts as a binder, while the lemon juice and zest provide a refreshing citrus flavor. Be sure to scrape down the sides of the bowl to incorporate all the ingredients evenly.
Step 3: Mix the Dry Ingredients
In a separate bowl, whisk together the all-purpose flour, cornstarch, baking soda, and salt. Whisking these ingredients helps distribute them evenly, preventing clumps in the dough.
Step 4: Combine Wet and Dry Ingredients
Gradually add the dry ingredients to the wet mixture, mixing on low speed until just combined. The dough will be sticky, which is normal. Avoid overmixing, as this can result in dense cookies instead of light and fluffy ones.
Step 5: Chill the Dough
Cover the bowl with plastic wrap and refrigerate for 45 minutes to an hour. Chilling the dough is crucial because it allows the flavors to meld and prevents the cookies from spreading too much while baking.
Step 6: Preheat the Oven and Prepare the Baking Sheet
Preheat your oven to 350°F (175°C). Line a baking sheet with parchment paper to prevent sticking and ensure even baking.
Step 7: Shape and Bake the Cookies
Using a spoon or cookie scoop, portion out about 1.5 tablespoons of dough per cookie. Roll into balls and place them on the baking sheet, leaving space between each cookie.
Bake for 11-13 minutes, or until the edges are slightly golden and a toothpick inserted into a cookie comes out clean. Avoid overbaking, as the cookies should remain soft and slightly chewy.
Step 8: Cool the Cookies
Transfer the cookies to a wire rack to cool completely before adding the glaze. This step is important because applying the glaze while the cookies are warm can cause it to melt and become too thin.
Step 9: Prepare the Lemon Glaze
In a small bowl, whisk together the powdered sugar, lemon juice, and milk until smooth. The glaze should have a drizzle-like consistency. If it is too thick, add a few extra drops of milk. If it is too thin, add a little more powdered sugar.
Step 10: Drizzle the Glaze Over the Cookies
Using a spoon or a piping bag, drizzle the glaze over the completely cooled cookies. Allow the glaze to set for about 10 minutes before serving.
Beginner Tips and Notes
- If the dough is too sticky to handle, lightly coat your hands with flour before rolling the cookies.
- For a stronger lemon flavor, increase the lemon zest to 3 teaspoons.
- If your cookies brown too quickly, try reducing the oven temperature by 5-10 degrees and baking for a couple of extra minutes.
- Store leftover cookies in an airtight container at room temperature for up to three days or in the refrigerator for up to a week.
Serving Suggestions
These Lemon Cheesecake Cookies pair wonderfully with a hot cup of tea, coffee, or even a glass of cold milk. To elevate the dessert, consider serving them with:
- A light fruit salad with strawberries and blueberries.
- A drizzle of white chocolate for added sweetness.
- A dollop of whipped cream on the side.
For those who enjoy experimenting, these cookies can also be crumbled over vanilla yogurt or ice cream for a delicious twist.
Engagement Features
Baking should be a fun and rewarding experience, especially for beginners. These cookies are not only easy to make but also a great way to impress family and friends. If you try this recipe, share your experience and any personal twists you added. Did you use a different citrus fruit? Did you make extra glaze for dipping? Let others know what worked for you.
Nothing brings people together like homemade treats, and these Lemon Cheesecake Cookies are sure to become a favorite in any kitchen. Whether you’re baking for a special occasion or just to satisfy a sweet craving, this recipe is one that you’ll want to make again and again.


