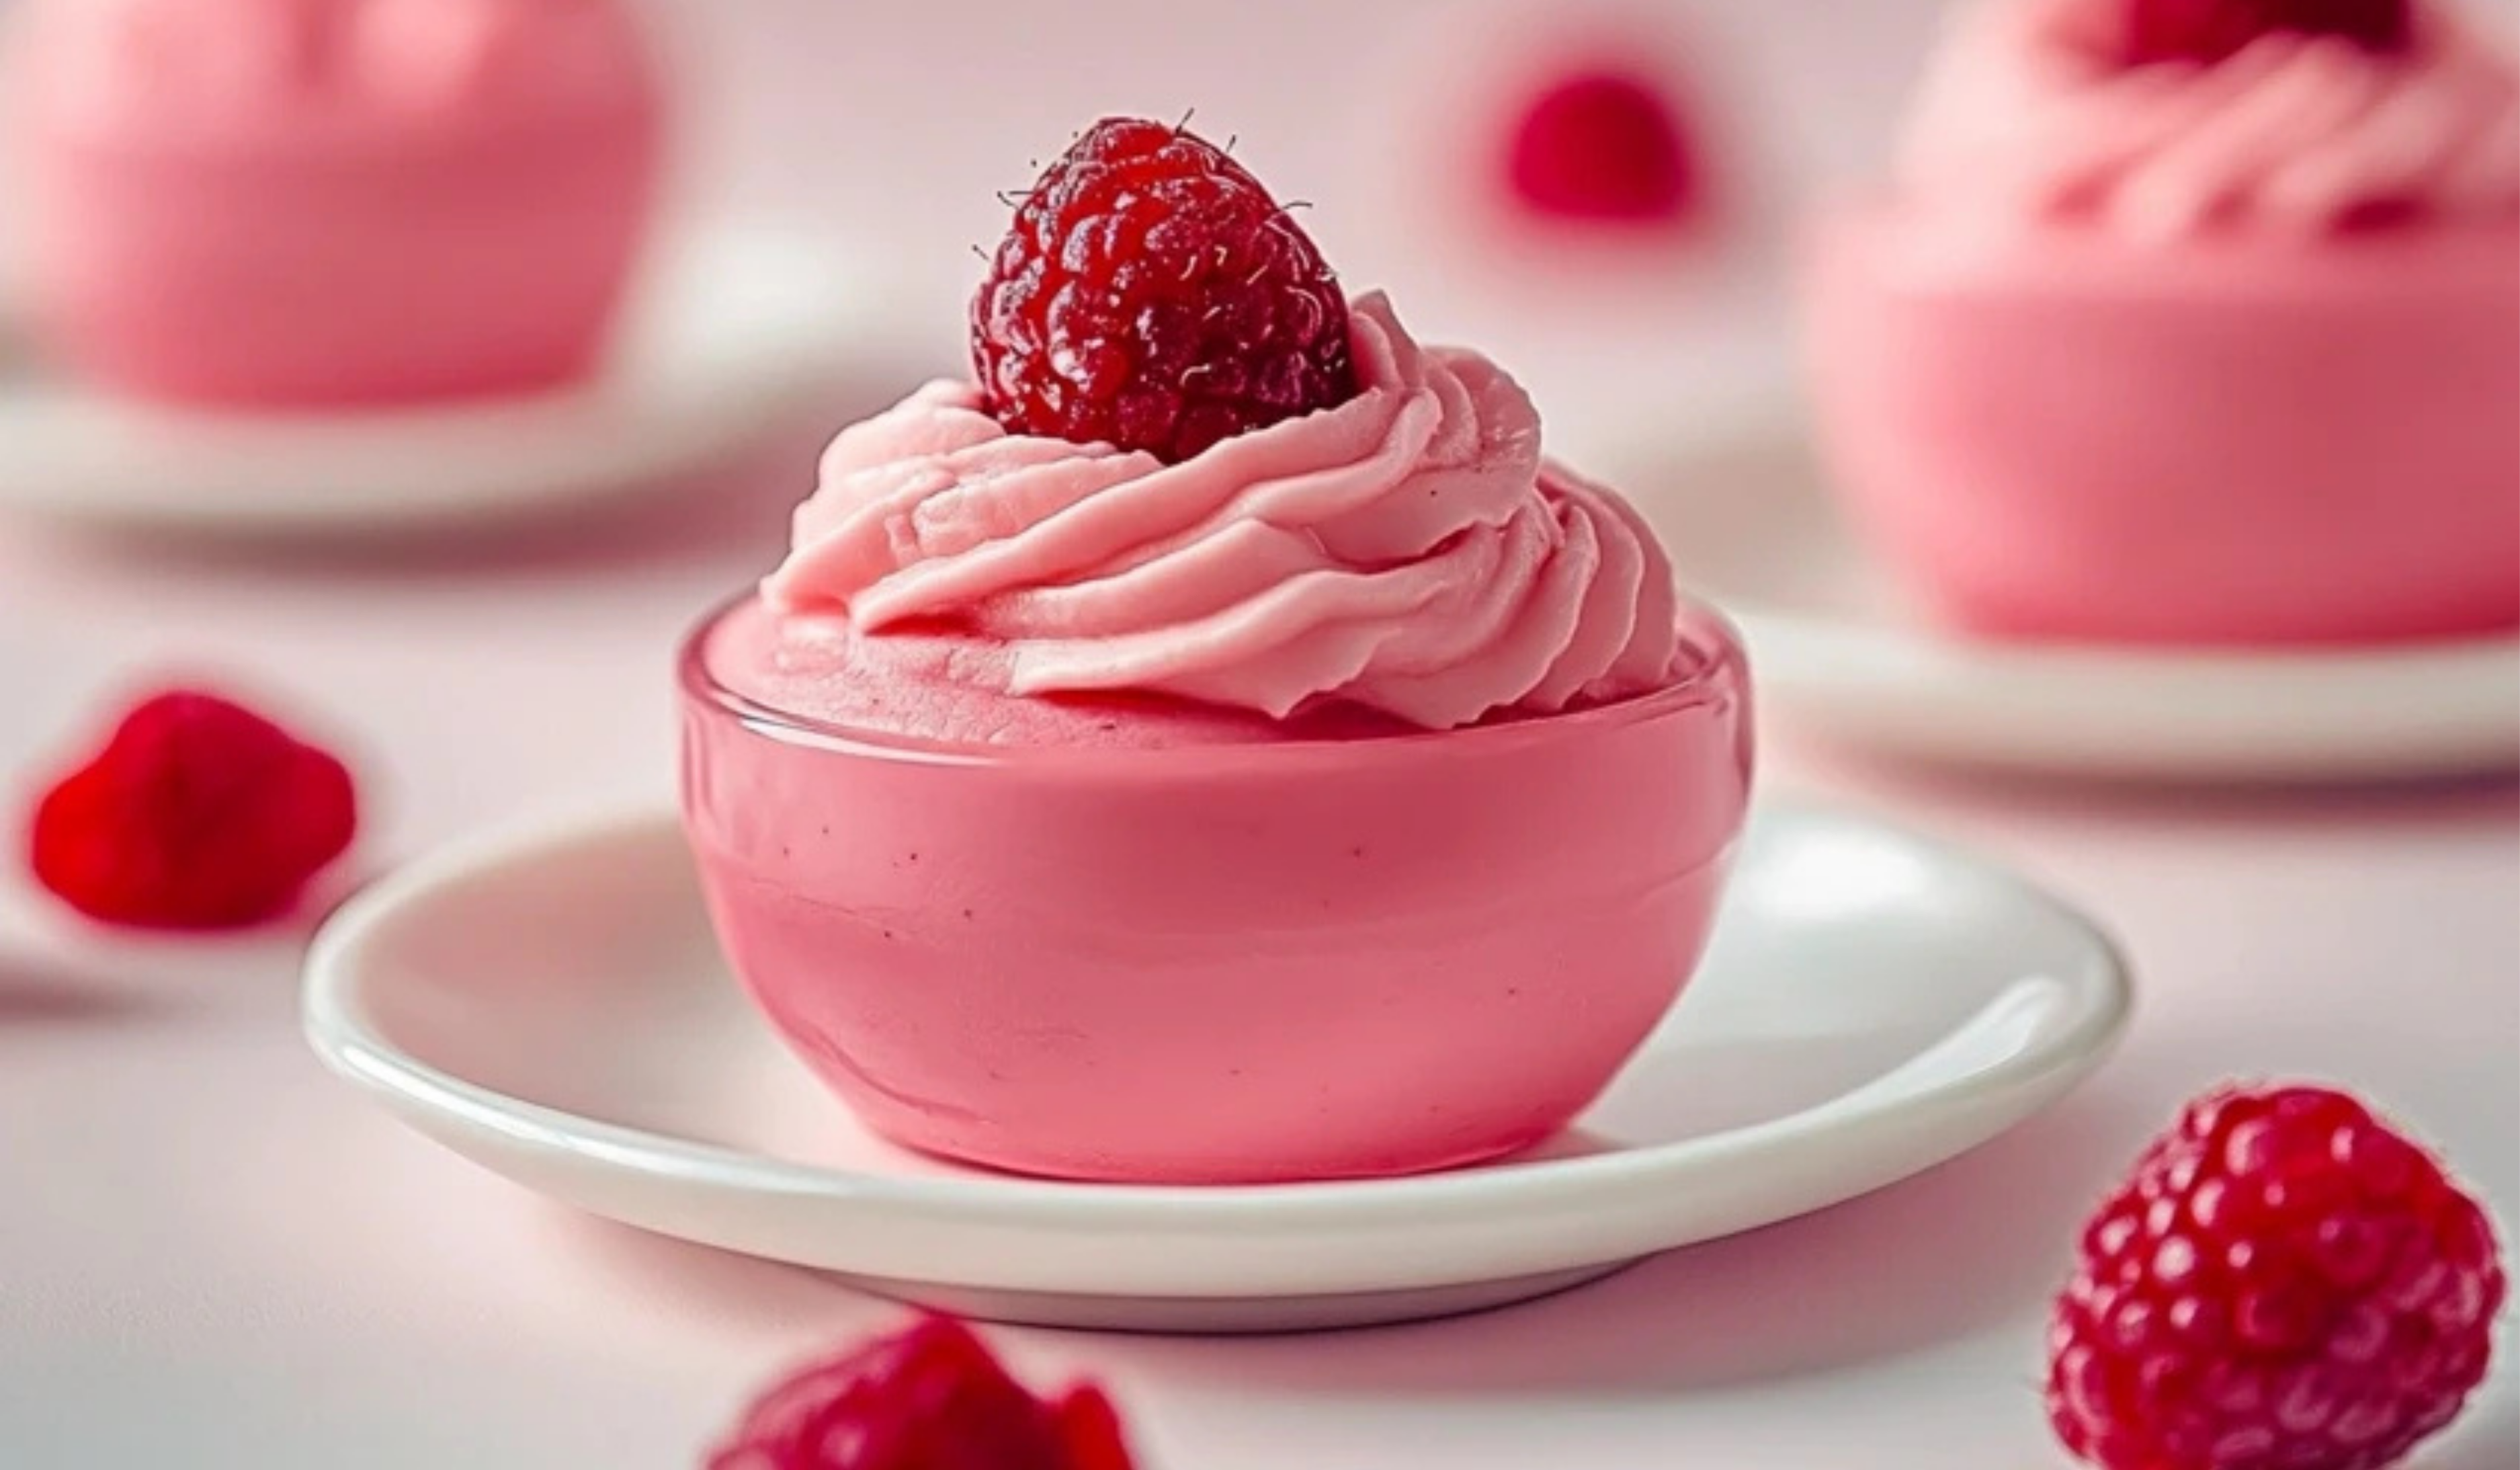
Raspberry Mousse: A Beginner-Friendly Dessert with a Burst of Real Fruit Flavor
There’s something special about making a homemade dessert from scratch. The process of blending simple ingredients into something delicate and flavorful feels almost magical. I still remember the first time I made raspberry mousse. The thought of working with gelatin intimidated me, and I worried that the texture wouldn’t turn out right. But after following a few simple steps, I ended up with a beautifully smooth, light, and airy mousse that looked and tasted like it came from a fancy bakery.
Print
Raspberry Mousse: A Beginner-Friendly Dessert with a Burst of Real Fruit Flavor
This Raspberry Mousse is a silky, airy, and naturally sweet dessert that’s bursting with fresh raspberry goodness! 🍓✨ Made with simple ingredients, it’s an easy yet elegant treat for any occasion!
- Total Time: 25 minutes (plus 2 hours chilling)
- Yield: 6 servings 1x
Ingredients
- 2 1/3 teaspoons (7 grams) powdered gelatin (one packet of Knox)
- 3 tablespoons cold water
- 10 oz (2 1/2 cups) fresh or frozen raspberries, thawed
- 1/2 cup granulated sugar
- 2 tablespoons fresh lemon juice
- 2 cups heavy whipping cream
- 1/4 cup powdered sugar
- 8–12 fresh raspberries and extra whipped cream for garnish (optional)
Instructions
1. Blooming the Gelatin
Start by pouring the cold water into a small bowl. Sprinkle the powdered gelatin evenly over the top and let it sit for 5 to 10 minutes. This process, known as blooming, allows the gelatin to absorb the water and ensures that it will dissolve properly when heated. If you skip this step, you may end up with clumps of gelatin in the mousse.
2. Preparing the Raspberry Syrup
In a medium saucepan, combine the raspberries, granulated sugar, and lemon juice over low heat. Stir frequently as the raspberries break down and the sugar dissolves. This should take about 5 minutes. The lemon juice enhances the tartness of the raspberries, balancing the sweetness of the mousse.
Once the mixture has softened into a syrup-like consistency, strain it through a fine mesh sieve into a heat-proof bowl. This step removes the seeds, ensuring a smooth texture. Use the back of a spoon to press as much liquid as possible through the strainer. Discard the remaining seeds and pulp.
3. Dissolving the Gelatin
Return the strained raspberry syrup to the saucepan. Add the bloomed gelatin and stir over low heat until the gelatin is fully dissolved. This should take about 1 to 2 minutes. Avoid boiling the mixture, as high heat can weaken the setting power of gelatin. Once the gelatin has completely melted into the raspberry syrup, remove the saucepan from the heat and transfer the mixture to a large, clean bowl. Let it cool at room temperature.
4. Whipping the Cream
In a separate large bowl, beat the heavy whipping cream and powdered sugar using an electric mixer. Start on low speed to prevent splattering, then increase to medium speed until soft peaks form. Soft peaks hold their shape but gently fold over when the beaters are lifted. Continue whipping until stiff peaks form, which means the cream holds its shape firmly. Be careful not to over-whip, as it can turn into butter.
5. Combining the Raspberry Syrup and Whipped Cream
To ensure a light and airy mousse, first mix about one-quarter of the whipped cream into the cooled raspberry syrup. This step helps loosen the syrup and makes it easier to fold in the remaining cream. Gently fold the rest of the whipped cream into the raspberry mixture using a spatula. Use slow, sweeping motions to avoid deflating the mixture. Stop folding as soon as the mixture is uniform in color and no white streaks remain.
6. Chilling and Setting the Mousse
Divide the mousse into 4 to 6 individual serving dishes. Small glass cups, ramekins, or dessert bowls work well. Cover each dish with plastic wrap and refrigerate for at least 2 hours, allowing the mousse to set. For the best texture, let it chill for up to 4 hours.
7. Garnishing and Serving
Before serving, garnish each mousse with a dollop of whipped cream and a few fresh raspberries. For an elegant touch, you can also add chocolate shavings, a drizzle of raspberry sauce, or a sprig of fresh mint.
Notes
- How to Know When the Gelatin is Ready: If the bloomed gelatin looks thick and jelly-like, it’s ready to be dissolved. If it’s still powdery, let it sit for another minute.
- Checking for Proper Whipping: Soft peaks will fold over when you lift the beaters, while stiff peaks will hold their shape firmly. Stop whipping once you reach stiff peaks to avoid grainy cream.
- Avoiding a Runny Mousse: Ensure that the raspberry syrup has cooled before adding it to the whipped cream. If it’s too warm, it will cause the whipped cream to deflate, leading to a runny consistency.
- Fixing Over-Whipped Cream: If the whipped cream starts to look grainy, add a small amount of unwhipped cream and gently mix until smooth again.
- Storage Tips: If you need to store the mousse, cover it tightly and refrigerate for up to 3 days. Avoid freezing, as it can change the texture.
- Prep Time: 20 minutes
- Cook Time: 5 minutes
This raspberry mousse is the perfect dessert for beginners. It requires no baking, minimal equipment, and just a few ingredients. With a little patience, anyone can achieve a restaurant-quality treat at home. The fresh raspberry flavor makes this mousse stand out, and its naturally vibrant pink color adds an elegant touch. Whether you’re making it for a family gathering, a special occasion, or just to satisfy a sweet craving, this recipe is sure to impress.
Another great thing about this mousse is its versatility. You can adjust the sweetness, make it dairy-free, or swap out the raspberries for other fruits like strawberries or mangoes. It’s a forgiving recipe, meaning there’s room for small mistakes without ruining the final product. With the right techniques and tips, even someone new to the kitchen can create a mousse that is smooth, creamy, and full of fresh fruit flavor.
Ingredients and Preparation
Ingredients
- 2 1/3 teaspoons (7 grams) powdered gelatin (one packet of Knox)
- 3 tablespoons cold water
- 10 oz (2 1/2 cups) fresh or frozen raspberries, thawed
- 1/2 cup granulated sugar
- 2 tablespoons fresh lemon juice
- 2 cups heavy whipping cream
- 1/4 cup powdered sugar
- 8-12 fresh raspberries and extra whipped cream for garnish (optional)
Ingredient Substitutions and Alternatives
- If fresh raspberries are unavailable, frozen raspberries work just as well. Make sure to thaw them before using.
- For a different fruit flavor, strawberries, blackberries, or even mangoes can be substituted.
- If you prefer a dairy-free version, substitute the heavy cream with full-fat coconut cream. Chill it before whipping for the best texture.
- Adjust the sweetness by reducing or increasing the sugar slightly, depending on personal preference.
- If you don’t have powdered gelatin, you can use gelatin sheets. One packet of powdered gelatin is equivalent to about four gelatin sheets.
Step-by-Step Instructions
1. Blooming the Gelatin
Start by pouring the cold water into a small bowl. Sprinkle the powdered gelatin evenly over the top and let it sit for 5 to 10 minutes. This process, known as blooming, allows the gelatin to absorb the water and ensures that it will dissolve properly when heated. If you skip this step, you may end up with clumps of gelatin in the mousse.
2. Preparing the Raspberry Syrup
In a medium saucepan, combine the raspberries, granulated sugar, and lemon juice over low heat. Stir frequently as the raspberries break down and the sugar dissolves. This should take about 5 minutes. The lemon juice enhances the tartness of the raspberries, balancing the sweetness of the mousse.
Once the mixture has softened into a syrup-like consistency, strain it through a fine mesh sieve into a heat-proof bowl. This step removes the seeds, ensuring a smooth texture. Use the back of a spoon to press as much liquid as possible through the strainer. Discard the remaining seeds and pulp.
3. Dissolving the Gelatin
Return the strained raspberry syrup to the saucepan. Add the bloomed gelatin and stir over low heat until the gelatin is fully dissolved. This should take about 1 to 2 minutes. Avoid boiling the mixture, as high heat can weaken the setting power of gelatin. Once the gelatin has completely melted into the raspberry syrup, remove the saucepan from the heat and transfer the mixture to a large, clean bowl. Let it cool at room temperature.
4. Whipping the Cream
In a separate large bowl, beat the heavy whipping cream and powdered sugar using an electric mixer. Start on low speed to prevent splattering, then increase to medium speed until soft peaks form. Soft peaks hold their shape but gently fold over when the beaters are lifted. Continue whipping until stiff peaks form, which means the cream holds its shape firmly. Be careful not to over-whip, as it can turn into butter.
5. Combining the Raspberry Syrup and Whipped Cream
To ensure a light and airy mousse, first mix about one-quarter of the whipped cream into the cooled raspberry syrup. This step helps loosen the syrup and makes it easier to fold in the remaining cream. Gently fold the rest of the whipped cream into the raspberry mixture using a spatula. Use slow, sweeping motions to avoid deflating the mixture. Stop folding as soon as the mixture is uniform in color and no white streaks remain.
6. Chilling and Setting the Mousse
Divide the mousse into 4 to 6 individual serving dishes. Small glass cups, ramekins, or dessert bowls work well. Cover each dish with plastic wrap and refrigerate for at least 2 hours, allowing the mousse to set. For the best texture, let it chill for up to 4 hours.
7. Garnishing and Serving
Before serving, garnish each mousse with a dollop of whipped cream and a few fresh raspberries. For an elegant touch, you can also add chocolate shavings, a drizzle of raspberry sauce, or a sprig of fresh mint.
Beginner Tips and Notes
- How to Know When the Gelatin is Ready: If the bloomed gelatin looks thick and jelly-like, it’s ready to be dissolved. If it’s still powdery, let it sit for another minute.
- Checking for Proper Whipping: Soft peaks will fold over when you lift the beaters, while stiff peaks will hold their shape firmly. Stop whipping once you reach stiff peaks to avoid grainy cream.
- Avoiding a Runny Mousse: Ensure that the raspberry syrup has cooled before adding it to the whipped cream. If it’s too warm, it will cause the whipped cream to deflate, leading to a runny consistency.
- Fixing Over-Whipped Cream: If the whipped cream starts to look grainy, add a small amount of unwhipped cream and gently mix until smooth again.
- Storage Tips: If you need to store the mousse, cover it tightly and refrigerate for up to 3 days. Avoid freezing, as it can change the texture.

Serving Suggestions
Raspberry mousse is delicious on its own, but pairing it with complementary flavors can elevate the experience.
- With Chocolate: Serve alongside a piece of dark chocolate or drizzle with melted chocolate for a rich contrast.
- With a Crunchy Element: Sprinkle crushed graham crackers, toasted nuts, or biscotti crumbs on top for added texture.
- With a Light Cake: Serve with vanilla sponge cake or ladyfingers for a more filling dessert.
- As a Parfait: Layer the mousse with crushed cookies and fresh fruit for an elegant twist.
For a refreshing summer treat, serve the mousse with a chilled glass of iced tea or lemonade. If preparing for a formal event, a light sparkling wine or raspberry-infused cocktail pairs beautifully with its fruity notes.
Conclusion
Making raspberry mousse from scratch may sound intimidating, but with clear steps and a little patience, it becomes an easy and rewarding experience. This recipe is beginner-friendly, requiring no complicated techniques or special equipment. The result is a smooth, creamy, and perfectly balanced dessert that highlights the fresh taste of raspberries.
Whether you’re trying mousse for the first time or looking for an elegant dessert to add to your repertoire, this recipe is a great place to start. It’s light enough for a casual treat but impressive enough for special occasions. Once you master this version, you can experiment with different fruits and flavors to make it your own.
Give this recipe a try and enjoy the process of creating something delicious from scratch. If you do, let us know how it turns out and share any creative variations you come up with.