The Sweet Simplicity of Homemade Strawberry Pie Filling

There’s something magical about the taste of fresh strawberries, especially when they’re transformed into a luscious pie filling. This Strawberry Pie Filling recipe by Jamie Lothridge is a perfect introduction to homemade desserts for beginners. With no need for gelatin or artificial additives, it highlights the natural sweetness and vibrant flavor of ripe strawberries. Whether you’re looking to top a cheesecake, fill a pie crust, or drizzle over ice cream, this recipe promises versatility, simplicity, and mouthwatering results.
Print
The Sweet Simplicity of Homemade Strawberry Pie Filling
🥧🍓 Capture the essence of summer with Homemade Strawberry Pie Filling! Made with fresh strawberries and just the right touch of sweetness, this versatile filling is perfect for pies, pastries, or as a delicious topping. Easy, fresh, and utterly delightful! 🌟
#StrawberryLove 🍓 #PieFillingMadeEasy 🥧 #FreshAndFlavorful 🌿 #BakingBliss 🍬 #HomemadeHappiness 🏠 #DessertGoals ✨ #JuicyGoodness 😍 #SweetTreats 🍽️ #BerryDelicious 💕 #SimpleAndSweet 🍓
- Total Time: 25 minutes
- Yield: 8 servings 1x
Ingredients
- 2 pounds fresh strawberries, tops removed (divided use)
- Substitute: Frozen strawberries can be used if fresh ones are unavailable. Thaw them completely before use.
- ¾ cup granulated sugar
- Tip: Adjust the sugar based on the sweetness of your strawberries.
- 1 cup boiling water
- Note: This helps dissolve the cornstarch and sugar smoothly.
- 3 tablespoons cornstarch
- Alternative: Arrowroot powder or tapioca starch can also work.
- 1 teaspoon vanilla extract
- Upgrade: Use vanilla bean paste for a more intense flavor.
Instructions
- Prepare the Strawberries
- Place 1 ½ cups of the strawberries in a food processor or blender. Puree until smooth.
- Tip: If you don’t have a blender, mash the strawberries with a fork or potato masher. The texture won’t be as smooth, but it will still work.
- Mix the Base Ingredients
- Add sugar, boiling water, and cornstarch to the strawberry puree. Blend until fully combined and smooth.
- Note: Ensure the cornstarch is completely dissolved to avoid lumps.
- Cook the Mixture
- Pour the mixture into a medium saucepan. Heat over medium, stirring constantly.
- Once it starts boiling, continue cooking for 3 minutes. The mixture will thicken and turn glossy.
- Troubleshooting: If the mixture isn’t thickening, increase the heat slightly and keep stirring.
- Add Vanilla Extract
- Remove the saucepan from heat and stir in the vanilla extract.
- Tip: Let the mixture cool slightly before adding the vanilla to retain its flavor.
- Prepare the Remaining Strawberries
- Halve or quarter the rest of the strawberries based on their size.
- Tip: Uniform pieces ensure even coating in the glaze.
- Combine and Chill
- Fold the strawberry pieces into the glaze, ensuring they’re well-coated.
- Pour the filling into a pie crust or transfer it to a container to chill until ready to serve.
- Tip: Stir the mixture before using it as a topping to redistribute the glaze.
Notes
- How to Tell When the Mixture is Ready
- The glaze should be thick and translucent, with a jam-like consistency.
- Avoid Overcooking
- If the glaze cooks too long, it can become too thick. Keep an eye on the clock and stir constantly.
- Prepping Efficiently
- Wash and hull all strawberries before starting the recipe. This saves time during the process.
- What to Do if It’s Too Thick or Thin
- Too Thick: Add a tablespoon of water at a time until the desired consistency is reached.
- Too Thin: Return to the heat and cook for another minute or two.
- Storage Tips
- Store leftover filling in an airtight container in the refrigerator for up to 3 days.
- Prep Time: 15 minutes
- Cook Time: 10 minutes
As someone who loves desserts but often shies away from intricate recipes, I was thrilled to discover this straightforward method. The first time I made this filling, I was amazed at how quickly it came together. The fragrance of strawberries simmering on the stove filled my kitchen with warmth and comfort. If you’re new to cooking or baking, this recipe will make you feel like a pro in no time.
Why This Recipe is Perfect for Beginners
- Minimal Ingredients: With only five main ingredients, this recipe keeps things simple and accessible.
- Quick and Easy: Ready in just 15 minutes, it’s a great choice for those short on time.
- No Specialty Tools Needed: A blender or food processor and a saucepan are all you need.
- Healthier Alternative: By skipping gelatin and artificial flavors, it focuses on the natural goodness of strawberries.
Ingredients and Preparation
Let’s dive into the essentials. Below is a breakdown of the ingredients along with alternative options for added flexibility:
Ingredients
- 2 pounds fresh strawberries, tops removed (divided use)
- Substitute: Frozen strawberries can be used if fresh ones are unavailable. Thaw them completely before use.
- ¾ cup granulated sugar
- Tip: Adjust the sugar based on the sweetness of your strawberries.
- 1 cup boiling water
- Note: This helps dissolve the cornstarch and sugar smoothly.
- 3 tablespoons cornstarch
- Alternative: Arrowroot powder or tapioca starch can also work.
- 1 teaspoon vanilla extract
- Upgrade: Use vanilla bean paste for a more intense flavor.
Step-by-Step Instructions
Follow these steps for a hassle-free experience. Each step is designed to be beginner-friendly with helpful notes along the way.
- Prepare the Strawberries
- Place 1 ½ cups of the strawberries in a food processor or blender. Puree until smooth.
- Tip: If you don’t have a blender, mash the strawberries with a fork or potato masher. The texture won’t be as smooth, but it will still work.
- Mix the Base Ingredients
- Add sugar, boiling water, and cornstarch to the strawberry puree. Blend until fully combined and smooth.
- Note: Ensure the cornstarch is completely dissolved to avoid lumps.
- Cook the Mixture
- Pour the mixture into a medium saucepan. Heat over medium, stirring constantly.
- Once it starts boiling, continue cooking for 3 minutes. The mixture will thicken and turn glossy.
- Troubleshooting: If the mixture isn’t thickening, increase the heat slightly and keep stirring.
- Add Vanilla Extract
- Remove the saucepan from heat and stir in the vanilla extract.
- Tip: Let the mixture cool slightly before adding the vanilla to retain its flavor.
- Prepare the Remaining Strawberries
- Halve or quarter the rest of the strawberries based on their size.
- Tip: Uniform pieces ensure even coating in the glaze.
- Combine and Chill
- Fold the strawberry pieces into the glaze, ensuring they’re well-coated.
- Pour the filling into a pie crust or transfer it to a container to chill until ready to serve.
- Tip: Stir the mixture before using it as a topping to redistribute the glaze.
Beginner Tips and Notes
Even the simplest recipes can come with questions. Here are some tips to ensure success:
- How to Tell When the Mixture is Ready
- The glaze should be thick and translucent, with a jam-like consistency.
- Avoid Overcooking
- If the glaze cooks too long, it can become too thick. Keep an eye on the clock and stir constantly.
- Prepping Efficiently
- Wash and hull all strawberries before starting the recipe. This saves time during the process.
- What to Do if It’s Too Thick or Thin
- Too Thick: Add a tablespoon of water at a time until the desired consistency is reached.
- Too Thin: Return to the heat and cook for another minute or two.
- Storage Tips
- Store leftover filling in an airtight container in the refrigerator for up to 3 days.
Serving Suggestions
The versatility of this strawberry pie filling means there are countless ways to enjoy it. Here are some ideas to inspire you:
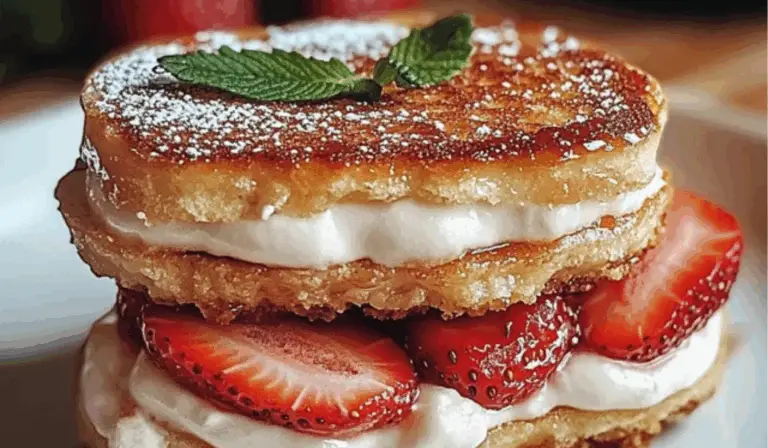
- Classic Pie: Pour into a graham cracker crust and top with whipped cream.
- Cheesecake Topping: Spread over a baked or no-bake cheesecake for a fruity finish.
- Breakfast Boost: Use it as a topping for pancakes, waffles, or yogurt.
- Ice Cream Sundae: Drizzle over vanilla ice cream and add a sprinkle of crushed nuts.
- Layered Parfait: Alternate layers of strawberry filling with granola and whipped cream in a glass.
Beginner-Friendly Tools
You don’t need fancy gadgets to create this delightful dessert. Here are some tools that make the process even easier:
- Blender or Food Processor: For a smooth puree.
- Medium Saucepan: A nonstick pan prevents the glaze from sticking.
- Silicone Spatula: Perfect for stirring and scraping every last bit of glaze.

Encouragement for First-Time Cooks
This Strawberry Pie Filling recipe is more than just a dessert; it’s a confidence booster for beginner cooks. Its simplicity allows you to focus on mastering the basics while still achieving a delicious and visually appealing result. As you prepare this recipe, remember that perfection isn’t the goal—enjoying the process is!
Cooking can be intimidating, but this recipe is a reminder that great things often come from small, simple efforts. I encourage you to try this dish and share your experience in the comments below. Did you try a creative twist? Serve it in a unique way? Let’s inspire each other in the kitchen!
Whether you’re making a pie for a special occasion or simply indulging in a homemade treat, this Strawberry Pie Filling will bring a touch of sweetness to your table. So grab those strawberries and get started—you’re going to love the results!