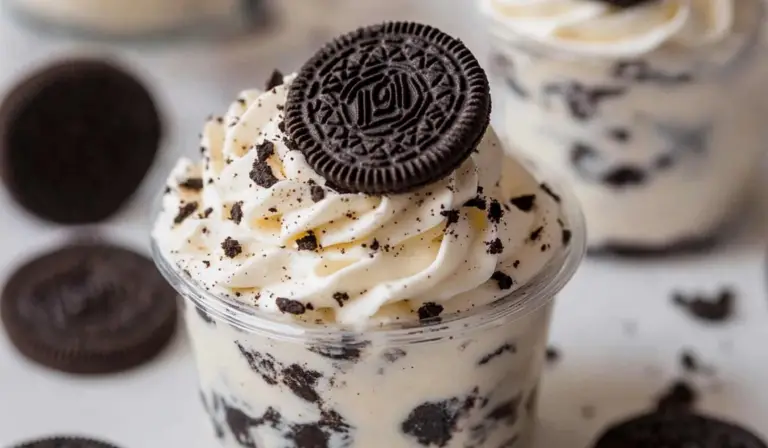
Ingredients
- 8 oz block of Cream Cheese (softened): This is the base of your cheesecake filling. It’s important to soften the cream cheese before mixing to achieve that smooth, creamy texture.
- 8 oz Cool Whip or Whipped Topping: The Cool Whip lightens up the cream cheese filling and gives it that fluffy texture that makes no-bake cheesecakes so delightful.
- 2/3 cup Powdered Sugar: Adds just the right amount of sweetness to the filling without being too overpowering.
- 1 tsp Vanilla Extract: Vanilla is key in bringing out the flavors in the cheesecake filling. It adds depth and enhances the creamy texture.
- 24-26 Oreo Cookies: The star of the show! You’ll need some crushed Oreos for the crust and topping, plus a few whole cookies to garnish the cheesecake cups.
Instructions
Step 1: Crush the Oreos
Start by crushing the Oreo cookies. The easiest way to do this is by placing the cookies in a plastic bag, sealing it, and then using a rolling pin or sturdy spoon to crush them into fine crumbs. You can also use a food processor for this step, but a plastic bag and rolling pin work just as well and are a little more fun! Set aside about 1 1/2 to 2 tablespoons of the crushed Oreos to form the base of each cheesecake cup.
Step 2: Make the Cheesecake Filling
In a large mixing bowl, beat the softened cream cheese and powdered sugar together using a hand mixer or stand mixer. Mix until it’s smooth and creamy, making sure there are no lumps. Add the vanilla extract and mix again to incorporate the flavor into the cheesecake filling.
Next, gently fold in the Cool Whip. Be careful not to overmix, as you want to keep the fluffiness of the whipped topping. Once the Cool Whip is fully incorporated, fold in the remaining crushed Oreos, which will give the filling a little texture and that Oreo flavor we all love.
Step 3: Assemble the Cheesecake Cups
Take 6 small dessert dishes or cups (with a capacity of at least 3/4 cup to 1 cup each) and spoon about 1 1/2 to 2 tablespoons of the crushed Oreos into the bottom of each cup. This will form the base of your dessert.
Next, spoon the cheesecake filling into each cup, dividing it evenly between the dishes. Use the back of the spoon to gently press the filling down onto the Oreo crust to compact it slightly.
Step 4: Chill and Set
Place the cheesecake cups in the refrigerator and let them chill for at least 30 minutes. This will help the filling set and firm up, making them easier to serve and eat. You can also chill them for longer if desired, but 30 minutes is usually sufficient.
Step 5: Top and Serve
Once the cheesecake cups are chilled and ready to go, top each one with a dollop of whipped cream. For an extra touch, sprinkle more crushed Oreos on top. If desired, you can even place a whole Oreo cookie on top for added decoration and flavor.
Notes
- Use Room Temperature Cream Cheese: Make sure the cream cheese is softened before mixing. Cold cream cheese can create lumps in the filling, making it difficult to get that smooth texture.
- Customize the Oreos: While classic Oreos are the standard choice for this recipe, you can experiment with different flavors. Try using golden Oreos for a lighter flavor, or mint-flavored Oreos for a refreshing twist. For a more decadent touch, you could even add chocolate or peanut butter-flavored Oreos.
- Cool Whip Alternatives: If you don’t have Cool Whip on hand, you can substitute it with fresh whipped cream. Just be sure to whip it until stiff peaks form, and fold it in gently to maintain the airy texture.
- Chill Longer: For best results, let the cheesecake cups chill for at least an hour before serving. If you have time, you can even prepare them the night before and let them set overnight.
- Add a Drizzle: If you want to elevate the presentation, drizzle some chocolate or caramel sauce over the whipped cream before serving. This adds an extra layer of flavor and makes the dessert look even more tempting.
- Prep Time: 15 minutes
- Cook Time: 0 minutes