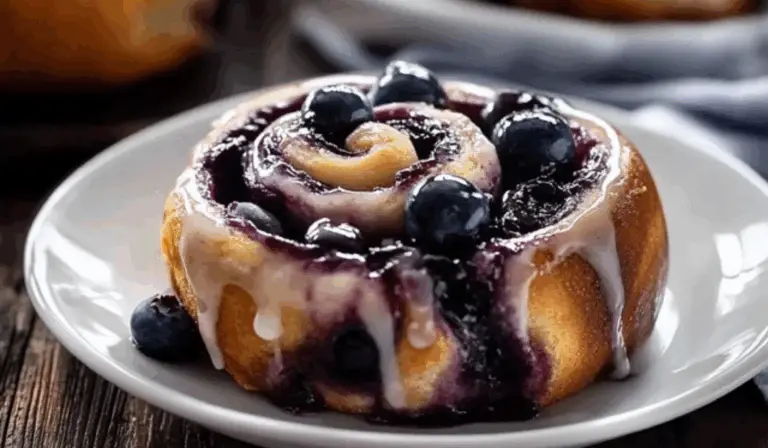
Mini Cream Cheese Fruit Tarts: A Beginner-Friendly Delight

There is something undeniably charming about bite-sized desserts. They offer a perfect balance of indulgence and portion control while allowing room for creativity in presentation. Mini cream cheese fruit tarts are an excellent choice for beginner cooks who want to impress without the stress of complex baking techniques. These tarts feature a light and flaky puff pastry shell, a smooth and tangy lemon cream cheese filling, and a colorful topping of fresh fruit and whipped cream.
Print
Mini Cream Cheese Fruit Tarts: A Beginner-Friendly Delight
These Mini Cream Cheese Fruit Tarts are the ultimate easy, elegant dessert! 🥧✨ A buttery crust, smooth cream cheese filling, and fresh, juicy fruit topping make every bite a refreshing, creamy delight. Perfect for parties, afternoon treats, or whenever you need a little sweetness!
- Total Time: 35 minutes
- Yield: 9 mini tarts 1x
Ingredients
Pastry
- 1 sheet frozen puff pastry
- 1 egg, beaten
- 2 tablespoons granulated sugar or coarse sparkling sugar
Lemon Cream Cheese Filling
- ½ cup chilled heavy cream
- 4 ounces cream cheese, at room temperature
- ⅔ cup powdered sugar
- Finely grated zest of 1 lemon
- 1 tablespoon freshly squeezed lemon juice
Topping
- 2 cups chopped fruit (such as berries, mandarins, and grapes)
- Whipped cream for garnish
Instructions
1. Preparing the Puff Pastry
Preheat the oven to 375°F and line two baking sheets with parchment paper or silicone baking mats. Take the frozen puff pastry out of the freezer and allow it to thaw at room temperature until it is cold but no longer frozen, which usually takes about 10 to 15 minutes.
Once thawed, unfold the puff pastry and cut it into nine squares. If larger or smaller tarts are preferred, the size can be adjusted accordingly. Place the squares onto the prepared baking sheets, leaving space between each piece to allow for even baking. Using the tip of a sharp knife, score a half-inch border around each square without cutting all the way through. This step ensures that the edges rise and create a frame for the filling.
Brush the edges with the beaten egg and sprinkle them with granulated sugar. This enhances the golden-brown color and adds a slight sweetness to the pastry. Bake for about 15 minutes, rotating the baking sheets halfway through to promote even browning. Once the pastry is puffed and golden, remove it from the oven and allow it to cool completely.
2. Making the Lemon Cream Cheese Filling
In a mixing bowl, beat the chilled heavy cream with a hand or stand mixer until stiff peaks form. This process incorporates air into the cream, creating a light and fluffy texture. Set the whipped cream aside.
In another bowl, beat the cream cheese, powdered sugar, lemon zest, and freshly squeezed lemon juice until smooth and well combined. The lemon zest adds fragrance and enhances the tartness of the filling, complementing the sweetness of the sugar.
Gently fold the whipped cream into the lemon-cream cheese mixture, being careful not to overmix. Overmixing can deflate the whipped cream, resulting in a dense rather than airy filling. The final consistency should be smooth and slightly thick but still light.
3. Assembling the Tarts
Once the puff pastry squares have cooled, gently press the center of each tart shell to flatten it slightly, creating space for the filling. Be careful to leave the outer edge intact to maintain structure.
Using a spoon or piping bag, fill each tart shell with the lemon-cream cheese mixture. Smooth the top for an even surface. Arrange the fresh fruit on top, mixing colors and shapes for an appealing presentation. A swirl of whipped cream can be added just before serving for extra richness.
Notes
Avoiding Common Mistakes
For those new to baking, a few simple techniques can ensure the best results.
- Preventing soggy pastry: Make sure the tarts are fully baked before adding the filling. The pastry should be crisp and golden to prevent it from becoming soft when filled.
- Ensuring a smooth filling: The cream cheese should be at room temperature before mixing. If it is too cold, it can create lumps in the filling.
- Even browning: Rotating the baking sheets halfway through the baking time helps distribute heat evenly, preventing some tarts from being darker than others.
Efficient Kitchen Prep
To make the process smoother, it helps to have all ingredients measured and prepared before starting. This ensures that each step flows seamlessly. If working with limited counter space, using a baking tray to organize ingredients can prevent clutter.
Tool Substitutions
If a hand or stand mixer is unavailable, the heavy cream can be whipped by hand using a whisk, though this requires more effort. A rolling pin is not needed for this recipe, but if adjustments to the pastry thickness are desired, a sturdy glass bottle can work as an alternative.
- Prep Time: 20 minutes
- Cook Time: 15 minutes
This recipe is ideal for those new to baking because it requires minimal ingredients and follows straightforward steps. The puff pastry eliminates the need for homemade dough, making the process quicker and more approachable. The no-bake cream cheese filling simplifies preparation, ensuring a foolproof experience even for those unfamiliar with making custards or pastry creams. Additionally, the use of fresh fruit enhances the tarts with natural sweetness, making them both delicious and visually appealing.
Whether for a family gathering, an afternoon treat, or a dessert platter at a celebration, these mini tarts deliver a satisfying balance of flavors and textures. With a crisp, buttery base, a velvety citrus-infused filling, and a refreshing fruit topping, they create an irresistible combination.
Ingredients and Preparation
Pastry
- 1 sheet frozen puff pastry
- 1 egg, beaten
- 2 tablespoons granulated sugar or coarse sparkling sugar
Lemon Cream Cheese Filling
- ½ cup chilled heavy cream
- 4 ounces cream cheese, at room temperature
- ⅔ cup powdered sugar
- Finely grated zest of 1 lemon
- 1 tablespoon freshly squeezed lemon juice
Topping
- 2 cups chopped fruit (such as berries, mandarins, and grapes)
- Whipped cream for garnish
Ingredient Alternatives
For flexibility, several substitutions can be made based on dietary needs or ingredient availability. If puff pastry is not an option, a simple cookie crust or phyllo dough can be used. For the filling, a dairy-free version can be made using coconut cream and a plant-based cream cheese alternative. If lemon is not preferred, lime or orange zest can provide a similar citrusy brightness. Any fresh fruit can work as a topping, such as kiwis, bananas, or pomegranate seeds.
Step-by-Step Instructions
1. Preparing the Puff Pastry
Preheat the oven to 375°F and line two baking sheets with parchment paper or silicone baking mats. Take the frozen puff pastry out of the freezer and allow it to thaw at room temperature until it is cold but no longer frozen, which usually takes about 10 to 15 minutes.
Once thawed, unfold the puff pastry and cut it into nine squares. If larger or smaller tarts are preferred, the size can be adjusted accordingly. Place the squares onto the prepared baking sheets, leaving space between each piece to allow for even baking. Using the tip of a sharp knife, score a half-inch border around each square without cutting all the way through. This step ensures that the edges rise and create a frame for the filling.
Brush the edges with the beaten egg and sprinkle them with granulated sugar. This enhances the golden-brown color and adds a slight sweetness to the pastry. Bake for about 15 minutes, rotating the baking sheets halfway through to promote even browning. Once the pastry is puffed and golden, remove it from the oven and allow it to cool completely.
2. Making the Lemon Cream Cheese Filling
In a mixing bowl, beat the chilled heavy cream with a hand or stand mixer until stiff peaks form. This process incorporates air into the cream, creating a light and fluffy texture. Set the whipped cream aside.
In another bowl, beat the cream cheese, powdered sugar, lemon zest, and freshly squeezed lemon juice until smooth and well combined. The lemon zest adds fragrance and enhances the tartness of the filling, complementing the sweetness of the sugar.
Gently fold the whipped cream into the lemon-cream cheese mixture, being careful not to overmix. Overmixing can deflate the whipped cream, resulting in a dense rather than airy filling. The final consistency should be smooth and slightly thick but still light.
3. Assembling the Tarts
Once the puff pastry squares have cooled, gently press the center of each tart shell to flatten it slightly, creating space for the filling. Be careful to leave the outer edge intact to maintain structure.
Using a spoon or piping bag, fill each tart shell with the lemon-cream cheese mixture. Smooth the top for an even surface. Arrange the fresh fruit on top, mixing colors and shapes for an appealing presentation. A swirl of whipped cream can be added just before serving for extra richness.
Beginner Tips and Notes
Avoiding Common Mistakes
For those new to baking, a few simple techniques can ensure the best results.
- Preventing soggy pastry: Make sure the tarts are fully baked before adding the filling. The pastry should be crisp and golden to prevent it from becoming soft when filled.
- Ensuring a smooth filling: The cream cheese should be at room temperature before mixing. If it is too cold, it can create lumps in the filling.
- Even browning: Rotating the baking sheets halfway through the baking time helps distribute heat evenly, preventing some tarts from being darker than others.
Efficient Kitchen Prep
To make the process smoother, it helps to have all ingredients measured and prepared before starting. This ensures that each step flows seamlessly. If working with limited counter space, using a baking tray to organize ingredients can prevent clutter.
Tool Substitutions
If a hand or stand mixer is unavailable, the heavy cream can be whipped by hand using a whisk, though this requires more effort. A rolling pin is not needed for this recipe, but if adjustments to the pastry thickness are desired, a sturdy glass bottle can work as an alternative.

Serving Suggestions
Pairing with Complementary Dishes
These mini tarts can be served alongside other light desserts such as fruit sorbets or yogurt parfaits for a refreshing end to a meal. They also pair well with tea, coffee, or a citrus-infused sparkling drink.
For a complete dessert platter, consider serving them with chocolate-dipped strawberries or a simple fruit salad. The combination of creamy, flaky, and fruity elements makes for an elegant and satisfying presentation.
Storage and Make-Ahead Tips
If preparing in advance, the pastry shells can be baked and stored in an airtight container for up to two days. The filling can be made a day ahead and kept refrigerated in a covered bowl. However, assembling the tarts should be done close to serving time to maintain freshness and texture. Leftover tarts should be refrigerated and consumed within a few hours for the best taste and consistency.
Encouraging Experimentation and Engagement
This recipe provides an excellent foundation for creativity. Experimenting with different fruit combinations, such as tropical mango and passion fruit or classic apple and cinnamon, can bring unique flavors to the dessert.
For those trying the recipe for the first time, sharing experiences and results can be a fun way to learn and improve. Whether adapting the flavors or presenting the tarts in different shapes, there are endless ways to personalize them.
These mini cream cheese fruit tarts prove that an impressive dessert does not have to be complicated. With simple ingredients, clear steps, and room for variation, they make an ideal starting point for beginners looking to build confidence in the kitchen.