Mastering Honey Garlic Chicken Bites: A Beginner’s Guide to a Flavorful and Easy Meal

Cooking at home doesn’t have to be complicated. Many beginner cooks worry about long ingredient lists, tricky techniques, and meals that don’t turn out as expected. That’s why starting with simple, flavorful recipes is the key to building confidence in the kitchen. Honey garlic chicken bites are a perfect dish for anyone looking to create something quick, delicious, and foolproof.
Print
Mastering Honey Garlic Chicken Bites: A Beginner’s Guide to a Flavorful and Easy Meal
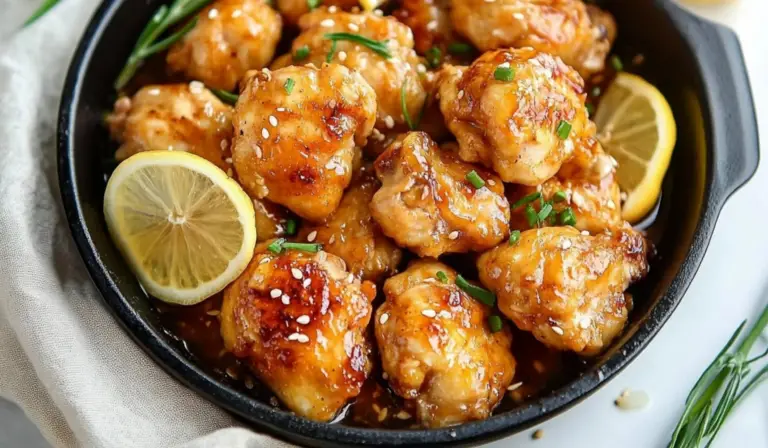
These Honey Garlic Chicken Bites are coated in a sticky, garlicky glaze that’s the perfect balance of sweet and savory! 🍯🧄 Juicy, golden-brown, and packed with bold flavor, this dish is super easy, beginner-friendly, and ready in minutes. Perfect with rice, veggies, or on its own! 🍽️🔥
- Total Time: 22 minutes
- Yield: 4 servings 1x
Ingredients
- 1 lb (450g) boneless, skinless chicken breast, cut into 1-inch cubes
- 2 teaspoons cornstarch (optional, helps with browning and sauce thickness)
- Kosher salt and freshly ground black pepper, to taste
- 1 tablespoon olive oil
- 1 tablespoon unsalted butter
- 4 cloves garlic, finely minced
- ¼ cup honey
- 3 tablespoons low-sodium chicken stock
- 1 to 2 tablespoons lemon juice (adjust to taste)
- 1 teaspoon hot sauce (optional, adds a mild heat; Sriracha works well)
- 1 teaspoon red chili pepper flakes, for garnish
- 1 tablespoon fresh parsley, finely chopped, for garnish
Instructions
Step 1: Prepare the Chicken
In a large bowl, add the chicken breast cubes, then sprinkle cornstarch, salt, and black pepper over them. Toss well to coat evenly. This step helps the chicken develop a slight crust when seared, giving it better texture and flavor.
Step 2: Heat the Pan and Cook the Chicken
Place a large skillet over medium-high heat and add olive oil. Once the oil is hot, add butter and let it melt. Butter enhances the flavor of the chicken while the oil prevents burning.
Add the chicken pieces in a single layer, ensuring they are not overcrowded. If necessary, cook in batches. Let the chicken sear for 6-8 minutes, turning occasionally, until all sides are golden brown and fully cooked. The chicken should reach an internal temperature of 165°F (75°C). Once done, remove from the pan and set aside.
Step 3: Make the Honey Garlic Sauce
In the same skillet, lower the heat to medium and add garlic. Sauté for about 30 seconds, stirring constantly to prevent burning.
Pour in the honey, chicken stock, lemon juice, and hot sauce (if using). Stir well and let the sauce simmer for 2-3 minutes until slightly thickened.
Step 4: Combine Chicken with the Sauce
Return the cooked chicken to the pan and toss it in the sauce. Allow it to simmer for another 2 minutes, ensuring the chicken absorbs all the flavors. The sauce should coat the chicken pieces evenly.
Step 5: Garnish and Serve
Remove from heat and sprinkle with chopped parsley and red chili flakes for added freshness and a hint of spice.
Notes
1. How to Tell If Chicken is Cooked
- Use a meat thermometer to ensure the internal temperature is 165°F (75°C).
- Cut one piece open; the inside should be white with no pink.
- The juices should run clear when pierced with a fork.
2. Avoiding Overcrowding the Pan
- If you add too much chicken at once, it will steam instead of sear. Work in batches if needed.
- A hot pan is essential for achieving a golden-brown crust on the chicken.
3. Adjusting the Sauce Thickness
- If the sauce is too thin, let it simmer longer to reduce and thicken naturally.
- If you prefer a thicker sauce, mix ½ teaspoon of cornstarch with 1 tablespoon of water, then stir it into the sauce and simmer for another minute.
4. Prepping Efficiently
- Mince the garlic before you start cooking to avoid scrambling while the pan is hot.
- Have all ingredients measured and ready before turning on the stove.
5. Substituting Kitchen Tools
- If you don’t have a skillet, a heavy-bottomed pan or a wok works just as well.
- A wooden spoon is best for stirring to prevent scratching nonstick cookware.
- Prep Time: 10 minutes
- Cook Time: 12 minutes
This recipe brings together sweet and savory flavors, is prepared in a single skillet, and takes less than 30 minutes from start to finish. The balance of honey, garlic, and a touch of spice makes it a satisfying meal that can be paired with rice, vegetables, or even wrapped in a tortilla for an easy lunch option.
What makes this recipe ideal for beginners is the straightforward technique and the minimal ingredients required. The key to success lies in cooking the chicken properly, creating a well-balanced sauce, and mastering a few basic kitchen skills, such as browning meat and reducing a sauce.
By following this guide, you will not only be able to prepare this dish confidently but also gain valuable cooking knowledge that can be applied to other recipes.
Ingredients and Preparation
Before you start cooking, gathering and preparing all the ingredients is essential. This will make the process smooth and stress-free.
Ingredients
- 1 lb (450g) boneless, skinless chicken breast, cut into 1-inch cubes
- 2 teaspoons cornstarch (optional, helps with browning and sauce thickness)
- Kosher salt and freshly ground black pepper, to taste
- 1 tablespoon olive oil
- 1 tablespoon unsalted butter
- 4 cloves garlic, finely minced
- ¼ cup honey
- 3 tablespoons low-sodium chicken stock
- 1 to 2 tablespoons lemon juice (adjust to taste)
- 1 teaspoon hot sauce (optional, adds a mild heat; Sriracha works well)
- 1 teaspoon red chili pepper flakes, for garnish
- 1 tablespoon fresh parsley, finely chopped, for garnish
Ingredient Substitutions and Variations
- Protein Alternatives: If you prefer dark meat, substitute the chicken breast with boneless, skinless chicken thighs for a juicier texture. You can also use beef strips for a heartier variation.
- Cornstarch Alternative: If you don’t have cornstarch, flour can be used in the same quantity to lightly coat the chicken.
- Heat Levels: If you like a spicier dish, increase the amount of hot sauce or red chili flakes. For a milder flavor, omit them.
- Sweetness Adjustment: Honey provides a natural sweetness, but if you prefer less sugar, reduce the amount to 2 tablespoons.
Step-by-Step Instructions
Step 1: Prepare the Chicken
In a large bowl, add the chicken breast cubes, then sprinkle cornstarch, salt, and black pepper over them. Toss well to coat evenly. This step helps the chicken develop a slight crust when seared, giving it better texture and flavor.
Step 2: Heat the Pan and Cook the Chicken
Place a large skillet over medium-high heat and add olive oil. Once the oil is hot, add butter and let it melt. Butter enhances the flavor of the chicken while the oil prevents burning.
Add the chicken pieces in a single layer, ensuring they are not overcrowded. If necessary, cook in batches. Let the chicken sear for 6-8 minutes, turning occasionally, until all sides are golden brown and fully cooked. The chicken should reach an internal temperature of 165°F (75°C). Once done, remove from the pan and set aside.
Step 3: Make the Honey Garlic Sauce
In the same skillet, lower the heat to medium and add garlic. Sauté for about 30 seconds, stirring constantly to prevent burning.
Pour in the honey, chicken stock, lemon juice, and hot sauce (if using). Stir well and let the sauce simmer for 2-3 minutes until slightly thickened.
Step 4: Combine Chicken with the Sauce
Return the cooked chicken to the pan and toss it in the sauce. Allow it to simmer for another 2 minutes, ensuring the chicken absorbs all the flavors. The sauce should coat the chicken pieces evenly.
Step 5: Garnish and Serve
Remove from heat and sprinkle with chopped parsley and red chili flakes for added freshness and a hint of spice.
Beginner Tips and Notes
1. How to Tell If Chicken is Cooked
- Use a meat thermometer to ensure the internal temperature is 165°F (75°C).
- Cut one piece open; the inside should be white with no pink.
- The juices should run clear when pierced with a fork.
2. Avoiding Overcrowding the Pan
- If you add too much chicken at once, it will steam instead of sear. Work in batches if needed.
- A hot pan is essential for achieving a golden-brown crust on the chicken.
3. Adjusting the Sauce Thickness
- If the sauce is too thin, let it simmer longer to reduce and thicken naturally.
- If you prefer a thicker sauce, mix ½ teaspoon of cornstarch with 1 tablespoon of water, then stir it into the sauce and simmer for another minute.
4. Prepping Efficiently
- Mince the garlic before you start cooking to avoid scrambling while the pan is hot.
- Have all ingredients measured and ready before turning on the stove.
5. Substituting Kitchen Tools
- If you don’t have a skillet, a heavy-bottomed pan or a wok works just as well.
- A wooden spoon is best for stirring to prevent scratching nonstick cookware.

Serving Suggestions
1. Side Dish Pairings
- Steamed rice: The classic option that absorbs the sauce beautifully.
- Garlic butter noodles: A flavorful alternative to rice.
- Stir-fried vegetables: Broccoli, bell peppers, and snap peas add crunch and color.
- Mashed potatoes: A creamy and comforting choice.
2. Creative Serving Ideas
- Lettuce wraps: Spoon the chicken into lettuce leaves for a fresh, low-carb option.
- Tacos or wraps: Use tortillas and add fresh slaw for a fusion twist.
- Over quinoa or couscous: A nutritious, protein-packed option.
3. Storing and Reheating Leftovers
- Refrigeration: Store in an airtight container for up to 3 days.
- Freezing: Freeze in portioned containers for up to 2 months.
- Reheating: Warm in a skillet over medium heat with a splash of water or stock to refresh the sauce. Avoid microwaving for too long, as it may dry out the chicken.
Engagement Features
Cooking should be an enjoyable and rewarding experience. If you try this honey garlic chicken bites recipe, share your experience. What worked best for you? Did you make any customizations?
Experiment with flavors by adjusting the sweetness, acidity, or spice to suit your taste. As you grow more confident in the kitchen, you’ll be able to modify recipes effortlessly.
Learning to cook is about practice, patience, and having fun. Try this recipe and enjoy a homemade meal that’s both delicious and beginner-friendly.