How to Make Perfect Baked Cheese Tarts: A Creamy, Crispy Delight for All Occasions

Baked cheese tarts are a delectable combination of creamy, tangy filling and a crisp, flaky crust. These tarts are a treat that brings together textures and flavors in a way that delights the palate. With roots in Japanese-style desserts, baked cheese tarts have gained global popularity for their perfect balance of sweetness and richness. Whether you enjoy them warm for their melt-in-your-mouth quality or chilled for a denser, cheesecake-like texture, these tarts are a must-try. In this article, we’ll walk you through how to make these heavenly delights, breaking down each step so you can create bakery-quality tarts right in your kitchen.
Print
How to Make Perfect Baked Cheese Tarts: A Creamy, Crispy Delight for All Occasions
Get ready to fall in love with every creamy, cheesy bite of these baked cheese tarts! 💕🥧 A buttery crust meets a rich, velvety filling that’s baked to golden perfection. 🌟 Perfect as a snack, dessert, or even a gift, these tarts are a crowd-pleaser you’ll bake again and again. 💛✨ Treat yourself or share the joy with friends and family! Who wants the first bite? 😋🍽️
#GoldenGoodness 🌟 #CheeseLover 🧀 #PerfectlyBaked 🥧 #DessertVibes 💕 #FoodieFavorites 🍴 #SweetToothFix 🌈 #TartsGalore 💛 #LoveToBake 🧑🍳 #CheeseDreams 🥄 #BakeAndShare 🍰
- Total Time: 55 minutes
- Yield: 6–8 tarts 1x
Ingredients
For the Pastry Dough
- ¼ cup unsalted butter, chilled
- ½ cup confectioners’ sugar
- 1 large egg yolk (or 1½ tablespoons milk as a substitute)
- ¼ teaspoon pure vanilla extract
- ¼ cup almond flour
- ⅛ teaspoon kosher salt
- 1 cup cake flour
For the Cheese Filling
- ¼ cup granulated sugar
- 2 large egg yolks
- 1 tablespoon cornstarch
- 3 tablespoons whole milk (low-fat milk can be substituted, but avoid nonfat)
- 3 tablespoons heavy cream
- 3 tablespoons unsalted butter
- 8 ounces cream cheese, full-fat
- 2 teaspoons lemon juice
For Baking
- 1 tablespoon unsalted butter (for greasing the molds)
- 1 large egg (for egg wash)
- 1 teaspoon water
Instructions
- Preparing the Pastry Dough
- Start by chilling your ingredients and equipment to ensure a flaky crust. Cut the butter into small cubes and place it in the freezer. Refrigerate the flour, sugar, almond flour, salt, and egg yolk for at least an hour. If you’re using a food processor, chill its removable parts as well.
- In a food processor or stand mixer with a paddle attachment, combine the chilled butter and confectioners’ sugar. Blend until smooth. Add the egg yolk and vanilla extract, mixing until incorporated. Next, add the almond flour and salt, processing until the mixture is smooth. Finally, add the cake flour and mix on low speed until the dough is crumbly but holds together when pressed. If it doesn’t come together, add a teaspoon of the reserved egg white or yolk to bind it.
- Transfer the dough to a resealable plastic bag. Flatten it into a ¼-inch-thick disc using a rolling pin. This step ensures even thickness and makes the dough easier to handle later. Chill the dough in the refrigerator for at least three hours or freeze it for one hour if you’re short on time.
- Making the Cheese Filling
- In a large mixing bowl, whisk together the sugar and egg yolks until slightly fluffy. Add the cornstarch and whisk until smooth.
- In a saucepan over low-medium heat, combine the milk, cream, butter, and cream cheese. Stir until the cream cheese melts and the mixture is smooth. Remove it from the heat just before it starts to simmer.
- To temper the egg mixture, slowly pour the warm cheese mixture into the bowl while whisking continuously. This prevents the eggs from scrambling. Return the mixture to the saucepan and cook over medium heat, stirring constantly, until it thickens. This typically takes a few minutes. Remove from the heat and stir in the lemon juice. Pour the filling into a shallow dish, cover it with plastic wrap to prevent a skin from forming, and refrigerate until ready to use.
- Assembling the Pastry Shells
- Remove the chilled dough from the refrigerator and roll it out to ¼-inch thickness on a lightly floured surface. Using a round cutter, cut circles slightly larger than your tart molds. Press each circle gently into the molds, ensuring the dough covers the bottom and sides evenly. Trim any excess dough.
- To prevent the crust from puffing up during baking, prick the bottoms with a fork. Place a piece of parchment paper in each shell and fill it with pie weights or dried beans. This step, known as blind baking, ensures the crust retains its shape.
- Bake the shells in a preheated oven at 350°F (180°C) for 15 minutes. Remove the weights and parchment paper, then bake for another 5 minutes until the crust is slightly golden. Let the shells cool completely before adding the filling.
- Filling and Baking the Tarts
- Preheat the oven to 425°F (220°C). Spoon or pipe the chilled cheese filling into the cooled tart shells, slightly overfilling them. Prepare an egg wash by whisking together the egg and water, and brush it over the tops of the filling.
- Bake the tarts on the middle rack of the oven for 10–15 minutes, rotating the baking sheet halfway through for even browning. The tops should be golden and slightly caramelized.
- Remove the tarts from the oven and let them cool on a wire rack. Serve warm for a gooey filling, or refrigerate for a denser, cheesecake-like texture.
Notes
- Weigh your ingredients: For the best results, use a kitchen scale to measure your ingredients. This ensures precision, especially for the pastry dough.
- Chill thoroughly: Chilling the dough prevents it from becoming too sticky and helps maintain its structure during baking.
- Use quality ingredients: Full-fat cream cheese and fresh lemons will give your filling the best flavor and texture.
- Avoid overmixing: Overworking the dough can make it tough. Mix just until the ingredients come together.
- Blind bake properly: Ensure the crust is fully baked before adding the filling to avoid a soggy bottom.
- Prep Time: 30 minutes
- Cook Time: 25 minutes
The Allure of Baked Cheese Tarts
What sets baked cheese tarts apart from other desserts is their unique texture and flavor profile. The crust is a delicate shortcrust pastry, buttery and crisp, providing the perfect base for the rich and creamy filling. The filling itself is a blend of cream cheese, eggs, sugar, and a hint of lemon, resulting in a tangy and slightly sweet flavor that’s utterly satisfying. When baked, the tops of the tarts develop a beautiful golden hue, adding a touch of caramelized sweetness. The appeal lies in their versatility—you can enjoy them warm, at room temperature, or even chilled, and each variation offers a distinct experience.
Ingredients for Baked Cheese Tarts
For the Pastry Dough
- ¼ cup unsalted butter, chilled
- ½ cup confectioners’ sugar
- 1 large egg yolk (or 1½ tablespoons milk as a substitute)
- ¼ teaspoon pure vanilla extract
- ¼ cup almond flour
- ⅛ teaspoon kosher salt
- 1 cup cake flour
For the Cheese Filling
- ¼ cup granulated sugar
- 2 large egg yolks
- 1 tablespoon cornstarch
- 3 tablespoons whole milk (low-fat milk can be substituted, but avoid nonfat)
- 3 tablespoons heavy cream
- 3 tablespoons unsalted butter
- 8 ounces cream cheese, full-fat
- 2 teaspoons lemon juice
For Baking
- 1 tablespoon unsalted butter (for greasing the molds)
- 1 large egg (for egg wash)
- 1 teaspoon water
Step-by-Step Instructions
Preparing the Pastry Dough
Start by chilling your ingredients and equipment to ensure a flaky crust. Cut the butter into small cubes and place it in the freezer. Refrigerate the flour, sugar, almond flour, salt, and egg yolk for at least an hour. If you’re using a food processor, chill its removable parts as well.
In a food processor or stand mixer with a paddle attachment, combine the chilled butter and confectioners’ sugar. Blend until smooth. Add the egg yolk and vanilla extract, mixing until incorporated. Next, add the almond flour and salt, processing until the mixture is smooth. Finally, add the cake flour and mix on low speed until the dough is crumbly but holds together when pressed. If it doesn’t come together, add a teaspoon of the reserved egg white or yolk to bind it.
Transfer the dough to a resealable plastic bag. Flatten it into a ¼-inch-thick disc using a rolling pin. This step ensures even thickness and makes the dough easier to handle later. Chill the dough in the refrigerator for at least three hours or freeze it for one hour if you’re short on time.
Making the Cheese Filling
In a large mixing bowl, whisk together the sugar and egg yolks until slightly fluffy. Add the cornstarch and whisk until smooth.
In a saucepan over low-medium heat, combine the milk, cream, butter, and cream cheese. Stir until the cream cheese melts and the mixture is smooth. Remove it from the heat just before it starts to simmer.
To temper the egg mixture, slowly pour the warm cheese mixture into the bowl while whisking continuously. This prevents the eggs from scrambling. Return the mixture to the saucepan and cook over medium heat, stirring constantly, until it thickens. This typically takes a few minutes. Remove from the heat and stir in the lemon juice. Pour the filling into a shallow dish, cover it with plastic wrap to prevent a skin from forming, and refrigerate until ready to use.
Assembling the Pastry Shells
Remove the chilled dough from the refrigerator and roll it out to ¼-inch thickness on a lightly floured surface. Using a round cutter, cut circles slightly larger than your tart molds. Press each circle gently into the molds, ensuring the dough covers the bottom and sides evenly. Trim any excess dough.
To prevent the crust from puffing up during baking, prick the bottoms with a fork. Place a piece of parchment paper in each shell and fill it with pie weights or dried beans. This step, known as blind baking, ensures the crust retains its shape.
Bake the shells in a preheated oven at 350°F (180°C) for 15 minutes. Remove the weights and parchment paper, then bake for another 5 minutes until the crust is slightly golden. Let the shells cool completely before adding the filling.
Filling and Baking the Tarts
Preheat the oven to 425°F (220°C). Spoon or pipe the chilled cheese filling into the cooled tart shells, slightly overfilling them. Prepare an egg wash by whisking together the egg and water, and brush it over the tops of the filling.
Bake the tarts on the middle rack of the oven for 10–15 minutes, rotating the baking sheet halfway through for even browning. The tops should be golden and slightly caramelized.
Remove the tarts from the oven and let them cool on a wire rack. Serve warm for a gooey filling, or refrigerate for a denser, cheesecake-like texture.
Flavor and Texture
The contrast between the flaky, buttery crust and the creamy, tangy filling is what makes these tarts so special. The crust provides a satisfying crunch, while the filling melts in your mouth with a smooth, velvety texture. The hint of lemon juice adds brightness, balancing the richness of the cream cheese. When baked, the tops develop a golden hue with a subtle caramelized flavor, adding a delightful complexity to every bite.
Tips for Success
- Weigh your ingredients: For the best results, use a kitchen scale to measure your ingredients. This ensures precision, especially for the pastry dough.
- Chill thoroughly: Chilling the dough prevents it from becoming too sticky and helps maintain its structure during baking.
- Use quality ingredients: Full-fat cream cheese and fresh lemons will give your filling the best flavor and texture.
- Avoid overmixing: Overworking the dough can make it tough. Mix just until the ingredients come together.
- Blind bake properly: Ensure the crust is fully baked before adding the filling to avoid a soggy bottom.
Variations and Substitutions
- Chocolate cheese tarts: Add a tablespoon of cocoa powder to the filling for a chocolaty twist.
- Matcha cheese tarts: Mix a teaspoon of matcha powder into the filling for a unique, earthy flavor.
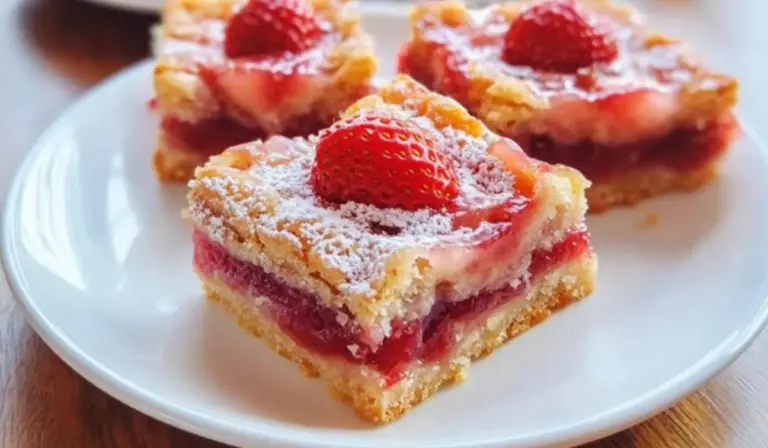
- Fruit toppings: Garnish the tarts with fresh berries, a drizzle of fruit compote, or a sprinkle of powdered sugar.
- Gluten-free option: Substitute the cake flour with a gluten-free flour blend.
Serving Suggestions
Baked cheese tarts are versatile and can be served in various ways. Enjoy them warm with a cup of tea or coffee for a cozy treat. Serve them chilled as part of a dessert spread at a dinner party. Pair them with fresh fruit or a dollop of whipped cream for an extra layer of indulgence. For a more sophisticated presentation, sprinkle a touch of powdered sugar or cocoa powder on top.

Storage and Reheating
If you plan to eat the tarts within the day, keep them at room temperature, covered lightly with plastic wrap. For longer storage, refrigerate them in an airtight container for up to three days. You can also freeze the tarts for up to a month. To serve, thaw them at room temperature or enjoy them straight from the freezer for a texture similar to ice cream.
To reheat, place the tarts in a preheated oven or toaster oven for a few minutes to restore their crispy crust and soften the filling.
Conclusion
Baked cheese tarts are a delightful fusion of textures and flavors, perfect for any occasion. With their buttery crust and creamy filling, they’re a treat that never fails to impress. Whether you’re baking them for a special celebration or as a simple indulgence, these tarts are sure to become a favorite in your dessert repertoire. So gather your ingredients, follow this guide, and experience the joy of making—and savoring—these irresistible tarts. Happy baking!