Gooey Maple Cinnamon Blondies: A Warm and Chewy Dessert for All Occasions
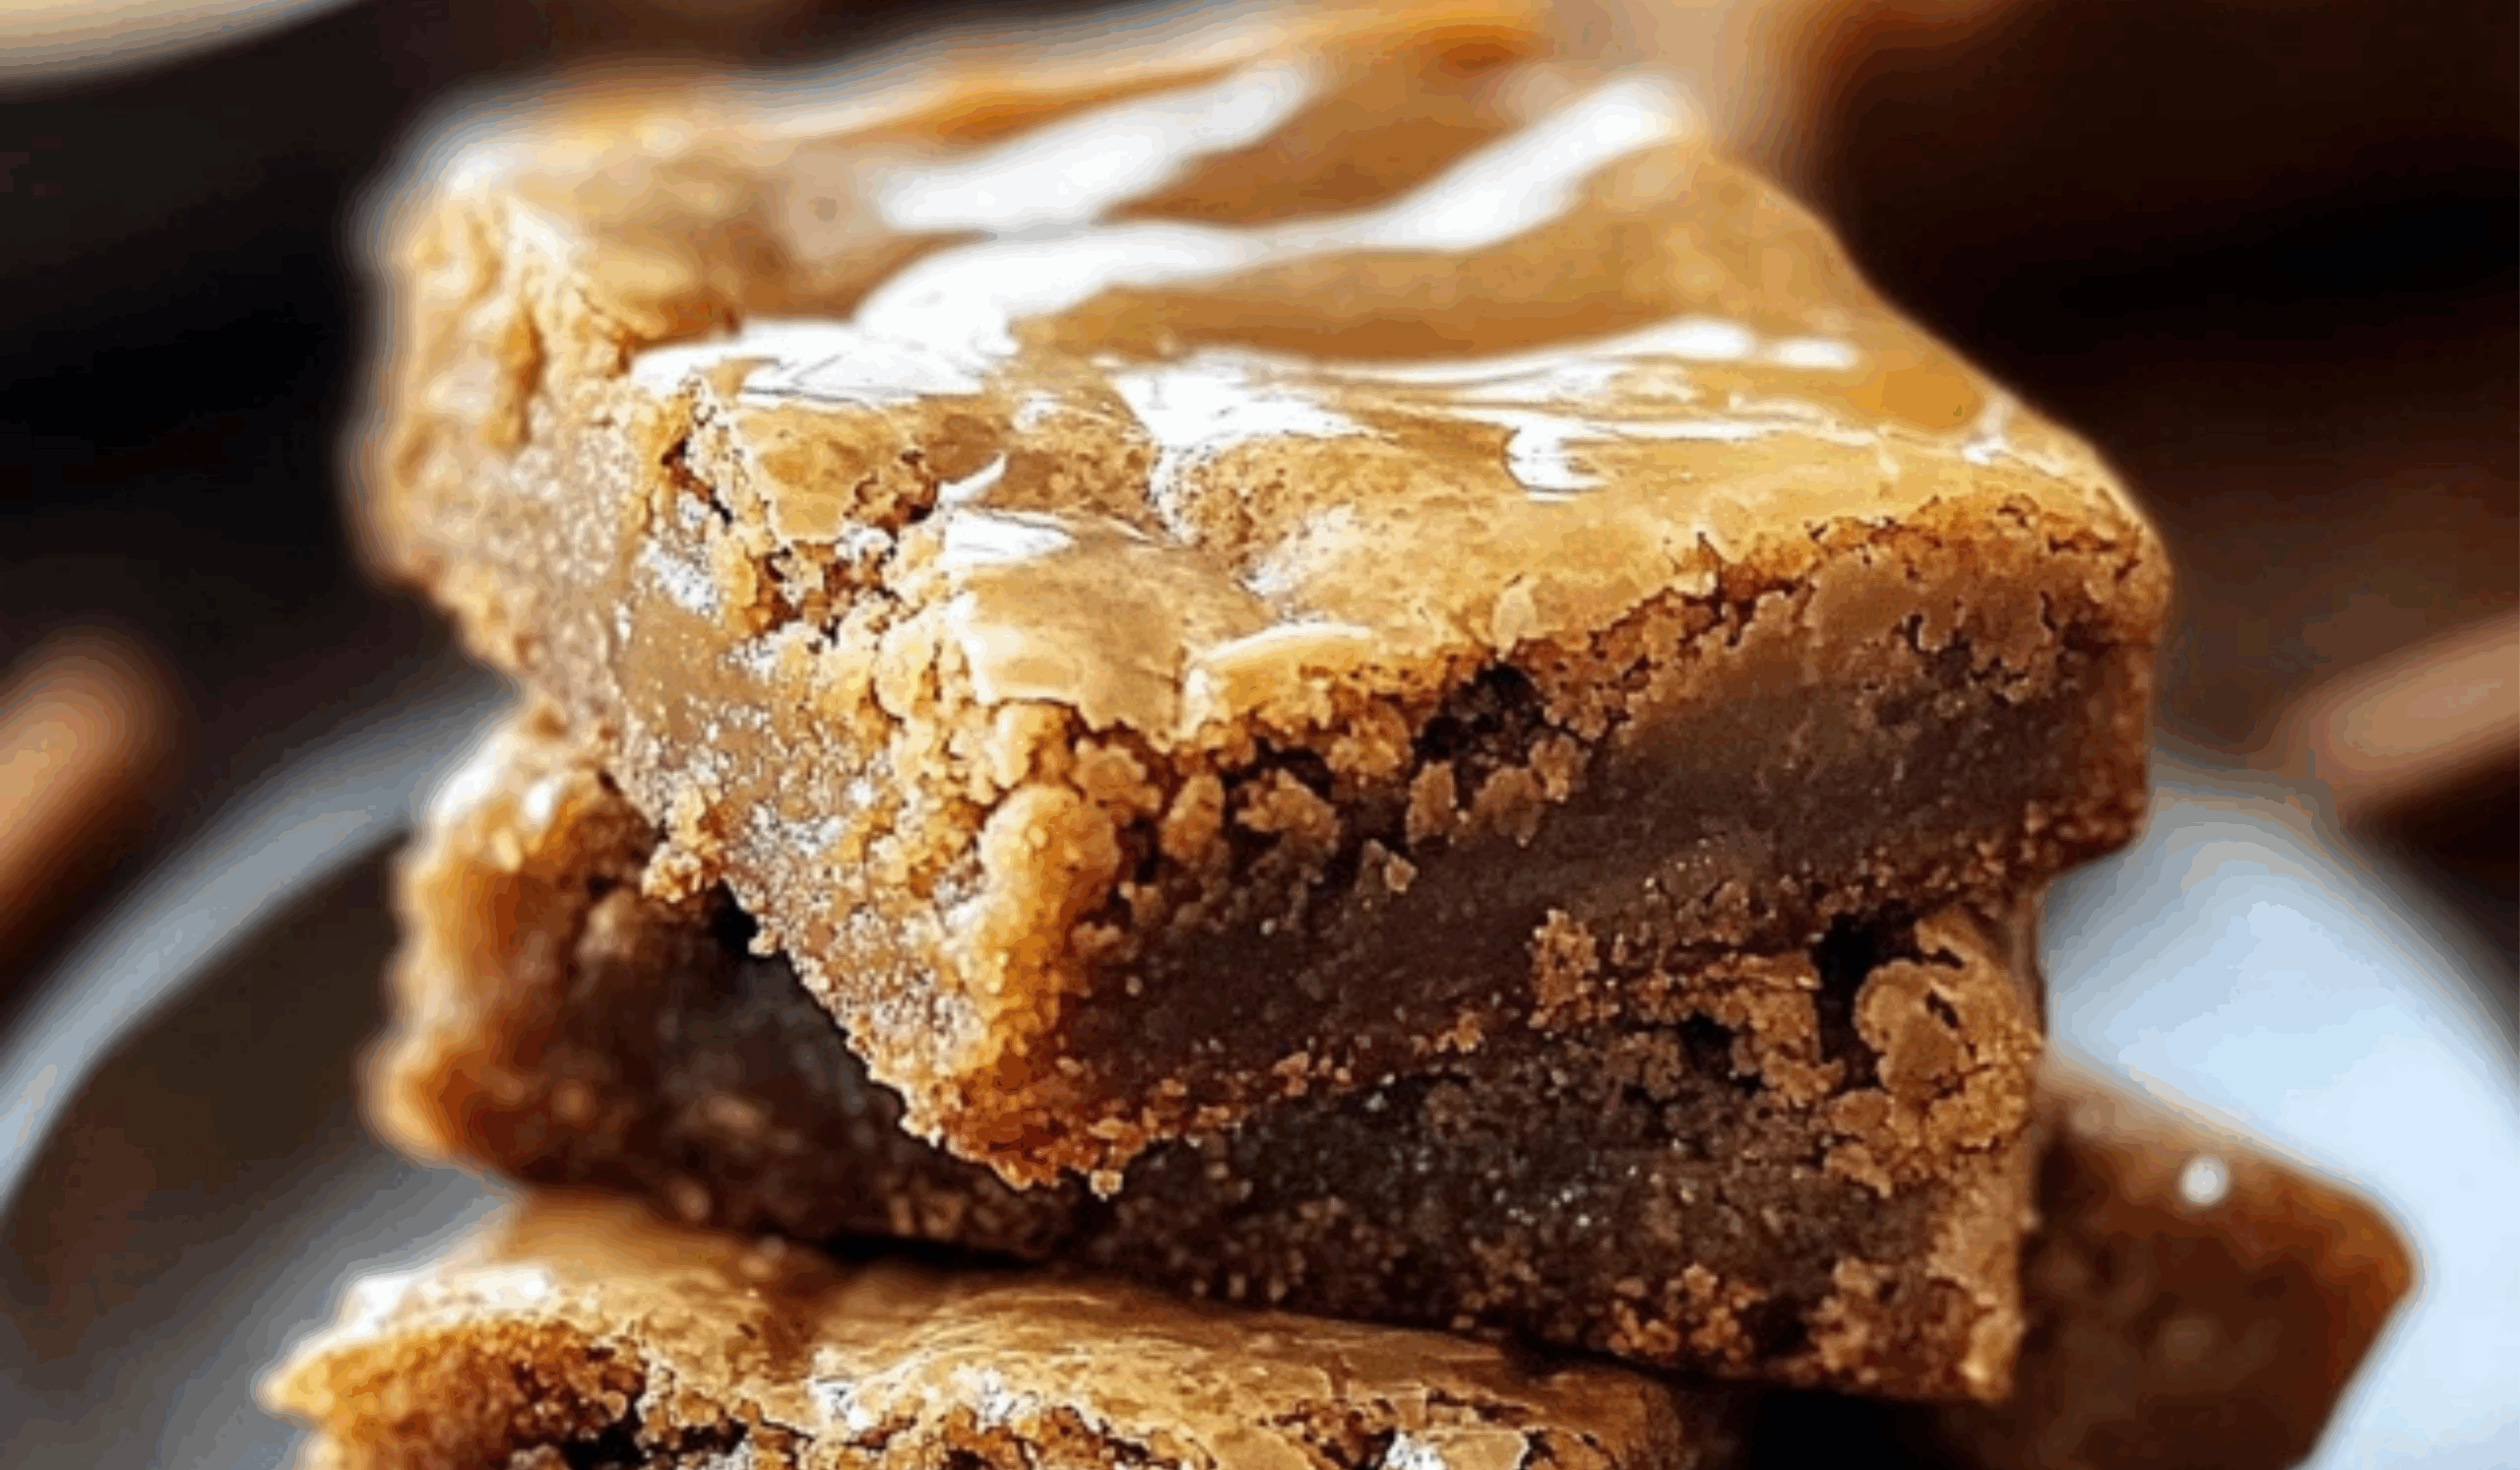
There’s something incredibly comforting about the aroma of cinnamon and maple drifting through the kitchen. It instantly evokes memories of cozy mornings, lazy autumn afternoons, or those impromptu baking sessions when you just need a little sweetness in your day. Gooey Maple Cinnamon Blondies are exactly that kind of dessert—warm, chewy, and packed with flavors that bring both nostalgia and indulgence. Perfect for beginner bakers or anyone looking to whip up a quick and satisfying treat, these blondies come together with minimal effort but deliver maximum payoff. Whether you’re preparing a snack for family movie night, impressing guests at a potluck, or simply baking for yourself, this recipe will become a go-to in your collection. Let’s dive into what makes these blondies a standout dessert and how you can make them perfectly from the very first try.

Ingredients and Preparation
The ingredients in this recipe are pantry staples, making it both convenient and budget-friendly. The star flavors—maple syrup and cinnamon—blend beautifully to create a dessert that’s rich and aromatic without being overly sweet. Here’s what you’ll need and why each element matters.
Ingredients:
- 1 cup unsalted butter, melted
- 1 1/2 cups packed light brown sugar
- 1/2 cup pure maple syrup (not pancake syrup)
- 2 large eggs
- 2 teaspoons vanilla extract
- 2 cups all-purpose flour
- 1 1/2 teaspoons ground cinnamon
- 1/2 teaspoon salt
- 1/2 teaspoon baking powder
- Optional: 1/2 cup chopped nuts (pecans or walnuts work beautifully), white chocolate chips, or a pinch of nutmeg for depth
Preparation Notes:
- Ensure the butter is fully melted but not hot to prevent scrambling the eggs.
- Use room temperature eggs for better mixing and texture.
- Pure maple syrup is essential for authentic flavor—avoid substitutes with added sugars or artificial ingredients.
- You can lightly toast nuts before adding them for extra flavor and crunch.
- Line your baking pan with parchment paper or grease well to ensure easy release after baking.
With these simple ingredients and a few basic tools, you’re ready to start baking a batch of these chewy, golden blondies.
Step-by-Step Instructions
- Preheat the Oven
Set your oven to 350°F (175°C). Prepare an 8×8 or 9×9-inch baking pan by lining it with parchment paper or lightly greasing it. This will help prevent sticking and ensure even baking. - Melt the Butter
In a large mixing bowl, melt the butter. Allow it to cool slightly for about 5 minutes before adding other ingredients. - Mix Wet Ingredients
To the cooled butter, add the brown sugar and whisk until smooth. Then mix in the maple syrup, eggs, and vanilla extract. Whisk until the mixture is fully combined and slightly glossy. - Combine Dry Ingredients
In a separate bowl, whisk together the flour, cinnamon, salt, and baking powder. Ensure even distribution to prevent clumps. - Combine Wet and Dry Mixtures
Gradually stir the dry ingredients into the wet mixture. Use a spatula or wooden spoon rather than an electric mixer to avoid overmixing, which can lead to tough blondies. - Add Optional Mix-ins
Fold in any optional add-ins like chopped nuts or white chocolate chips at this stage. - Spread in Pan and Bake
Pour the batter into the prepared baking pan and spread evenly. Bake for 25 to 30 minutes, or until the edges are set and the center is just slightly jiggly. A toothpick inserted in the middle should come out with moist crumbs, not wet batter. - Cool and Slice
Allow the blondies to cool in the pan for at least 20 minutes before slicing. This helps them firm up and makes cutting cleaner and easier.
Beginner Tips and Notes
- Don’t Overbake: These blondies are meant to be gooey in the center. Baking them too long will dry them out. Watch for the edges to be set and the center to be barely firm.
- Use Real Maple Syrup: The flavor of real maple syrup is complex and rich, whereas pancake syrups often contain corn syrup and artificial flavorings that won’t give the same result.
- Measure Flour Correctly: Scoop flour into your measuring cup and level it with a knife rather than packing it down. Too much flour can make the blondies dense.
- Let Them Cool: It might be tempting to cut into them right away, but they need time to cool for the perfect texture.
- Customize the Flavor: Try adding a pinch of ground cardamom or nutmeg for a slight twist on the classic cinnamon flavor.
- Room Temperature Eggs: Using room temperature eggs helps them mix better with the batter and improves the final texture. If you’re short on time, place the eggs in a bowl of warm water for 5 to 10 minutes.
Serving Suggestions
Gooey Maple Cinnamon Blondies are incredibly versatile when it comes to serving. Whether you’re enjoying them straight out of the pan or dressed up with toppings, there’s no wrong way to eat them.
- Classic Style: Serve warm or at room temperature on their own for a quick snack or dessert.
- With Ice Cream: A scoop of vanilla, butter pecan, or cinnamon ice cream on top makes this dessert even more decadent.
- Drizzled Toppings: Try a drizzle of warm maple syrup or caramel sauce for extra richness.
- Seasonal Touch: Add a sprinkle of powdered sugar or a dollop of whipped cream for holiday gatherings.
- Coffee Pairing: These blondies pair beautifully with a hot cup of coffee, chai latte, or maple-flavored tea.
- Make-Ahead Option: Bake and cool completely, then store in an airtight container for up to 4 days at room temperature. They can also be frozen for up to 2 months—just wrap them tightly in plastic wrap and foil.
Engagement Features
Tried this recipe? Did you add your own twist? Maybe you added dark chocolate chips or used a gluten-free flour blend. I’d love to hear how your blondies turned out. Was this your first time baking blondies from scratch? What did your friends or family think? If you’re looking for more simple yet crowd-pleasing dessert ideas, let me know and I can recommend similar beginner-friendly recipes. Share your baking success stories, tips, or questions in the comments below and let’s make this a place where new and experienced bakers can learn and grow together. Bookmark this recipe for next time or share it with someone who could use a cozy homemade treat this week.