Crème Brûlée Cake: A Beginner’s Guide to a Dreamy, Decadent Dessert
When I first learned how to make crème brûlée, I was intimidated. The idea of working with hot cream, tempering eggs, and achieving that perfect caramelized sugar top seemed overwhelming. But once I tried it step-by-step, it became one of my favorite kitchen adventures. Later, the idea of transforming this iconic dessert into a cake sounded thrilling yet achievable. With a few trials and a lot of tasting sessions shared with friends, the Crème Brûlée Cake quickly became a star in my recipe book. This dessert is perfect for beginner cooks because it captures the luxurious, creamy texture and caramel flavor of classic crème brûlée without complicated techniques. It is straightforward, forgiving, and guaranteed to impress at any gathering.
If you are new to baking or have never made custard before, do not worry. This recipe is designed for simplicity, with clear steps, practical tips, and flexible ingredient options. Let’s dive in.
Ingredients and Preparation
Before beginning, gather all your ingredients and prepare your workspace. Setting everything out will help the process flow smoothly and reduce the chance of missing a step.
For the Crust:
- 1 ½ cups graham cracker crumbs
- ¼ cup granulated sugar
- ½ cup melted butter
For the Custard Filling:
- 4 cups heavy cream
- 1 vanilla bean, split and seeds scraped (or 1 tablespoon vanilla extract)
- 8 large egg yolks
- ¾ cup granulated sugar
- 2 tablespoons cornstarch
For the Caramelized Sugar Topping:
- ¼ cup granulated sugar
Ingredient Substitutions:
- Gluten-Free Option: Use gluten-free graham crackers instead of regular ones for the crust.
- Dairy-Free Option: Replace heavy cream with full-fat coconut cream or almond cooking cream for a dairy-free version.
- Vanilla Alternatives: If you do not have a vanilla bean, high-quality vanilla extract works just as well.
This recipe requires a springform pan, a medium saucepan, a whisk, mixing bowls, and a kitchen torch or oven broiler to caramelize the sugar topping.
Step-by-Step Instructions
Step 1: Prepare the Crust
- Preheat your oven to 350°F (175°C).
- In a medium mixing bowl, combine the graham cracker crumbs, ¼ cup granulated sugar, and melted butter. Stir until the mixture resembles wet sand.
- Press the mixture firmly into the bottom of a springform pan to create an even, compact layer.
- Bake for 10 minutes until the crust is golden and set.
- Remove from the oven and allow it to cool completely while you prepare the custard.
Step 2: Make the Custard Filling
- In a medium saucepan, heat the heavy cream and the vanilla bean seeds (or vanilla extract) over medium heat. Stir occasionally and watch for small bubbles forming around the edges.
- Once it simmers gently, remove from the heat. Set aside.
- In a large mixing bowl, whisk together the egg yolks, ¾ cup granulated sugar, and cornstarch until the mixture becomes smooth and slightly lighter in color.
- Slowly pour the warm cream into the egg mixture in a steady stream, whisking constantly. This gradual process tempers the eggs, preventing them from scrambling.
- Once fully combined and smooth, allow the mixture to sit for a few minutes to settle.
Step 3: Assemble and Bake
- Pour the custard filling over the prepared, cooled crust in the springform pan.
- Create a water bath by placing the springform pan inside a larger baking dish and filling the outer dish with hot water until it reaches halfway up the sides of the springform pan. This gentle baking method ensures even cooking and prevents cracks.
- Carefully transfer the setup to the oven.
- Bake at 325°F (163°C) for about 50 to 60 minutes. The cake should be set at the edges but slightly wobbly in the center.
- Remove the cake from the oven and take it out of the water bath. Let it cool at room temperature, then refrigerate for at least 4 hours or overnight for the best texture.
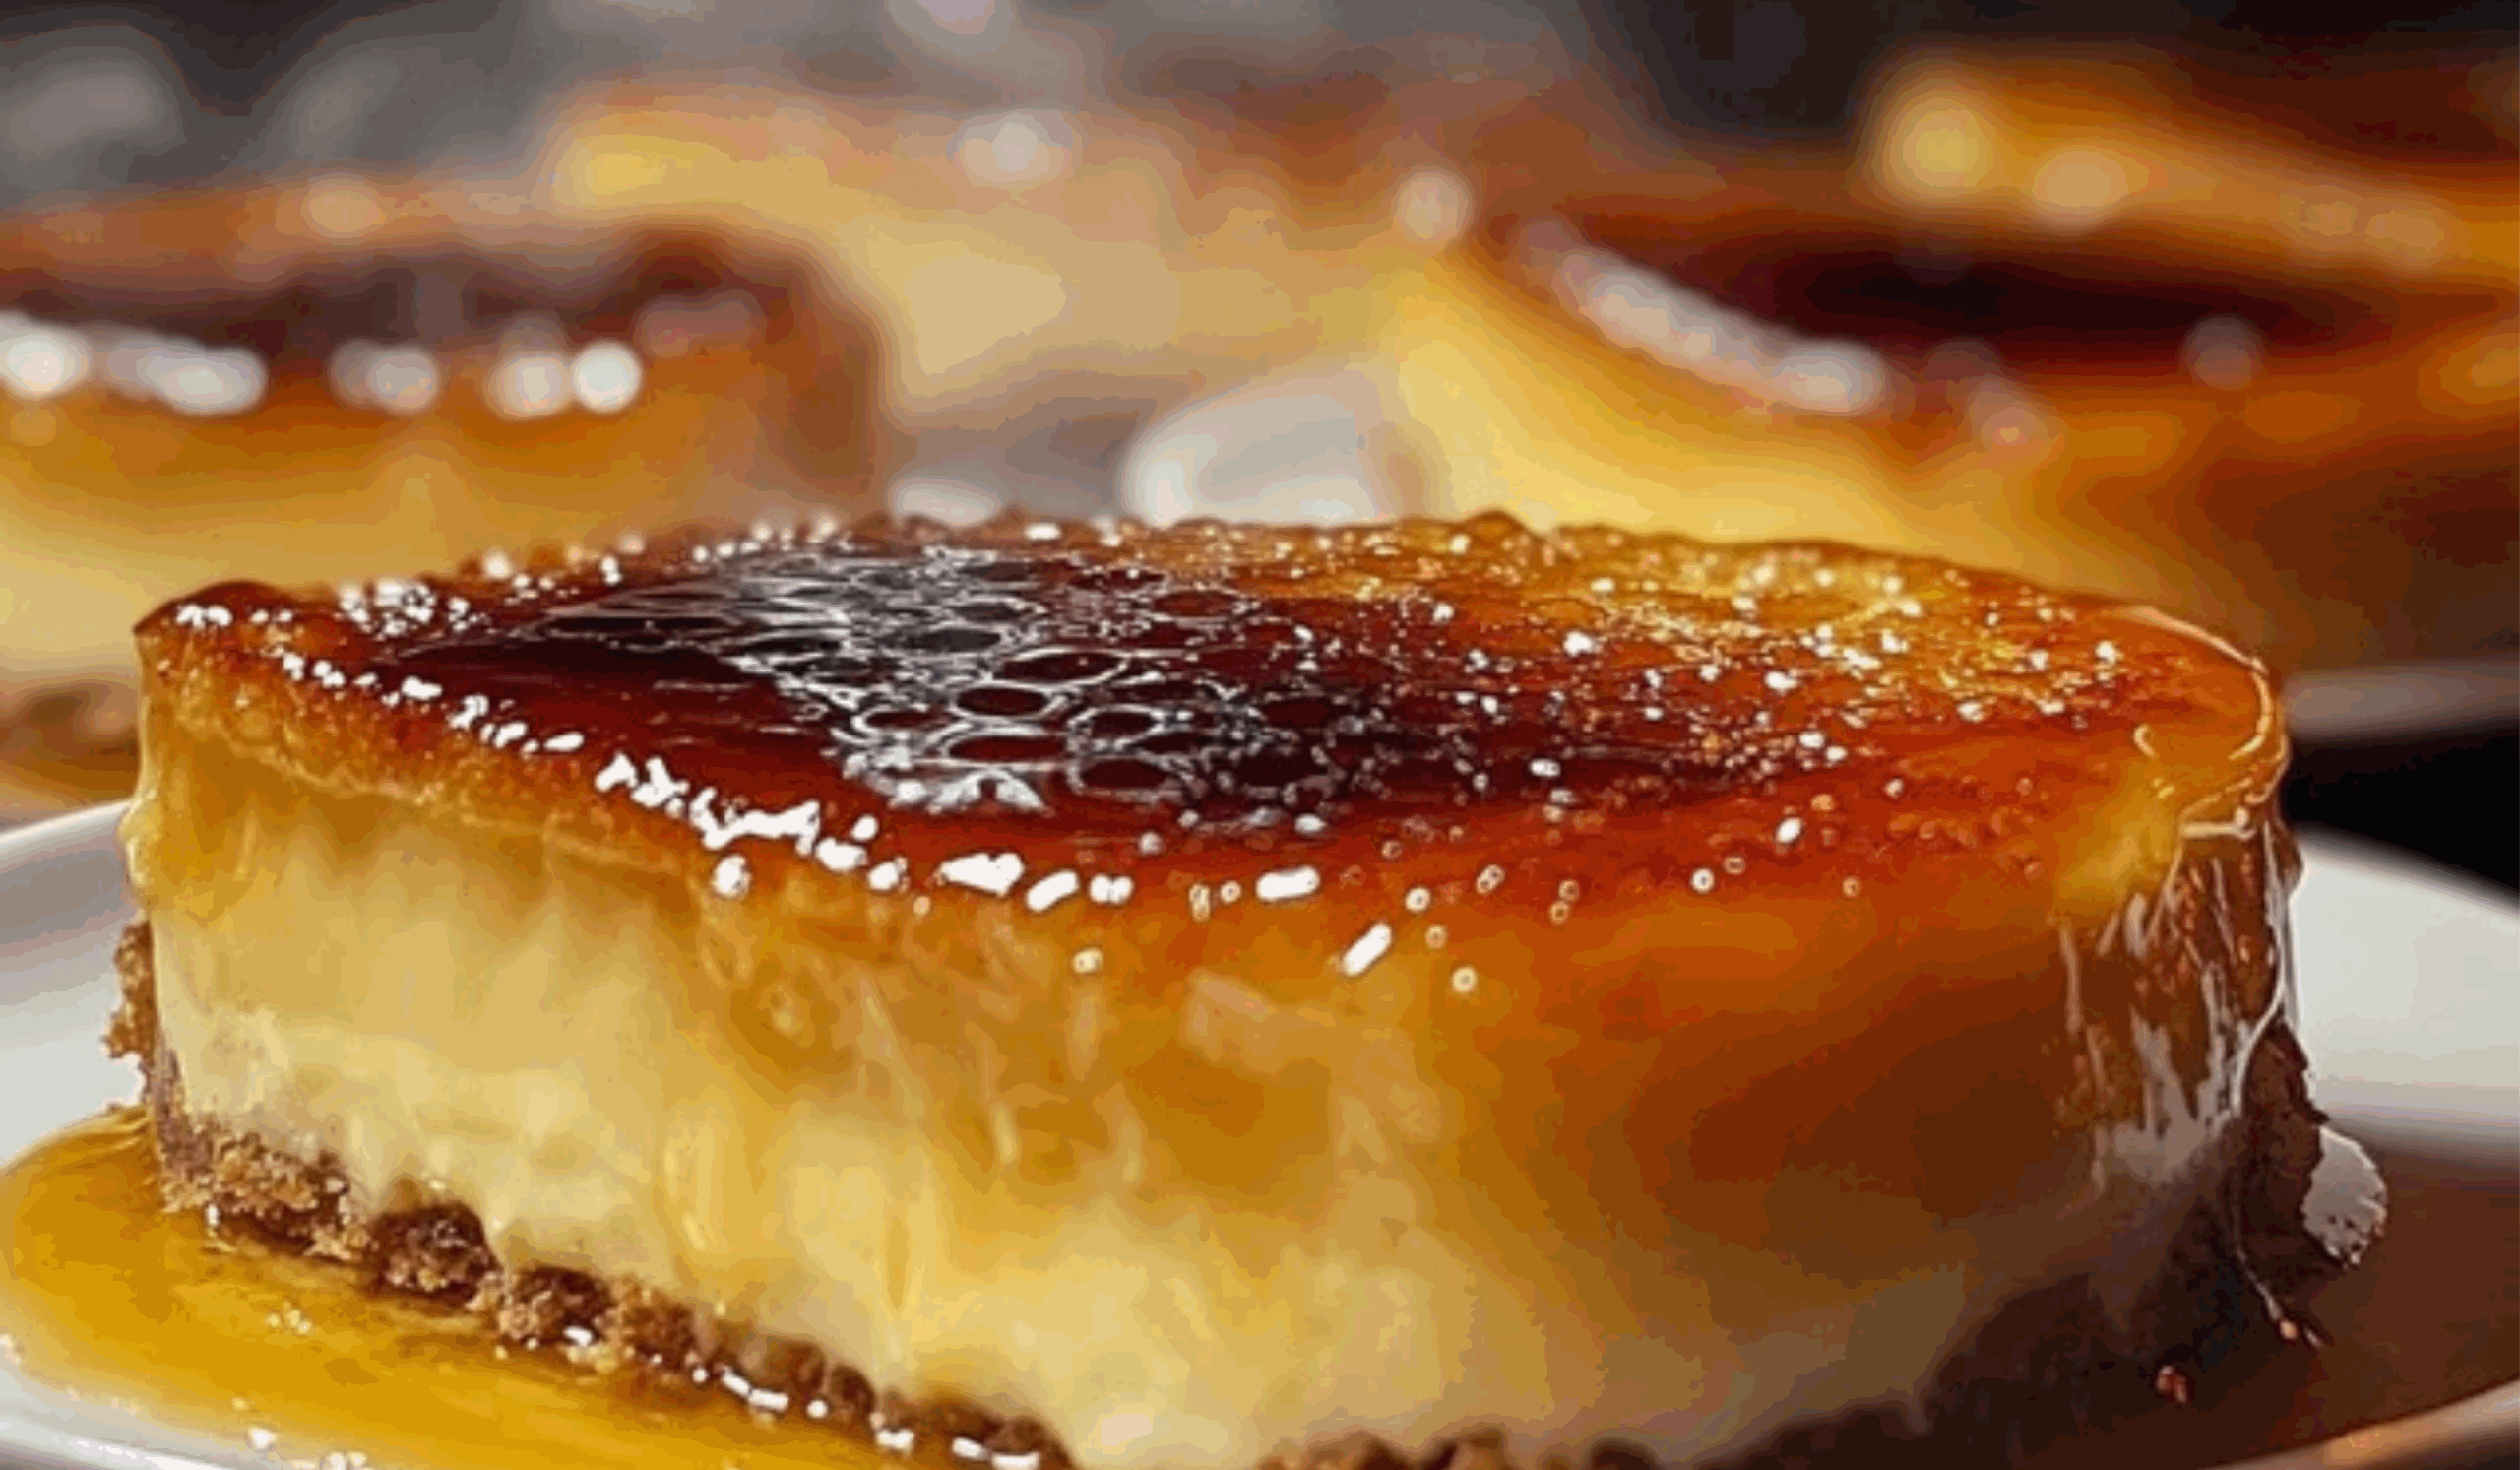
Step 4: Caramelize the Sugar Topping
- Just before serving, sprinkle ¼ cup granulated sugar evenly over the top of the chilled custard cake.
- Using a kitchen torch, carefully melt and caramelize the sugar until it forms a crisp, golden layer.
- If you do not have a torch, place the cake under a broiler for 1–2 minutes, watching closely to avoid burning.
Allow the sugar topping to cool and harden for a few minutes before slicing and serving.
Beginner Tips and Notes
Preventing Curdled Custard:
Always pour the warm cream into the egg mixture slowly while whisking. If you rush this step, the eggs might scramble, creating lumps instead of a smooth custard.
Ensuring an Even Crust:
Press the crust mixture down firmly and evenly with the bottom of a measuring cup or glass. This helps prevent crumbling when you slice the cake.
Caramelizing Sugar Without a Torch:
If using a broiler, keep the oven door slightly open and watch closely. The sugar can burn very quickly, and a few extra seconds can make a big difference.
Storage Tips:
Store any leftover Crème Brûlée Cake in the refrigerator, covered with plastic wrap or in an airtight container. It will keep fresh for up to three days. The caramelized sugar topping will soften slightly over time, but the cake will remain delicious.
Quick Kitchen Hacks:
- Use a fine-mesh sieve to strain the custard mixture before baking to catch any bits of cooked egg or vanilla pod.
- Prepare the crust a day ahead and store it at room temperature to save time when assembling.
Substituting Tools:
If you do not have a springform pan, you can use a deep pie dish, but serving might be trickier. Line it with parchment paper for easier removal.

Serving Suggestions
To elevate the Crème Brûlée Cake experience, consider these serving ideas:
- Fresh Berries: Serve slices with a handful of fresh raspberries, blueberries, or strawberries. Their tartness balances the sweetness beautifully.
- Fruit Compote: A drizzle of berry or stone fruit compote adds a lovely, bright contrast.
- Whipped Cream: A small dollop of lightly sweetened whipped cream can add extra luxury.
- Savory Balance: For a balanced meal, follow a lighter main course such as grilled chicken breast with lemon herb seasoning or a beef tenderloin salad.
Pairing the cake with complementary flavors ensures your guests leave the table impressed and satisfied.
Leftover Ideas:
If you have leftover slices, try crumbling a piece over a fresh fruit salad for a twist on trifle. You can also layer it in a parfait glass with whipped cream and berries for a luxurious snack.
Engagement Features
Congratulations, you have now unlocked the art of creating a showstopping dessert that combines the comforting creaminess of custard with the satisfying crunch of caramelized sugar. This Crème Brûlée Cake is a recipe you will want to return to whenever you need something elegant yet achievable.
I encourage you to give this recipe a try. Whether it is your first time making a custard or you are looking for a reliable dessert to wow your guests, this cake delivers. After you bake it, I would love to hear how it turned out for you. Feel free to share your experience, tips, or questions in the comments. If you made any ingredient swaps or personalized the recipe, let others know — your creativity could inspire someone else’s perfect version.
Happy baking and enjoy every creamy, caramelized bite.


