Buttery Cherry Berry Skillet Crisp: A Beginner’s Dream Dessert

If you’ve been searching for a dessert that strikes the perfect balance between impressive and easy, look no further than the Buttery Cherry Berry Skillet Crisp. This recipe combines the juicy sweetness of fresh cherries and mixed berries with a warm, golden crumble topping. Whether you’re new to cooking or simply short on time, this dish is ideal for beginners.
Print
Buttery Cherry Berry Skillet Crisp: A Beginner’s Dream Dessert
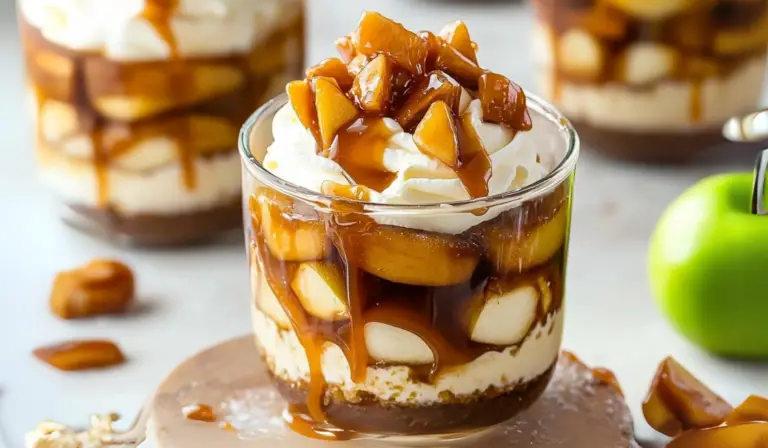
Warm, buttery perfection meets juicy cherries and berries in this delightful Skillet Crisp! 🍒🫐💛 A beginner’s dream dessert, it’s quick, easy, and so satisfying. 🙌 With its golden, crumbly topping and luscious fruit filling, this crisp is perfect for any occasion—especially when topped with a dollop of whipped cream or ice cream! 🍦✨ Get ready to wow your taste buds and fill your home with delicious aromas. 🏡❤️
#ButteryBerryCrisp #EasyAndDelicious #CherryBerryLove #SkilletDesserts #ComfortBaking #SweetTreats #BeginnerFriendly #DessertBliss #HomemadeMagic #WarmAndCozy 🍒🫐💛
- Total Time: 1 hour
- Yield: 8 servings 1x
Ingredients
For the Fruit Filling
6 tablespoons salted butter: Adds richness and flavor to the filling. If you only have unsalted butter, add a pinch of salt to the fruit mixture.
3 cups sweet cherries, pitted: Fresh cherries are the star here, but frozen cherries work just as well. Thaw and drain them before using.
3–4 cups mixed fruit (strawberries, raspberries, blueberries): Use a mix of your favorite berries for a burst of color and flavor. Frozen berries can substitute fresh ones, just be sure to thaw and pat them dry.
1 tablespoon cornstarch: This thickens the juices, preventing the crisp from becoming watery. Arrowroot powder or tapioca starch are excellent alternatives.
1/3 cup brown sugar: Balances the tartness of the fruit and adds a caramel-like depth. Adjust the quantity based on your fruit’s natural sweetness.
2 teaspoons vanilla extract: Enhances the overall flavor of the fruit filling.
For the Crumble Topping
1 ½ cups old-fashioned rolled oats: Provides a hearty, chewy texture. For a gluten-free version, use certified gluten-free oats.
1 cup all-purpose flour: Serves as the base of the crumble. If you’re gluten-free, substitute with almond flour or a gluten-free flour blend.
1/4–1/2 cup brown sugar (to taste): Adds sweetness and caramel notes to the topping.
1 teaspoon cinnamon: Infuses warmth and depth. You can also experiment with nutmeg or allspice.
1/2 teaspoon cardamom: A unique spice that pairs beautifully with berries. If you don’t have cardamom, omit it or replace it with more cinnamon.
1/4 teaspoon kosher salt: Balances the sweetness and enhances the other flavors.
1 ½ sticks (3/4 cup) salted butter: Provides richness and helps bind the crumble. If using unsalted butter, add a pinch of salt.
Instructions
Step 1: Preheat the Oven
Preheat your oven to 350°F (175°C). A preheated oven ensures even cooking, which is especially important for a dessert with multiple components like this one.
Step 2: Brown the Butter
Place a 10–12 inch oven-safe skillet over medium heat and add the 6 tablespoons of salted butter. Let the butter melt and begin to brown, stirring often. After about 3–4 minutes, you’ll notice a nutty aroma and the butter will turn a deep golden color. Remove the skillet from heat. This step adds a rich, toasty flavor to the fruit filling that takes the dessert to the next level.
Step 3: Prepare the Fruit Filling
To the browned butter, add the cherries, mixed berries, cornstarch, brown sugar, and vanilla extract. Gently toss everything together until the fruit is evenly coated. Don’t worry if the mixture looks a little uneven—once baked, the flavors will meld beautifully.
Step 4: Make the Crumble Topping
In a medium mixing bowl, combine the oats, flour, brown sugar, cinnamon, cardamom, and salt. Mix until the dry ingredients are evenly distributed. Cut the 1 ½ sticks of salted butter into small cubes and add them to the bowl. Using your fingers, a fork, or a pastry cutter, work the butter into the dry ingredients until the mixture resembles coarse crumbs. The goal is to have some pea-sized clumps, which will create a deliciously crisp texture.
Step 5: Assemble the Crisp
Sprinkle the crumble topping evenly over the fruit mixture in the skillet. Don’t press the topping down; you want it to remain loose and crumbly to achieve that classic crisp texture.
Step 6: Bake
Place the skillet in the preheated oven and bake for 40–45 minutes, or until the topping is golden brown and the fruit filling is bubbling around the edges. The aroma of baked fruit and spices will fill your kitchen, making the wait well worth it.
Step 7: Cool and Serve
Once baked, remove the skillet from the oven and let the crisp cool for at least 10 minutes. This allows the filling to thicken slightly, making it easier to serve. Enjoy the crisp warm or at room temperature, paired with a scoop of vanilla ice cream or a dollop of whipped cream.
Notes
- How to Pit Cherries Easily: If you don’t have a cherry pitter, use a straw or chopstick to push the pit out through the stem end of the cherry. It’s quick and mess-free.
- Prevent a Watery Filling: If your fruit is very juicy, increase the cornstarch by half a tablespoon to ensure the filling thickens properly.
- Even Browning for the Topping: Rotate the skillet halfway through baking to ensure the topping browns evenly.
- Overcooked or Burnt Topping: If the topping browns too quickly, cover it loosely with aluminum foil during the last 10–15 minutes of baking.
- Prep Time: 15 minutes
- Cook Time: 45 minutes
Imagine a dessert that fills your kitchen with the comforting aroma of baked fruit and buttery oats. The best part? This recipe doesn’t require any fancy equipment or advanced techniques. All you need is a skillet, a few basic ingredients, and a love for delicious homemade treats. Let’s dive into what makes this recipe so special and how even a novice can create a dessert that’s sure to impress family and friends.
What sets the Buttery Cherry Berry Skillet Crisp apart is its simplicity. The fruit filling comes together effortlessly, while the crumble topping is practically foolproof. It’s a versatile recipe that works with whatever fruit you have on hand—perfect for using up summer’s bounty or making the most of frozen berries in colder months. Plus, this dessert is naturally customizable, allowing you to adjust the sweetness or spice level to suit your taste.
Ingredients and Preparation
This recipe calls for simple, pantry-friendly ingredients, ensuring you won’t need to make a special trip to the store. Here’s a breakdown of what you’ll need, along with suggestions for substitutions to make this dessert your own.
For the Fruit Filling
6 tablespoons salted butter: Adds richness and flavor to the filling. If you only have unsalted butter, add a pinch of salt to the fruit mixture.
3 cups sweet cherries, pitted: Fresh cherries are the star here, but frozen cherries work just as well. Thaw and drain them before using.
3–4 cups mixed fruit (strawberries, raspberries, blueberries): Use a mix of your favorite berries for a burst of color and flavor. Frozen berries can substitute fresh ones, just be sure to thaw and pat them dry.
1 tablespoon cornstarch: This thickens the juices, preventing the crisp from becoming watery. Arrowroot powder or tapioca starch are excellent alternatives.
1/3 cup brown sugar: Balances the tartness of the fruit and adds a caramel-like depth. Adjust the quantity based on your fruit’s natural sweetness.
2 teaspoons vanilla extract: Enhances the overall flavor of the fruit filling.
For the Crumble Topping
1 ½ cups old-fashioned rolled oats: Provides a hearty, chewy texture. For a gluten-free version, use certified gluten-free oats.
1 cup all-purpose flour: Serves as the base of the crumble. If you’re gluten-free, substitute with almond flour or a gluten-free flour blend.
1/4–1/2 cup brown sugar (to taste): Adds sweetness and caramel notes to the topping.
1 teaspoon cinnamon: Infuses warmth and depth. You can also experiment with nutmeg or allspice.
1/2 teaspoon cardamom: A unique spice that pairs beautifully with berries. If you don’t have cardamom, omit it or replace it with more cinnamon.
1/4 teaspoon kosher salt: Balances the sweetness and enhances the other flavors.
1 ½ sticks (3/4 cup) salted butter: Provides richness and helps bind the crumble. If using unsalted butter, add a pinch of salt.
Step-by-Step Instructions
Step 1: Preheat the Oven
Preheat your oven to 350°F (175°C). A preheated oven ensures even cooking, which is especially important for a dessert with multiple components like this one.
Step 2: Brown the Butter
Place a 10–12 inch oven-safe skillet over medium heat and add the 6 tablespoons of salted butter. Let the butter melt and begin to brown, stirring often. After about 3–4 minutes, you’ll notice a nutty aroma and the butter will turn a deep golden color. Remove the skillet from heat. This step adds a rich, toasty flavor to the fruit filling that takes the dessert to the next level.
Step 3: Prepare the Fruit Filling
To the browned butter, add the cherries, mixed berries, cornstarch, brown sugar, and vanilla extract. Gently toss everything together until the fruit is evenly coated. Don’t worry if the mixture looks a little uneven—once baked, the flavors will meld beautifully.
Step 4: Make the Crumble Topping
In a medium mixing bowl, combine the oats, flour, brown sugar, cinnamon, cardamom, and salt. Mix until the dry ingredients are evenly distributed. Cut the 1 ½ sticks of salted butter into small cubes and add them to the bowl. Using your fingers, a fork, or a pastry cutter, work the butter into the dry ingredients until the mixture resembles coarse crumbs. The goal is to have some pea-sized clumps, which will create a deliciously crisp texture.
Step 5: Assemble the Crisp
Sprinkle the crumble topping evenly over the fruit mixture in the skillet. Don’t press the topping down; you want it to remain loose and crumbly to achieve that classic crisp texture.
Step 6: Bake
Place the skillet in the preheated oven and bake for 40–45 minutes, or until the topping is golden brown and the fruit filling is bubbling around the edges. The aroma of baked fruit and spices will fill your kitchen, making the wait well worth it.
Step 7: Cool and Serve
Once baked, remove the skillet from the oven and let the crisp cool for at least 10 minutes. This allows the filling to thicken slightly, making it easier to serve. Enjoy the crisp warm or at room temperature, paired with a scoop of vanilla ice cream or a dollop of whipped cream.
Beginner Tips and Troubleshooting
- How to Pit Cherries Easily: If you don’t have a cherry pitter, use a straw or chopstick to push the pit out through the stem end of the cherry. It’s quick and mess-free.
- Prevent a Watery Filling: If your fruit is very juicy, increase the cornstarch by half a tablespoon to ensure the filling thickens properly.
- Even Browning for the Topping: Rotate the skillet halfway through baking to ensure the topping browns evenly.
- Overcooked or Burnt Topping: If the topping browns too quickly, cover it loosely with aluminum foil during the last 10–15 minutes of baking.
Serving Suggestions
- Ice Cream Pairing: Vanilla ice cream is a classic choice, but don’t hesitate to experiment with flavors like caramel, pistachio, or even a tangy lemon sorbet.
- Sauce Options: Drizzle with caramel or chocolate sauce for an indulgent touch.
- Breakfast Twist: Serve leftovers with Greek yogurt for a decadent breakfast.

Storage and Reheating
Store any leftovers in an airtight container in the refrigerator for up to 3 days. To reheat, place a portion in a microwave-safe dish and heat for 30 seconds to 1 minute. For a crispier topping, reheat in a 350°F oven for 5–10 minutes.
Conclusion
The Buttery Cherry Berry Skillet Crisp is a testament to how simple ingredients and straightforward techniques can result in an unforgettable dessert. Perfect for beginners, this recipe lets you master the art of baking while impressing your family and friends. The warm, juicy filling and crisp, buttery topping make it an irresistible treat that’s as versatile as it is delicious.
Whether you’re serving it at a family gathering, bringing it to a potluck, or enjoying it as a comforting weeknight dessert, this skillet crisp will quickly become a go-to recipe in your repertoire. Don’t forget to share your experience and tips in the comments below—we’d love to hear how you made this recipe your own. Happy baking!