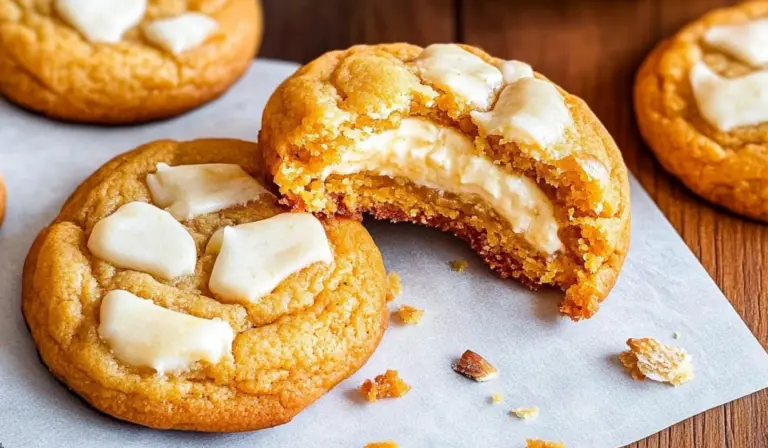
Slutty Cheesecake Bars: A Beginner-Friendly Indulgence

Few desserts can match the pure indulgence of these Slutty Cheesecake Bars—a delightful fusion of gooey chocolate chip cookie dough, crunchy Oreos, and rich, creamy cheesecake. Each bite delivers the perfect balance of textures and flavors, making it an irresistible treat for any occasion.
Print
Slutty Cheesecake Bars: A Beginner-Friendly Indulgence
These Slutty Cheesecake Bars are the ultimate indulgence—rich, creamy cheesecake layered with gooey chocolate chip cookie dough and fudgy brownies! A beginner-friendly recipe that delivers decadent, drool-worthy bites every time.
- Total Time: 4 hours (including chilling time)
- Yield: 15 bars 1x
Ingredients
Cookie Layer:
- 17.5-ounce package of chocolate chip cookie mix
- ½ cup (1 stick) salted butter, softened
- 1 large egg
- 24 Oreos
Cheesecake Layer:
- 16 ounces (two 8-ounce packages) cream cheese, softened
- 1 ⅓ cups powdered sugar
- 1 tablespoon cornstarch
- ⅔ cup sour cream
- 2 large eggs
- 1 ⅓ cups roughly chopped Oreos, divided
Instructions
Step 1: Prepare the Baking Pan
Preheat your oven to 350°F (175°C). Line a 9×13-inch baking pan with parchment paper, leaving some overhang for easy removal. If you don’t have parchment paper, grease the pan well with butter or non-stick cooking spray.
Step 2: Make the Cookie Layer
In a large mixing bowl, combine the chocolate chip cookie mix, softened butter, and egg. Use a hand mixer or a wooden spoon to mix until the dough comes together. It should be soft and pliable but not too sticky.
Press the dough evenly into the bottom of the prepared pan, ensuring full coverage. This will be the base of your bars, so take your time spreading it out.
Step 3: Add the Oreo Layer
Arrange the Oreos evenly on top of the cookie dough, pressing them down slightly. They don’t need to be perfectly aligned—just make sure each bar will have some Oreo goodness in it.
Step 4: Make the Cheesecake Filling
In a large bowl, beat the softened cream cheese, powdered sugar, and cornstarch with a hand mixer until light and fluffy. This step is crucial to getting a smooth cheesecake texture, so make sure there are no lumps.
Mix in the sour cream until smooth. Then, add the eggs one at a time, mixing just until incorporated. Overmixing at this stage can lead to cracks in the cheesecake.
Gently fold in ⅔ cup of the chopped Oreos.
Step 5: Assemble and Bake
Spread the cheesecake mixture evenly over the Oreo layer, smoothing out the top with a spatula. Sprinkle the remaining chopped Oreos over the top for extra crunch and flavor.
Bake in the preheated oven for 35-40 minutes, or until the cheesecake is set. The center should still have a slight jiggle when you tap the pan—this ensures a creamy texture once chilled.
Step 6: Cool and Chill
Remove from the oven and let cool to room temperature on a wire rack. Once cooled, cover with plastic wrap and refrigerate for at least three hours (overnight is even better). This chilling step is essential for achieving the perfect texture.
Notes
How to Tell if Your Cheesecake is Done
- The edges should be slightly firm while the center still jiggles slightly when the pan is shaken.
- If using a thermometer, the internal temperature should be around 150°F (65°C).
Troubleshooting Common Issues
- Cracks in the Cheesecake: Overmixing or baking too long can cause cracks. Stick to the recommended mixing method and baking time.
- Cheesecake Didn’t Set Properly: Make sure to chill for at least 3 hours. If it still seems too soft, chill longer.
- Soggy Crust: Be sure to let the bars cool before chilling to prevent condensation from making the base soggy.
Cutting Tips for Perfect Squares
- Use a hot, sharp knife (run it under hot water and wipe dry before cutting).
- Wipe the knife clean between cuts for neater slices.
Storage and Freezing Tips
- Refrigeration: Store in an airtight container in the refrigerator for up to 5 days.
- Freezing: Wrap individual bars tightly in plastic wrap, then store in an airtight container for up to 3 months. Thaw in the refrigerator before serving.
- Prep Time: 15 minutes
- Cook Time: 45 minutes
The name may be playful, but the recipe itself is incredibly straightforward, making it an excellent choice for beginner bakers. If you’ve ever hesitated to try making cheesecake from scratch, this recipe provides the perfect starting point. There’s no need for a water bath or complicated techniques—just a simple layering process that results in a show-stopping dessert.
One of the best things about these bars is their versatility. You can switch up the flavors by using different types of cookies, add extra mix-ins like chocolate chips or chopped nuts, or drizzle them with caramel or chocolate sauce for an extra touch of decadence. Whether you’re baking for a special occasion, a family gathering, or just a personal treat, these bars are guaranteed to impress.
Let’s dive into the details of how to make these irresistible cheesecake bars, with plenty of beginner-friendly tips along the way.
Ingredients and Preparation
Gathering the right ingredients is the first step to a successful bake. Below is a complete list of what you’ll need, along with a few possible substitutions to fit different dietary preferences and pantry availability.
Cookie Layer:
- 17.5-ounce package of chocolate chip cookie mix
- ½ cup (1 stick) salted butter, softened
- 1 large egg
- 24 Oreos
Cheesecake Layer:
- 16 ounces (two 8-ounce packages) cream cheese, softened
- 1 ⅓ cups powdered sugar
- 1 tablespoon cornstarch
- ⅔ cup sour cream
- 2 large eggs
- 1 ⅓ cups roughly chopped Oreos, divided
Optional Garnishes:
- Caramel sauce
- Chocolate sauce
- Chopped nuts
- Extra chocolate chips
Ingredient Substitutions and Variations:
- Chocolate Chip Cookie Mix Alternative: If you prefer homemade dough, you can make your own using 1 ½ cups all-purpose flour, ½ cup granulated sugar, ½ cup brown sugar, ½ teaspoon baking soda, ¼ teaspoon salt, ½ cup butter, 1 egg, and ½ teaspoon vanilla extract.
- Oreo Alternatives: Try different flavors such as golden Oreos, peanut butter Oreos, or any other favorite sandwich cookie.
- Dairy-Free Version: Use dairy-free cream cheese and sour cream substitutes.
- Extra Crunch: Add chopped nuts or even crushed pretzels for a salty-sweet twist.
Step-by-Step Instructions
Step 1: Prepare the Baking Pan
Preheat your oven to 350°F (175°C). Line a 9×13-inch baking pan with parchment paper, leaving some overhang for easy removal. If you don’t have parchment paper, grease the pan well with butter or non-stick cooking spray.
Step 2: Make the Cookie Layer
In a large mixing bowl, combine the chocolate chip cookie mix, softened butter, and egg. Use a hand mixer or a wooden spoon to mix until the dough comes together. It should be soft and pliable but not too sticky.
Press the dough evenly into the bottom of the prepared pan, ensuring full coverage. This will be the base of your bars, so take your time spreading it out.
Step 3: Add the Oreo Layer
Arrange the Oreos evenly on top of the cookie dough, pressing them down slightly. They don’t need to be perfectly aligned—just make sure each bar will have some Oreo goodness in it.
Step 4: Make the Cheesecake Filling
In a large bowl, beat the softened cream cheese, powdered sugar, and cornstarch with a hand mixer until light and fluffy. This step is crucial to getting a smooth cheesecake texture, so make sure there are no lumps.
Mix in the sour cream until smooth. Then, add the eggs one at a time, mixing just until incorporated. Overmixing at this stage can lead to cracks in the cheesecake.
Gently fold in ⅔ cup of the chopped Oreos.
Step 5: Assemble and Bake
Spread the cheesecake mixture evenly over the Oreo layer, smoothing out the top with a spatula. Sprinkle the remaining chopped Oreos over the top for extra crunch and flavor.
Bake in the preheated oven for 35-40 minutes, or until the cheesecake is set. The center should still have a slight jiggle when you tap the pan—this ensures a creamy texture once chilled.
Step 6: Cool and Chill
Remove from the oven and let cool to room temperature on a wire rack. Once cooled, cover with plastic wrap and refrigerate for at least three hours (overnight is even better). This chilling step is essential for achieving the perfect texture.
Beginner Tips and Notes
How to Tell if Your Cheesecake is Done
- The edges should be slightly firm while the center still jiggles slightly when the pan is shaken.
- If using a thermometer, the internal temperature should be around 150°F (65°C).
Troubleshooting Common Issues
- Cracks in the Cheesecake: Overmixing or baking too long can cause cracks. Stick to the recommended mixing method and baking time.
- Cheesecake Didn’t Set Properly: Make sure to chill for at least 3 hours. If it still seems too soft, chill longer.
- Soggy Crust: Be sure to let the bars cool before chilling to prevent condensation from making the base soggy.
Cutting Tips for Perfect Squares
- Use a hot, sharp knife (run it under hot water and wipe dry before cutting).
- Wipe the knife clean between cuts for neater slices.
Storage and Freezing Tips
- Refrigeration: Store in an airtight container in the refrigerator for up to 5 days.
- Freezing: Wrap individual bars tightly in plastic wrap, then store in an airtight container for up to 3 months. Thaw in the refrigerator before serving.

Serving Suggestions
These bars are already rich and indulgent, but adding a few extras can elevate them even further. Here are some delicious serving ideas:
- Drizzle with caramel or chocolate sauce for added sweetness.
- Serve with fresh berries like strawberries or raspberries for a tart contrast.
- Pair with a scoop of vanilla ice cream for an extra creamy treat.
- Sprinkle with crushed nuts for extra texture.
These bars are perfect for potlucks, family gatherings, or even as a special weekend treat.
Conclusion: Why You Should Try This Recipe
If you’re new to baking, this recipe is the perfect confidence booster. It combines familiar, store-bought ingredients with an easy-to-follow process, resulting in a dessert that looks and tastes impressive with minimal effort.
Not only do these Slutty Cheesecake Bars deliver on taste and texture, but they also allow for creativity. You can experiment with different flavors, mix-ins, and toppings to make them your own.
Now it’s time to get baking. Try these bars and share your experience—whether it’s your first time baking cheesecake or you’re already a dessert pro, I’d love to hear how they turn out. Happy baking!