Easy Salted Nut Roll Bars: A Beginner-Friendly Treat
There’s something special about a dessert that perfectly balances sweet and salty flavors. If you love peanut butter, marshmallows, and crunchy textures, these Salted Nut Roll Bars will become your new favorite treat. I remember making these for a last-minute gathering, hoping for something easy yet delicious. They disappeared within minutes, and people kept asking for the recipe. That’s when I knew this was a dessert worth sharing.
Print
Easy Salted Nut Roll Bars: A Beginner-Friendly Treat
Craving the perfect balance of sweet, salty, and chewy? These Easy Salted Nut Roll Bars have it all! A buttery base, gooey marshmallow layer, and crunchy peanut topping come together for a no-fuss treat that’s perfect for beginners. Whip up a batch in no time and enjoy a snack that satisfies every craving! 🥜🍯
- Total Time: 32 minutes
- Yield: 12-16 bars
Ingredients
For the crust:
- 1 box yellow cake mix
- 1 egg
- ¾ cup melted butter, divided
For the topping:
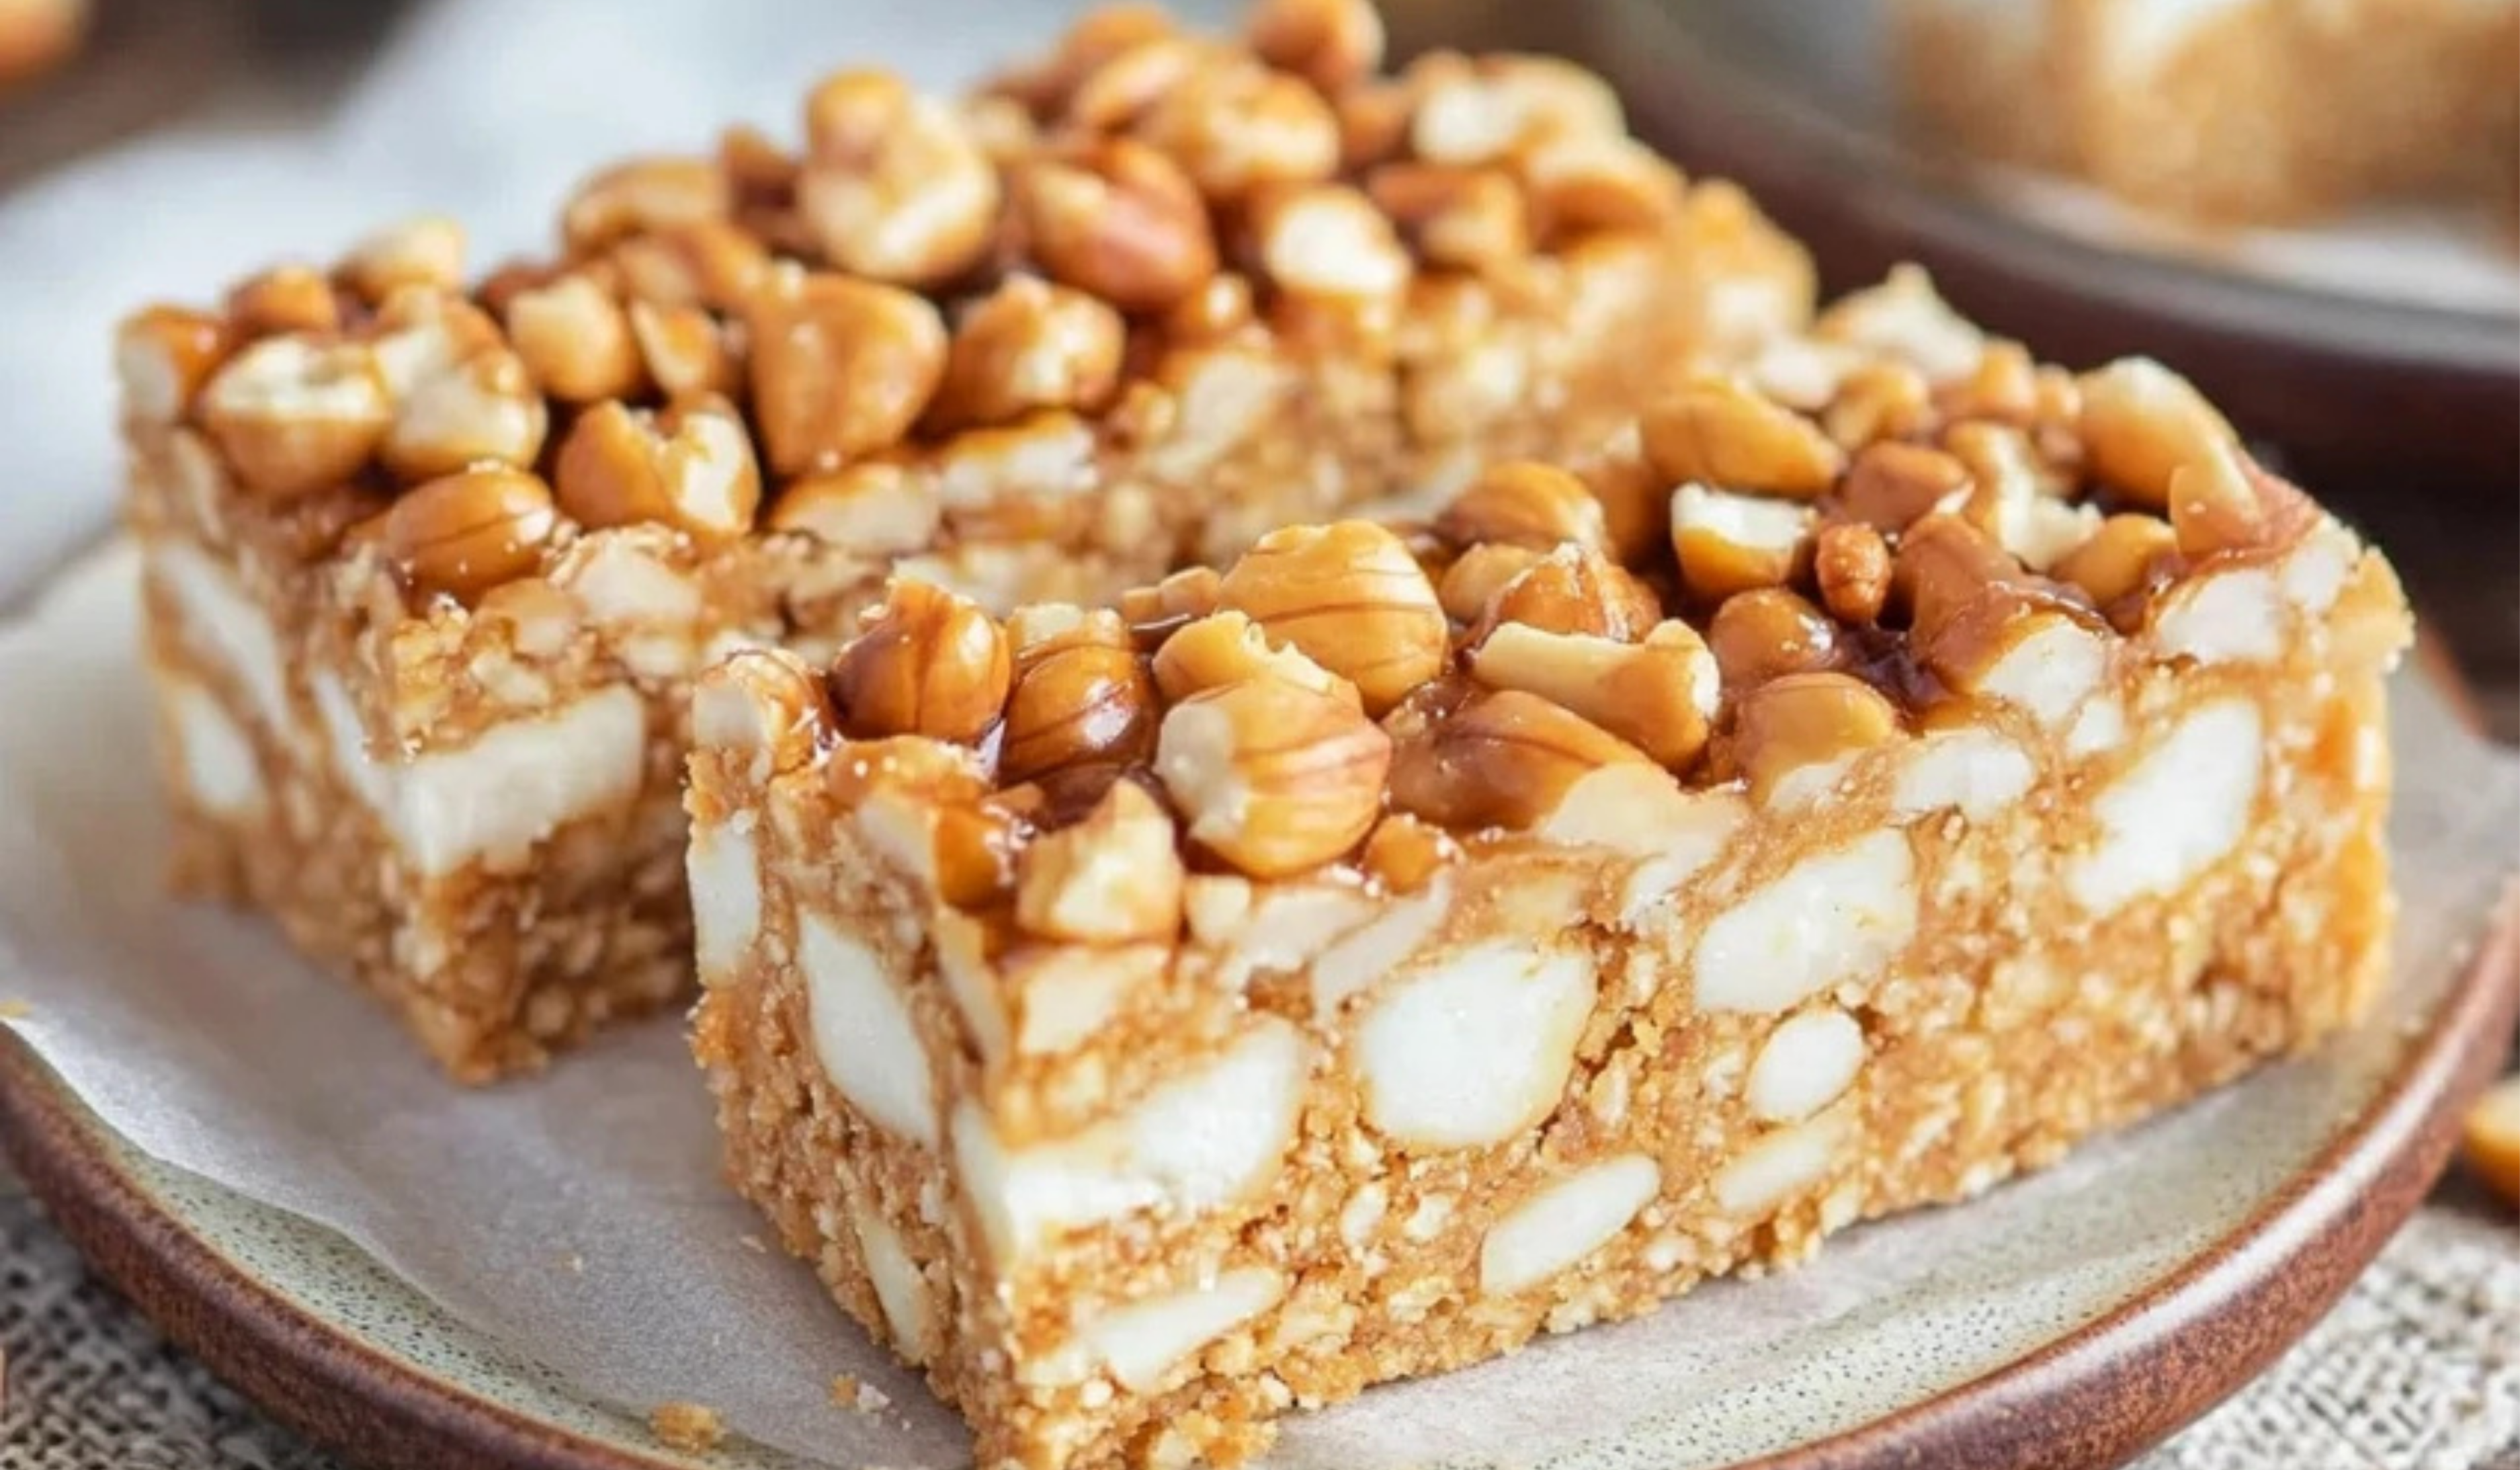
- 3 cups miniature marshmallows
- 12-ounce bag peanut butter chips
- ½ cup light corn syrup
- 1 teaspoon vanilla extract
- 2 cups salted peanuts
- 2 cups Rice Krispies cereal
Instructions
Step 1: Preheat and Prepare the Pan
Preheat your oven to 350°F (175°C). Line a 9×9-inch baking pan with parchment paper or lightly grease it with baking spray. This prevents the bars from sticking and makes cleanup easier.
Step 2: Make the Crust
In a mixing bowl, beat together the cake mix, egg, and ¼ cup of melted butter until well combined. The mixture will be thick and slightly crumbly. Press it evenly into the bottom of the prepared baking pan.
Bake for 10-12 minutes until the crust is set and lightly golden. It should be firm to the touch but not overly browned.
Step 3: Prepare the Peanut Butter Mixture
While the crust is baking, make the topping:
- In a saucepan over low heat, melt the remaining ½ cup butter, peanut butter chips, and light corn syrup. Stir frequently until the mixture is completely smooth.
- Remove from heat and stir in vanilla extract.
- Add salted peanuts and Rice Krispies, stirring gently until everything is coated in the peanut butter mixture.
Step 4: Add Marshmallows and Assemble
Once the crust is baked, sprinkle 3 cups of miniature marshmallows evenly over the hot crust. Return the pan to the oven for about 3 minutes, just until the marshmallows puff up.
Remove the pan from the oven and immediately spread the peanut butter mixture over the marshmallow layer. Use a spatula to spread it evenly, ensuring every part is covered.
Step 5: Chill and Cut
Refrigerate the bars for at least 1 hour to set. Once firm, use a sharp knife to cut into squares or rectangles. Enjoy!
Notes
1. How to Tell If the Crust is Ready
The crust should look set but not overly dry. If you press lightly on it, it should hold together without feeling sticky. Overbaking can make it too hard, so keep an eye on the timer.
2. Preventing the Peanut Butter Mixture from Burning
Since peanut butter chips can burn easily, use low heat and stir constantly. If you notice any scorching, remove the pan from heat and stir to distribute the heat evenly.
3. Getting Clean Slices
To cut clean bars, use a sharp knife and wipe it clean between cuts. Chilling the bars before slicing helps them hold their shape.
4. Substituting Proteins for a Savory Twist
If you want to add a unique twist, some people enjoy a hint of savory crunch in sweet desserts. Instead of pork or ham-based toppings like bacon, try finely chopped crispy beef or chicken bits sprinkled over the top for a salty contrast.
- Prep Time: 20 minutes
- Cook Time: 12 minutes
What makes this recipe perfect for beginners? It starts with a boxed cake mix, cutting down on prep time and effort. The rest of the ingredients are simple pantry staples, making it easy to whip up without a special trip to the store. The layering process is straightforward, with no complicated techniques involved. Plus, these bars are versatile—you can tweak the ingredients based on what you have on hand.
Whether you’re making these for a party, a family dessert, or just because you’re craving something sweet, you’ll love how easy they are to prepare. Let’s get started.
Ingredients and Preparation
Ingredients
For the crust:
- 1 box yellow cake mix
- 1 egg
- ¾ cup melted butter, divided
For the topping:
- 3 cups miniature marshmallows
- 12-ounce bag peanut butter chips
- ½ cup light corn syrup
- 1 teaspoon vanilla extract
- 2 cups salted peanuts
- 2 cups Rice Krispies cereal
Ingredient Substitutions and Alternatives
- Cake Mix Alternative: If you don’t have yellow cake mix, you can use a vanilla or butter cake mix. A homemade shortbread crust can also work if you prefer to make it from scratch.
- Peanut Butter Chips Substitute: If you have a peanut allergy or prefer a different flavor, white chocolate or butterscotch chips can be a great alternative.
- Corn Syrup Substitute: Honey or maple syrup can replace light corn syrup, though the texture may vary slightly.
- Nut Variations: If you don’t like peanuts, you can swap them with chopped almonds, cashews, or pecans.
- Rice Krispies Alternative: Crushed graham crackers or chopped pretzels can replace Rice Krispies for a different texture.
Step-by-Step Instructions
Step 1: Preheat and Prepare the Pan
Preheat your oven to 350°F (175°C). Line a 9×9-inch baking pan with parchment paper or lightly grease it with baking spray. This prevents the bars from sticking and makes cleanup easier.
Step 2: Make the Crust
In a mixing bowl, beat together the cake mix, egg, and ¼ cup of melted butter until well combined. The mixture will be thick and slightly crumbly. Press it evenly into the bottom of the prepared baking pan.
Bake for 10-12 minutes until the crust is set and lightly golden. It should be firm to the touch but not overly browned.
Step 3: Prepare the Peanut Butter Mixture
While the crust is baking, make the topping:
- In a saucepan over low heat, melt the remaining ½ cup butter, peanut butter chips, and light corn syrup. Stir frequently until the mixture is completely smooth.
- Remove from heat and stir in vanilla extract.
- Add salted peanuts and Rice Krispies, stirring gently until everything is coated in the peanut butter mixture.
Step 4: Add Marshmallows and Assemble
Once the crust is baked, sprinkle 3 cups of miniature marshmallows evenly over the hot crust. Return the pan to the oven for about 3 minutes, just until the marshmallows puff up.
Remove the pan from the oven and immediately spread the peanut butter mixture over the marshmallow layer. Use a spatula to spread it evenly, ensuring every part is covered.
Step 5: Chill and Cut
Refrigerate the bars for at least 1 hour to set. Once firm, use a sharp knife to cut into squares or rectangles. Enjoy!
Beginner Tips and Notes
1. How to Tell If the Crust is Ready
The crust should look set but not overly dry. If you press lightly on it, it should hold together without feeling sticky. Overbaking can make it too hard, so keep an eye on the timer.
2. Preventing the Peanut Butter Mixture from Burning
Since peanut butter chips can burn easily, use low heat and stir constantly. If you notice any scorching, remove the pan from heat and stir to distribute the heat evenly.
3. Getting Clean Slices
To cut clean bars, use a sharp knife and wipe it clean between cuts. Chilling the bars before slicing helps them hold their shape.
4. Substituting Proteins for a Savory Twist
If you want to add a unique twist, some people enjoy a hint of savory crunch in sweet desserts. Instead of pork or ham-based toppings like bacon, try finely chopped crispy beef or chicken bits sprinkled over the top for a salty contrast.

Serving Suggestions
Pairing Ideas
These Salted Nut Roll Bars are delicious on their own, but they also pair well with:
- A cup of coffee or hot cocoa for a cozy snack.
- Vanilla ice cream for an extra indulgent treat.
- Fresh fruit like sliced apples or strawberries to balance the sweetness.
How to Store Leftovers
- Room Temperature: Store in an airtight container for up to 3 days.
- Refrigerator: Keep them in the fridge for up to a week to maintain freshness.
- Freezer: Wrap bars individually in plastic wrap, then store them in a freezer-safe container. They can last up to 3 months. Thaw at room temperature before serving.
Why This Recipe Works for Beginners
- Minimal Ingredients – Uses mostly pantry staples, so no need for fancy ingredients.
- Quick Prep and Bake Time – Ready in just over 30 minutes.
- No Complicated Techniques – No special baking skills required.
- Versatile and Customizable – Easily adaptable to different flavors and dietary needs.
- Perfect for Any Occasion – Great for parties, potlucks, or just a simple homemade treat.
Conclusion: Try It and Share Your Experience
If you’re new to baking, these Salted Nut Roll Bars are the perfect place to start. The combination of buttery cake, gooey marshmallows, and crunchy peanut topping makes them irresistible. Plus, the easy step-by-step method ensures success every time.
I’d love to hear how your bars turn out! Did you try any fun ingredient swaps? Share your experience in the comments or let me know if you have any questions. Happy baking!