Easy & Irresistible King’s Hawaiian Cheesecake Danish: A Beginner’s Guide
There is something comforting about a warm, homemade pastry that is both simple to make and incredibly satisfying to eat. This King’s Hawaiian Cheesecake Danish is a beginner-friendly recipe that delivers a soft, buttery texture with a creamy, sweet filling. It is the perfect balance of richness and lightness, making it ideal for both breakfast and dessert.
Print
Easy & Irresistible King’s Hawaiian Cheesecake Danish: A Beginner’s Guide
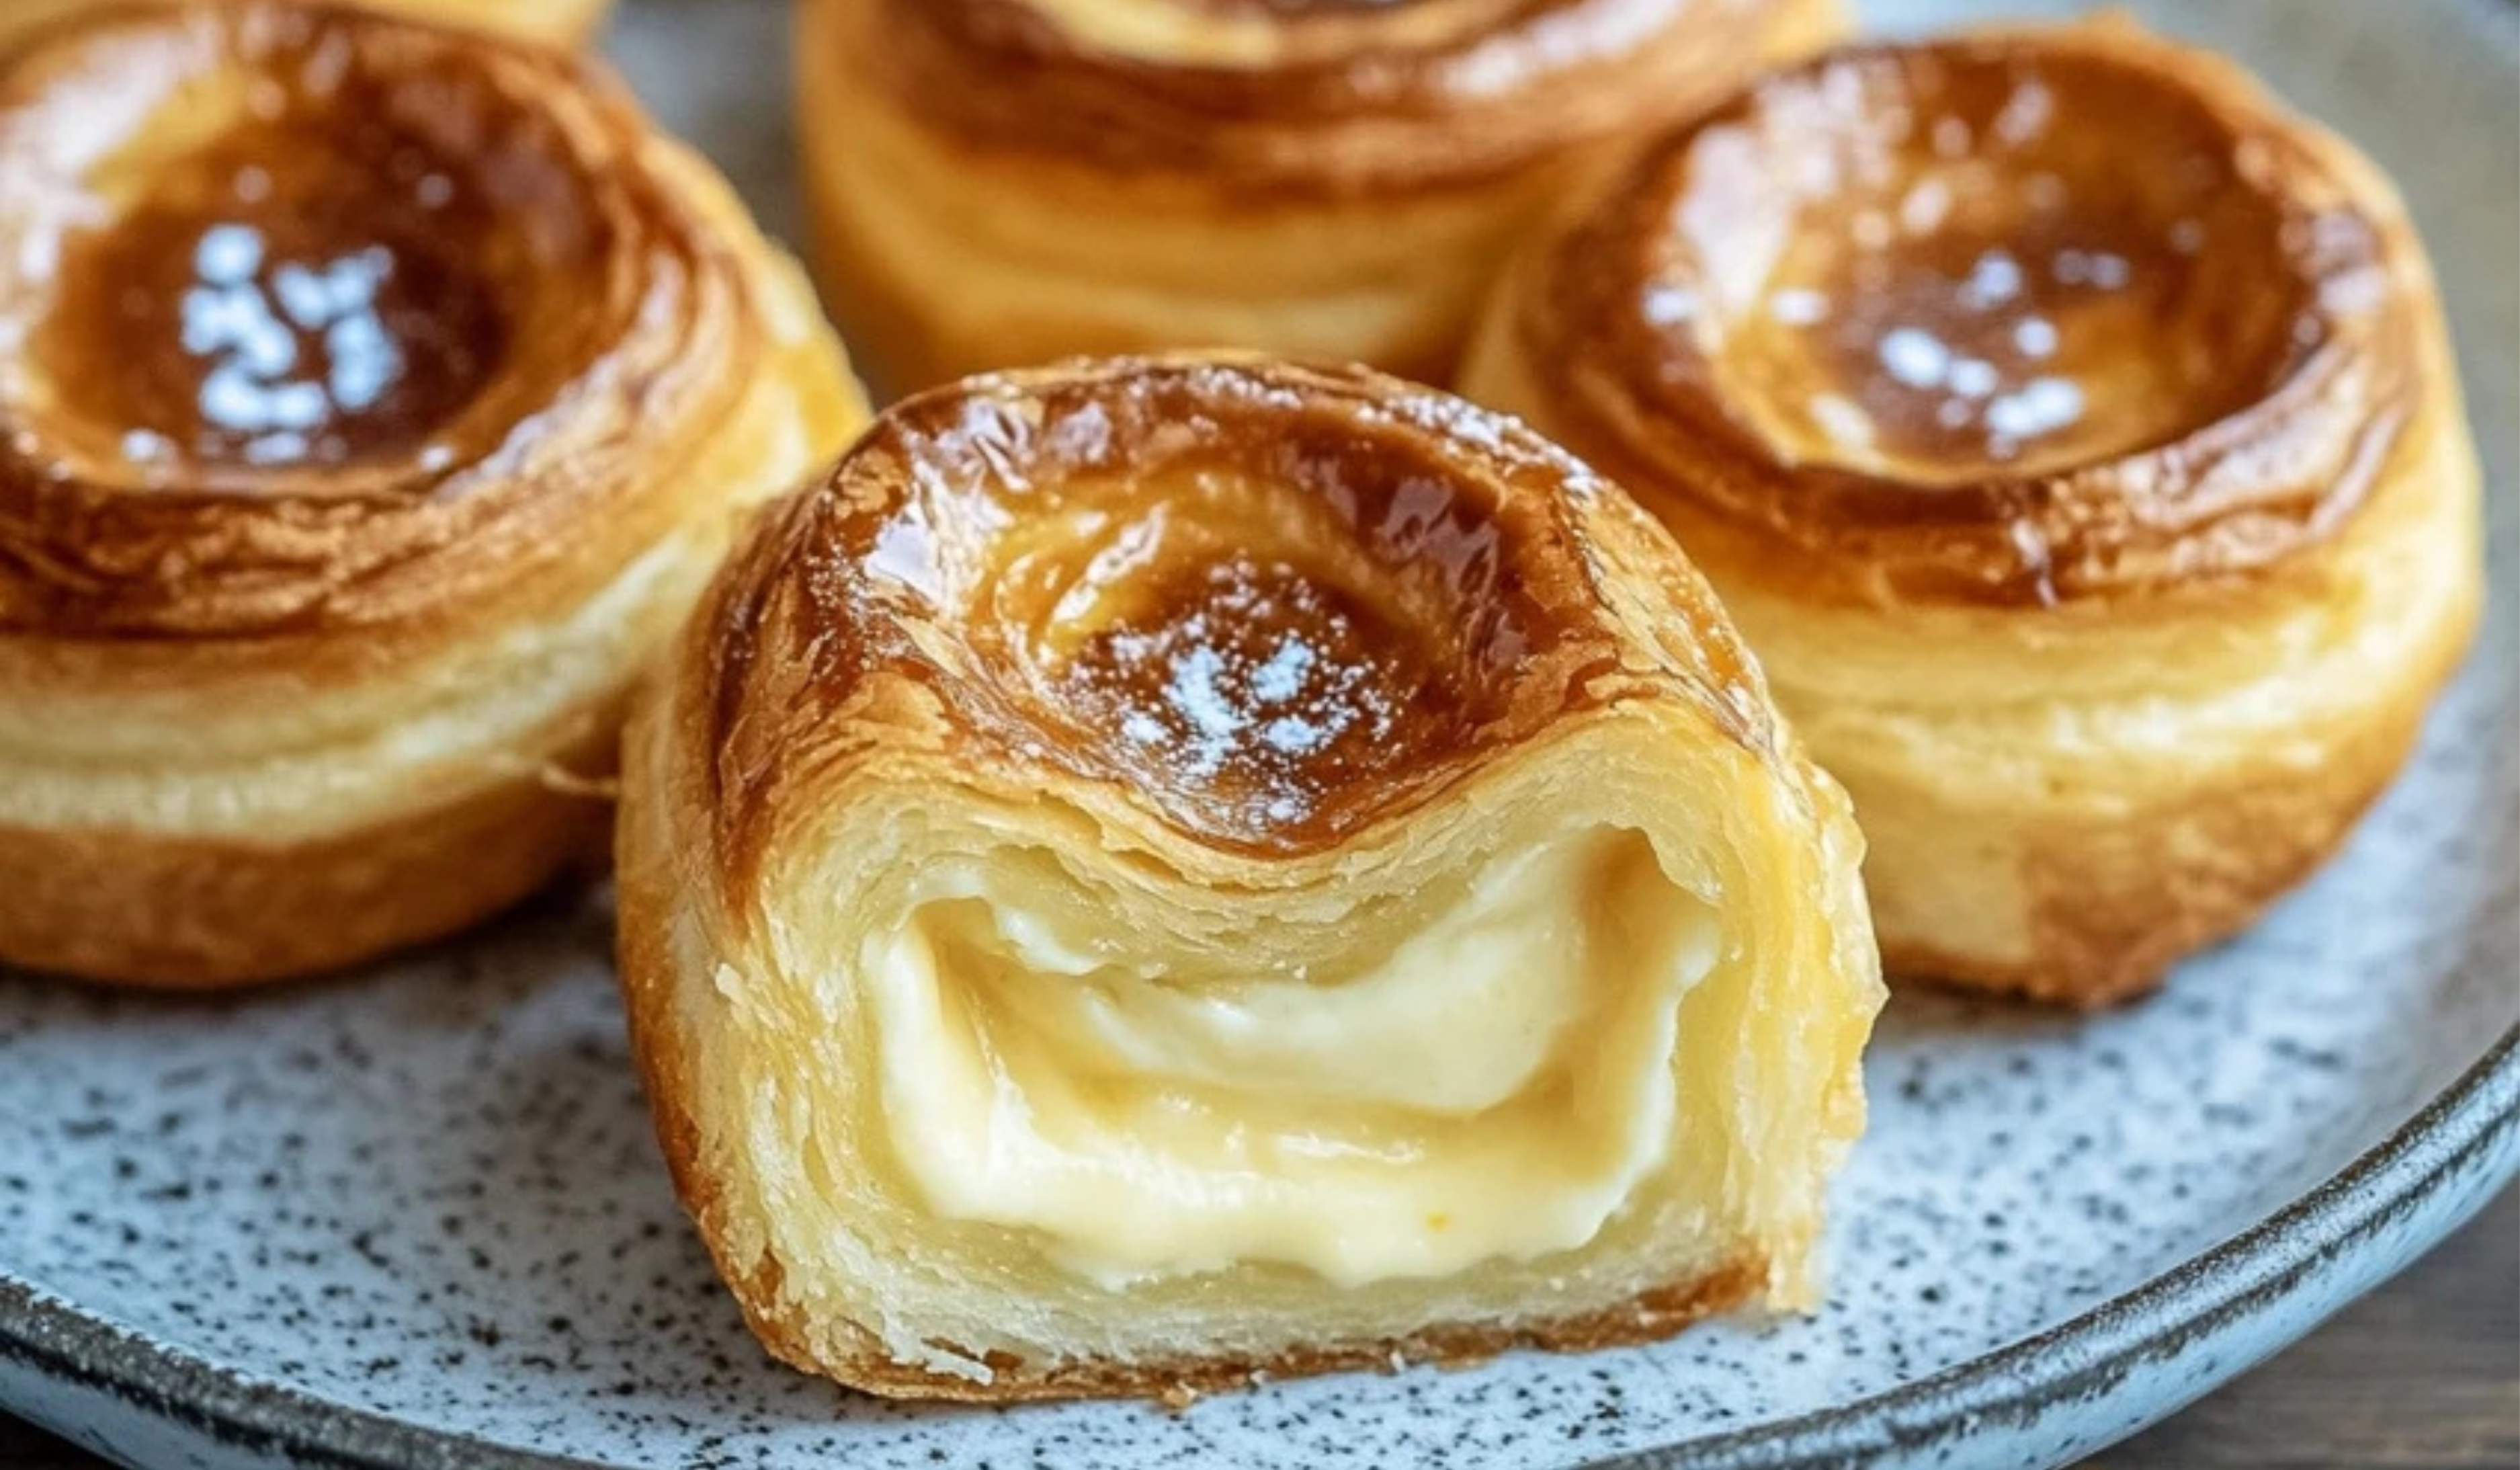
Soft, buttery King’s Hawaiian rolls filled with rich, creamy cheesecake and baked to golden perfection—these Cheesecake Danishes are pure indulgence! Sweet, fluffy, and beginner-friendly, they’re the perfect treat for any time of day! 🍰🍯🥐✨
- Total Time: 25-30 minutes
- Yield: 12 servings 1x
Ingredients
For the Danish:
- 1 package King’s Hawaiian rolls (12 rolls)
- 8 oz cream cheese, softened
- 1/3 cup granulated sugar
- 1 teaspoon vanilla extract
- 1/2 cup fruit preserves (strawberry, raspberry, or any preferred flavor)
For the Glaze:
- 1/2 cup powdered sugar
- 2–3 teaspoons milk
- 1/2 teaspoon vanilla extract
Instructions
Step 1: Prepare the Rolls
- Preheat the oven to 350°F (175°C) to ensure even baking.
- Place the King’s Hawaiian rolls in a baking dish as a whole block. Do not separate them.
- Using a small spoon or your fingers, gently press a shallow well into the center of each roll. Be careful not to press too hard, as you do not want to break through the bottom.
Step 2: Make the Cheesecake Filling
- In a medium bowl, add softened cream cheese, granulated sugar, and vanilla extract.
- Use a hand mixer or a whisk to blend the ingredients until smooth and creamy. The mixture should have no lumps.
- Spoon or pipe the cheesecake filling into each well, filling them about halfway.
Step 3: Add the Fruit Preserves
- Take a small spoonful of fruit preserves and gently spread it over the cheesecake filling in each roll.
- Do not overload the rolls with too much preserves, as this can cause the filling to overflow during baking.
Step 4: Bake the Danish
- Place the baking dish in the preheated oven and bake for 15-18 minutes, or until the edges of the rolls turn a light golden brown and the cheesecake filling is set.
- Remove from the oven and let them cool slightly before adding the glaze.
Step 5: Prepare the Glaze
- In a small bowl, whisk together powdered sugar, milk, and vanilla extract until smooth.
- If the glaze is too thick, add a few extra drops of milk to reach the desired consistency. If it is too thin, add a little more powdered sugar.
- Drizzle the glaze over the warm danishes using a spoon or a small piping bag.
Step 6: Serve and Enjoy
- Gently pull the danishes apart and serve them warm.
- These can be enjoyed with coffee, tea, or as a standalone treat.
Notes
How to Tell When It’s Done
- The edges of the rolls should be light golden brown, and the cheesecake filling should be set but still slightly soft in the center.
- If the rolls are browning too quickly but the filling is not fully set, cover them loosely with aluminum foil and continue baking.
Common Mistakes and How to Fix Them
- Overfilling with preserves: Too much fruit preserves can cause the rolls to become soggy. Use just a small amount.
- Cheesecake filling is lumpy: Ensure that the cream cheese is fully softened before mixing. If it is too cold, it will not blend smoothly.
- Dough becomes too dry: If the rolls dry out too much after baking, brush them lightly with a bit of melted butter before serving.
Efficient Kitchen Tips
- To soften cream cheese quickly, cut it into small pieces and let it sit at room temperature for 10-15 minutes.
- Use a ziplock bag with the tip cut off as a simple piping bag for even distribution of the filling.
- Make cleanup easier by lining your baking dish with parchment paper before placing the rolls.
- Prep Time: 10 minutes
- Cook Time: 15-18 minutes
Many beginner cooks shy away from making pastries because they assume they require advanced skills or specialized equipment. However, this recipe proves otherwise. With just a few ingredients and minimal effort, anyone can create a delicious homemade treat. Using King’s Hawaiian rolls eliminates the need for making dough from scratch, allowing for a quick and hassle-free preparation process. The cheesecake filling requires only a few simple steps, and the fruit preserves add a bright, flavorful contrast.
This recipe is great for busy mornings, family gatherings, or special occasions. Whether you are hosting guests or simply looking to treat yourself, these cheesecake danishes will impress without demanding hours in the kitchen. The sweetness of the Hawaiian rolls, combined with the creamy filling and fruity topping, creates a delightful balance that is easy to achieve. Even if this is your first time baking, this guide will walk you through every step to ensure success.
Ingredients and Preparation
For the Danish:
- 1 package King’s Hawaiian rolls (12 rolls)
- 8 oz cream cheese, softened
- 1/3 cup granulated sugar
- 1 teaspoon vanilla extract
- 1/2 cup fruit preserves (strawberry, raspberry, or any preferred flavor)
For the Glaze:
- 1/2 cup powdered sugar
- 2-3 teaspoons milk
- 1/2 teaspoon vanilla extract
Ingredient Substitutions:
- Instead of cream cheese, you can use mascarpone for a milder, slightly sweeter filling.
- If you prefer a different sweetener, replace granulated sugar with honey or maple syrup.
- Instead of fruit preserves, try chocolate chips, caramel, or even peanut butter for a different flavor profile.
- If you want a stronger vanilla flavor, consider adding a small amount of almond extract to complement the sweetness.
Before starting, it is important to have all your ingredients measured and ready. This preparation step, known as mise en place, helps prevent mistakes and ensures a smoother cooking process.
Step-by-Step Instructions
Step 1: Prepare the Rolls
- Preheat the oven to 350°F (175°C) to ensure even baking.
- Place the King’s Hawaiian rolls in a baking dish as a whole block. Do not separate them.
- Using a small spoon or your fingers, gently press a shallow well into the center of each roll. Be careful not to press too hard, as you do not want to break through the bottom.
Step 2: Make the Cheesecake Filling
- In a medium bowl, add softened cream cheese, granulated sugar, and vanilla extract.
- Use a hand mixer or a whisk to blend the ingredients until smooth and creamy. The mixture should have no lumps.
- Spoon or pipe the cheesecake filling into each well, filling them about halfway.
Step 3: Add the Fruit Preserves
- Take a small spoonful of fruit preserves and gently spread it over the cheesecake filling in each roll.
- Do not overload the rolls with too much preserves, as this can cause the filling to overflow during baking.
Step 4: Bake the Danish
- Place the baking dish in the preheated oven and bake for 15-18 minutes, or until the edges of the rolls turn a light golden brown and the cheesecake filling is set.
- Remove from the oven and let them cool slightly before adding the glaze.
Step 5: Prepare the Glaze
- In a small bowl, whisk together powdered sugar, milk, and vanilla extract until smooth.
- If the glaze is too thick, add a few extra drops of milk to reach the desired consistency. If it is too thin, add a little more powdered sugar.
- Drizzle the glaze over the warm danishes using a spoon or a small piping bag.
Step 6: Serve and Enjoy
- Gently pull the danishes apart and serve them warm.
- These can be enjoyed with coffee, tea, or as a standalone treat.
Beginner Tips and Notes
How to Tell When It’s Done
- The edges of the rolls should be light golden brown, and the cheesecake filling should be set but still slightly soft in the center.
- If the rolls are browning too quickly but the filling is not fully set, cover them loosely with aluminum foil and continue baking.
Common Mistakes and How to Fix Them
- Overfilling with preserves: Too much fruit preserves can cause the rolls to become soggy. Use just a small amount.
- Cheesecake filling is lumpy: Ensure that the cream cheese is fully softened before mixing. If it is too cold, it will not blend smoothly.
- Dough becomes too dry: If the rolls dry out too much after baking, brush them lightly with a bit of melted butter before serving.
Efficient Kitchen Tips
- To soften cream cheese quickly, cut it into small pieces and let it sit at room temperature for 10-15 minutes.
- Use a ziplock bag with the tip cut off as a simple piping bag for even distribution of the filling.
- Make cleanup easier by lining your baking dish with parchment paper before placing the rolls.

Serving Suggestions
Pairing with Other Foods
These cheesecake danishes are delicious on their own, but they can be paired with:
- Fresh fruit like strawberries, blueberries, or orange slices for a refreshing contrast.
- Greek yogurt with honey and nuts for added texture and protein.
- Scrambled eggs or a savory omelet to balance out the sweetness.
Best Ways to Store and Reheat
- Refrigeration: Store any leftover danishes in an airtight container in the refrigerator for up to 2 days.
- Reheating: Warm them in the oven at 300°F (150°C) for 5 minutes or in the microwave for 15-20 seconds to restore their texture.
- Freezing: If you want to store them longer, freeze the baked danishes without the glaze in an airtight container. When ready to eat, thaw them in the refrigerator overnight and reheat in the oven.
Engagement Features
Baking should be a fun and rewarding experience, especially for beginners. This recipe is designed to be easy and approachable, and it offers plenty of room for customization. Whether you try a new filling, experiment with different glazes, or pair it with your favorite breakfast items, the possibilities are endless.
If you make these King’s Hawaiian Cheesecake Danishes, share your experience. Did you add your own twist? Did you run into any challenges? Your feedback can help other beginners feel more confident in their baking journey.
Cooking is a skill that grows with practice. Even if you are just starting out, simple recipes like this one can build your confidence in the kitchen. The joy of making something from scratch and sharing it with others is one of the best parts of cooking. Try this recipe, enjoy the process, and take pride in creating a delicious homemade treat.