Ingredients
Scale
For the Katsu Sauce:
- ½ cup ketchup – The base for the tangy sauce.
- 2 tbsp soy sauce – Adds depth and umami.
- 2 tsp brown sugar – Balances the tang with a touch of sweetness.
- 1 tbsp mirin – A Japanese rice wine that brings a hint of sweetness and acidity.
- 2 tsp Worcestershire sauce – For a savory and slightly smoky note.
- 1 tsp freshly grated ginger – Adds a fresh, spicy kick.
- 1 tsp finely minced garlic – Enhances the sauce with a touch of warmth and richness.
For the Chicken Katsu:
- 1 lb boneless, skinless chicken breasts (cut in half horizontally) – The star of the dish, perfect for frying and crisping up.
- Salt – To season and draw out moisture.
- 1 ½ cups all-purpose flour – To coat the chicken and create a crispy outer layer.
- 3 eggs – Used for the egg wash to help the breadcrumbs adhere to the chicken.
- 1 ½ tbsp water – To thin out the egg wash for an even coat.
- 3 cups panko breadcrumbs – These Japanese breadcrumbs create a light, airy, and ultra-crispy crust.
- Vegetable oil – For frying, enough to coat the bottom of your pan.
Instructions
1. Make the Katsu Sauce
- In a small bowl, combine ketchup, soy sauce, brown sugar, mirin, Worcestershire sauce, freshly grated ginger, and minced garlic.
- Stir the ingredients well until fully blended.
- Let the sauce rest for at least 30 minutes to allow the flavors to meld together.
2. Prepare the Chicken
- Lay the chicken breasts between two pieces of plastic wrap.
- Gently pound the chicken with a meat mallet or rolling pin until it is about ¼ inch thick.
- Sprinkle salt liberally on both sides of the chicken.
- Cover the chicken and refrigerate for 1 hour to let it rest. This step helps tenderize the chicken and lock in moisture, ensuring a juicy final result.(Note: While this step is recommended, you can skip it if you’re short on time.)
3. Set Up the Breading Station
- Set up a breading station with three bowls:
- In the first bowl, place all-purpose flour.
- In the second bowl, whisk together eggs and 1 ½ tbsp water until well combined.
- In the third bowl, add the panko breadcrumbs.
- Dredge each chicken cutlet in the flour, shaking off any excess. Dip it into the egg wash, coating it completely, and then coat with the panko breadcrumbs, pressing gently to ensure the breadcrumbs adhere.
4. Fry the Chicken
- In a large pan (preferably an iron skillet or stainless steel), add enough vegetable oil to coat the bottom about ½ inch deep.
- Heat the oil to 350°F. You can check the temperature with a thermometer or drop a small piece of bread into the oil—if it browns quickly, the oil is ready.
- Carefully add the breaded chicken to the pan, cooking for 1 to 2 minutes on the first side until the crust sets.
- Flip the chicken and cook for another 1 to 2 minutes on the second side until it’s golden brown.
- Continue flipping the chicken until both sides are evenly golden and crispy.
- Transfer the fried chicken to a wire rack to drain excess oil.
5. Finish Cooking the Chicken
- Preheat your oven to 200°F.
- Once the chicken is browned, place it on a wire rack in the oven to finish cooking for another 7 to 8 minutes. The chicken should reach an internal temperature of 165°F before serving.
6. Serve
- Once the chicken is fully cooked, remove it from the oven.
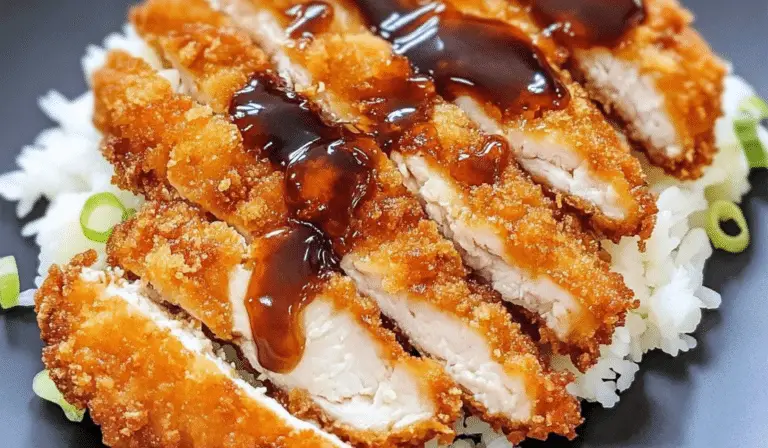
- Slice the chicken into thin strips, perfect for picking up with chopsticks.
- Serve with a generous drizzle of the homemade katsu sauce. It’s great alongside steamed rice or your favorite side dishes like coleslaw or pickled vegetables.
Notes
- Chicken Substitutes:
- You can use chicken thighs instead of chicken breasts for a richer, juicier alternative.
- For a lighter option, try air frying the breaded chicken instead of frying it in oil. Just spray the cutlets lightly with cooking spray and cook in the air fryer at 375°F for 15-20 minutes.
- Breading Tip:
- For extra crunch, double bread the chicken by dipping the chicken in the egg wash and panko breadcrumbs twice. This creates an even thicker, crispier coating.
- Make-Ahead Tip:
- The breaded chicken can be stored in the fridge for up to 24 hours before frying, or you can freeze the breaded cutlets for up to 3 months. Just make sure to place parchment paper between layers when freezing to prevent sticking.
- Serving Suggestions:
- Serve with steamed rice, a light salad, or a bowl of miso soup for a complete, comforting meal.
- For extra flavor, drizzle some of the katsu sauce over the rice or serve it as a dipping sauce on the side.
- Prep Time: 10 minutes
- Cook Time: 20 minutes