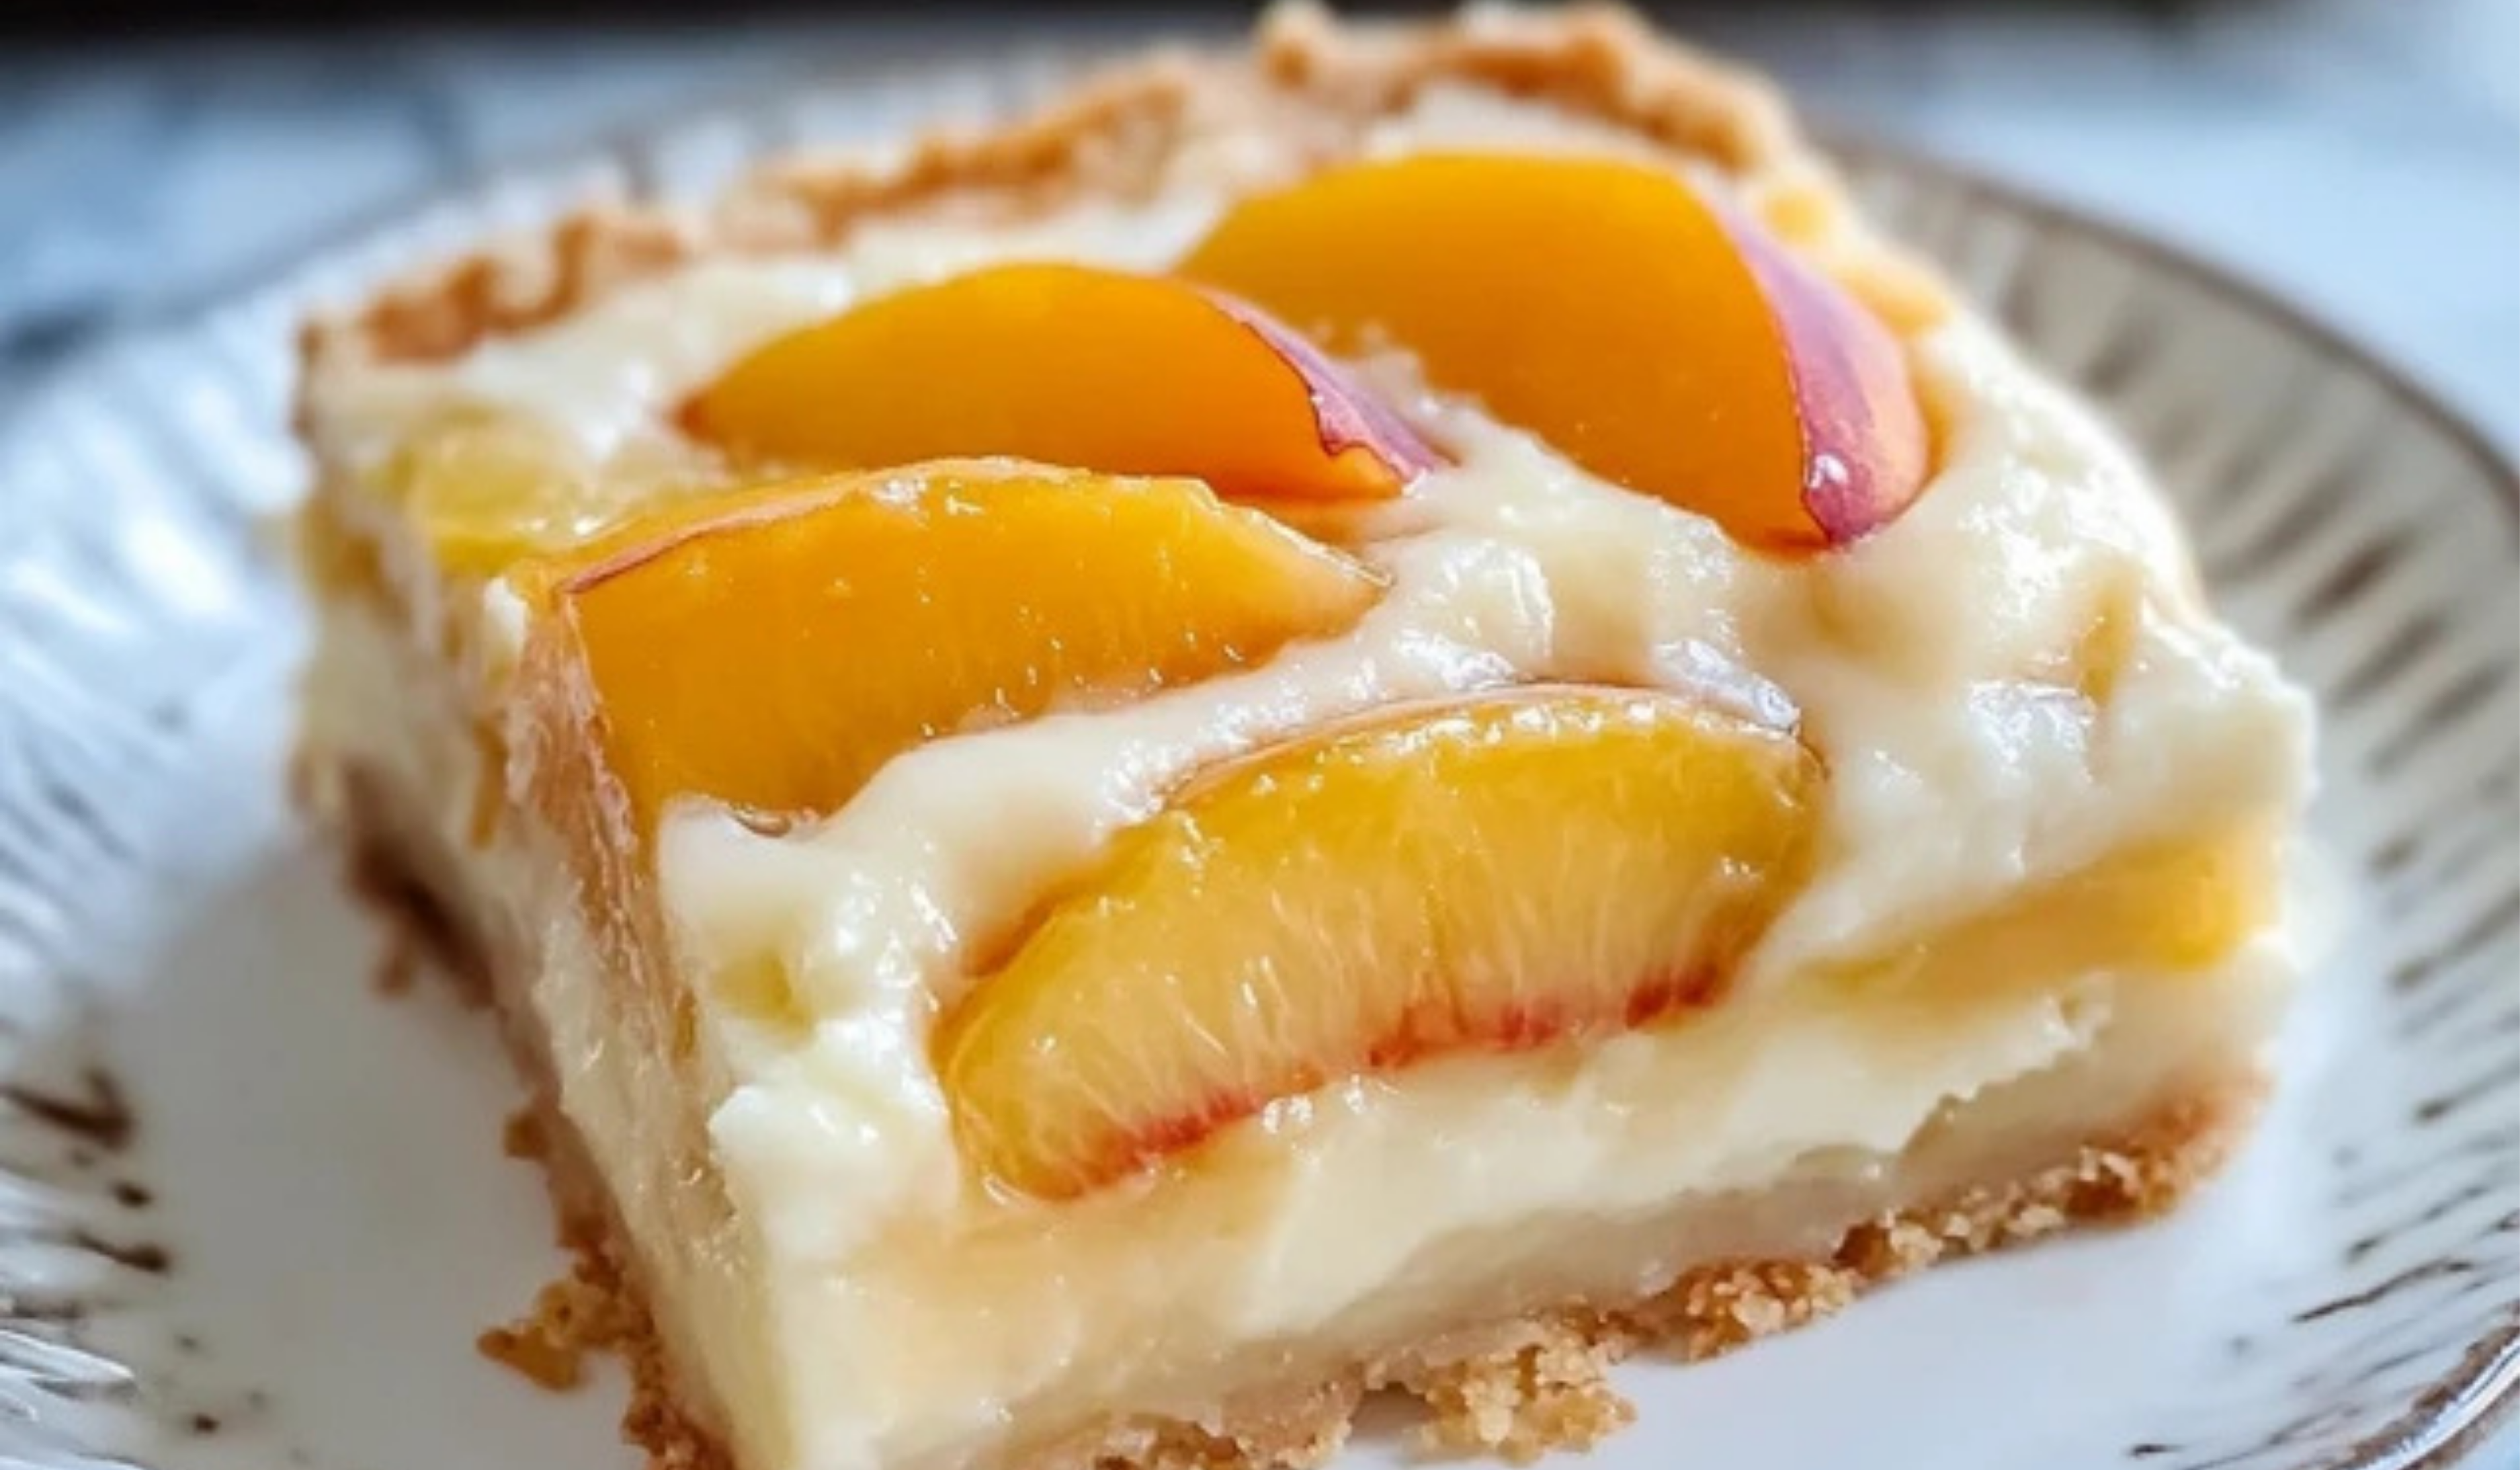
Baking can seem daunting for beginners, but some recipes offer a delightful and stress-free introduction to the world of desserts. One such recipe is the Peaches and Cream Bars. These bars combine a rich, buttery crust with a creamy filling and a fruity peach topping, making them the perfect treat for anyone looking to try their hand at baking. Whether you’re an experienced cook or just starting out, this recipe is simple, quick, and results in a delicious dessert that will impress family and friends alike.
Print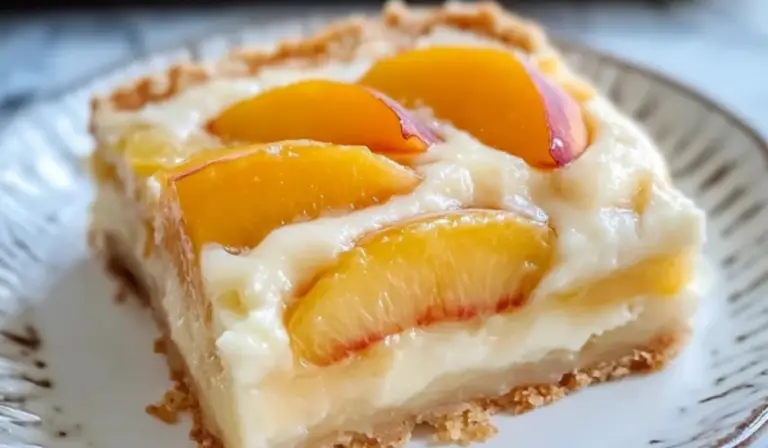
Peaches and Cream Bars: A Simple, Delicious Dessert for Beginners
Sweet, juicy peaches meet a creamy layer over a buttery crust—these Peaches and Cream Bars are the ultimate easy summer treat!
- Total Time: 55 minutes
- Yield: 15 bars 1x
Ingredients
For the Crust:
- 1 cup butter, softened
- 2 cups sugar
- 4 eggs
- 1 teaspoon vanilla extract
- 3 cups all-purpose flour
- 1 teaspoon salt
For the Filling:
- 8 oz cream cheese, softened
- 1/2 cup sugar
- 1 teaspoon vanilla extract
- 1 egg
- 21 oz can of peach pie filling (or fresh peaches, chopped)
For the Glaze:
- 1 cup powdered sugar
- 2 tablespoons milk
- 1 teaspoon almond extract
Instructions
Step 1: Make the Crust
Begin by preheating your oven to 350°F (175°C). Grease a 9×13-inch baking dish to prevent the bars from sticking. In a mixing bowl, cream together the softened butter and sugar until the mixture is light and fluffy. This step is important because it helps to incorporate air into the dough, resulting in a tender crust.
Next, add in the eggs one at a time, beating well after each addition. Add the vanilla extract and mix to combine.
In a separate bowl, whisk together the flour and salt. Slowly add the dry ingredients to the wet ingredients, mixing just until combined. You don’t want to overwork the dough, or your crust may become tough.
Step 2: Press the Dough into the Pan
Once the dough is ready, take half of it and press it evenly into the bottom of the greased 9×13-inch baking dish. It’s best to use your hands or a spatula to gently spread the dough, making sure the entire bottom of the pan is covered. This forms the base of the bars, and the dough should be thick enough to hold the filling later.
Step 3: Prepare the Filling
In a separate bowl, beat the softened cream cheese, sugar, vanilla extract, and egg until the mixture is smooth and creamy. You can use a hand mixer or a stand mixer for this step, but if you don’t have one, a whisk and some elbow grease will work just fine.
Once the filling is smooth, carefully spread it over the crust. Be gentle when spreading the cream cheese mixture to avoid disturbing the crust layer.
Step 4: Add the Peach Filling
Spoon the peach pie filling over the cream cheese layer. If you’re using fresh peaches, chop them into small pieces and distribute them evenly across the cream cheese layer. The peaches will cook down during baking, becoming soft and sweet, and they’ll create that beautiful fruit topping that makes these bars so special.
Step 5: Add the Remaining Dough
Now, take the remaining dough and dollop spoonfuls of it over the peach filling. You don’t need to cover the entire surface with dough – just place a few dollops here and there. This will bake into a crumbly, golden topping that adds texture and sweetness to the bars.
Step 6: Bake the Bars
Bake the bars at 350°F (175°C) for 30-35 minutes. You’ll know the bars are done when the top is golden brown, and the filling is set. If you’re unsure whether they’re ready, gently insert a toothpick into the center of the bars. If it comes out clean or with only a few crumbs, they’re done!
Once baked, remove the bars from the oven and allow them to cool in the pan on a wire rack. Let them cool completely before cutting them into squares.
Step 7: Make the Glaze
While the bars are cooling, prepare the glaze by whisking together the powdered sugar, milk, and almond extract. The glaze should be smooth and slightly runny, perfect for drizzling over the cooled bars.
Once the bars have cooled, drizzle the glaze over the top. The glaze adds a lovely sweetness and a hint of almond flavor that complements the peaches and cream beautifully.
Step 8: Slice and Enjoy
Once you’ve drizzled the glaze over the bars, cut them into squares and serve. These bars are perfect for family gatherings, potlucks, or just as a sweet treat to enjoy at home. They can be served chilled or at room temperature, depending on your preference.
Notes
- Don’t Overmix the Dough: When making the crust, mix the wet and dry ingredients just until they come together. Overmixing can make the crust dense and tough.
- Use Room Temperature Ingredients: This is especially important for the cream cheese and butter. When they’re softened, they mix together more easily, resulting in a smoother filling and dough.
- Check for Doneness: If you’re unsure whether the bars are baked through, do the toothpick test. Insert a toothpick into the center of the bars; if it comes out clean or with a few moist crumbs, they’re done.
- Peach Alternatives: If you can’t find canned peach pie filling, you can substitute it with fresh or frozen peaches. Simply chop them up and cook them in a small pan with a bit of sugar to create a thick, fruity filling.
- Prep Time: 20 minutes
- Cook Time: 35 minutes
I’ll never forget the first time I made these Peaches and Cream Bars. I was new to baking, and I wanted to try something that looked both impressive and tasted fantastic. I was drawn to this recipe because it required just a few basic ingredients, and the steps were easy to follow. When the bars came out of the oven, the sweet smell of peaches filled the kitchen, and the creamy filling looked just like something you’d see in a bakery display case. The best part? They tasted even better than they looked! If you’re a beginner cook, this is the perfect recipe to try your hand at. It’s simple, quick, and will make you feel like a seasoned pro in the kitchen.
Ingredients and Preparation
The ingredients for these Peaches and Cream Bars are straightforward and accessible, meaning you likely have most of them in your kitchen already. Here’s what you’ll need:
For the Crust:
- 1 cup butter, softened
- 2 cups sugar
- 4 eggs
- 1 teaspoon vanilla extract
- 3 cups all-purpose flour
- 1 teaspoon salt
For the Filling:
- 8 oz cream cheese, softened
- 1/2 cup sugar
- 1 teaspoon vanilla extract
- 1 egg
- 21 oz can of peach pie filling (or fresh peaches, chopped)
For the Glaze:
- 1 cup powdered sugar
- 2 tablespoons milk
- 1 teaspoon almond extract
If you’re looking for ingredient substitutions, don’t worry. You can swap out the canned peach pie filling for fresh peaches if you prefer a fresher, more natural option. If you can’t find almond extract for the glaze, vanilla extract works perfectly as a substitute. And while the recipe calls for butter, you can use margarine if needed, but keep in mind that the texture of the crust might vary slightly.
Step-by-Step Instructions
Now, let’s dive into how to make these delicious bars step by step. Don’t worry if you’re a beginner – I’ve broken everything down into simple, easy-to-follow steps. Just take your time, and you’ll end up with a treat your friends and family will rave about!
Step 1: Make the Crust
Begin by preheating your oven to 350°F (175°C). Grease a 9×13-inch baking dish to prevent the bars from sticking. In a mixing bowl, cream together the softened butter and sugar until the mixture is light and fluffy. This step is important because it helps to incorporate air into the dough, resulting in a tender crust.
Next, add in the eggs one at a time, beating well after each addition. Add the vanilla extract and mix to combine.
In a separate bowl, whisk together the flour and salt. Slowly add the dry ingredients to the wet ingredients, mixing just until combined. You don’t want to overwork the dough, or your crust may become tough.
Step 2: Press the Dough into the Pan
Once the dough is ready, take half of it and press it evenly into the bottom of the greased 9×13-inch baking dish. It’s best to use your hands or a spatula to gently spread the dough, making sure the entire bottom of the pan is covered. This forms the base of the bars, and the dough should be thick enough to hold the filling later.
Step 3: Prepare the Filling
In a separate bowl, beat the softened cream cheese, sugar, vanilla extract, and egg until the mixture is smooth and creamy. You can use a hand mixer or a stand mixer for this step, but if you don’t have one, a whisk and some elbow grease will work just fine.
Once the filling is smooth, carefully spread it over the crust. Be gentle when spreading the cream cheese mixture to avoid disturbing the crust layer.
Step 4: Add the Peach Filling
Spoon the peach pie filling over the cream cheese layer. If you’re using fresh peaches, chop them into small pieces and distribute them evenly across the cream cheese layer. The peaches will cook down during baking, becoming soft and sweet, and they’ll create that beautiful fruit topping that makes these bars so special.
Step 5: Add the Remaining Dough
Now, take the remaining dough and dollop spoonfuls of it over the peach filling. You don’t need to cover the entire surface with dough – just place a few dollops here and there. This will bake into a crumbly, golden topping that adds texture and sweetness to the bars.
Step 6: Bake the Bars
Bake the bars at 350°F (175°C) for 30-35 minutes. You’ll know the bars are done when the top is golden brown, and the filling is set. If you’re unsure whether they’re ready, gently insert a toothpick into the center of the bars. If it comes out clean or with only a few crumbs, they’re done!
Once baked, remove the bars from the oven and allow them to cool in the pan on a wire rack. Let them cool completely before cutting them into squares.
Step 7: Make the Glaze
While the bars are cooling, prepare the glaze by whisking together the powdered sugar, milk, and almond extract. The glaze should be smooth and slightly runny, perfect for drizzling over the cooled bars.
Once the bars have cooled, drizzle the glaze over the top. The glaze adds a lovely sweetness and a hint of almond flavor that complements the peaches and cream beautifully.
Step 8: Slice and Enjoy
Once you’ve drizzled the glaze over the bars, cut them into squares and serve. These bars are perfect for family gatherings, potlucks, or just as a sweet treat to enjoy at home. They can be served chilled or at room temperature, depending on your preference.
Beginner Tips and Notes
If you’re new to baking, don’t worry – I’ve got a few tips to make sure your Peaches and Cream Bars turn out perfectly!
- Don’t Overmix the Dough: When making the crust, mix the wet and dry ingredients just until they come together. Overmixing can make the crust dense and tough.
- Use Room Temperature Ingredients: This is especially important for the cream cheese and butter. When they’re softened, they mix together more easily, resulting in a smoother filling and dough.
- Check for Doneness: If you’re unsure whether the bars are baked through, do the toothpick test. Insert a toothpick into the center of the bars; if it comes out clean or with a few moist crumbs, they’re done.
- Peach Alternatives: If you can’t find canned peach pie filling, you can substitute it with fresh or frozen peaches. Simply chop them up and cook them in a small pan with a bit of sugar to create a thick, fruity filling.

Serving Suggestions
These Peaches and Cream Bars are delicious on their own, but there are a few ways to elevate the dish if you want to impress your guests even more. Here are a few serving suggestions:
- Serve with Ice Cream: A scoop of vanilla ice cream or whipped cream on the side complements the sweetness of the peaches and adds a creamy contrast to the bars.
- Pair with Fresh Berries: Serve the bars with a side of fresh berries like strawberries, raspberries, or blueberries to add a tart contrast to the sweet dessert.
- Top with Extra Glaze: For extra sweetness, drizzle a little more glaze on top of each bar right before serving.
If you have leftovers, you can store them in an airtight container at room temperature for up to 3 days, or refrigerate them for up to a week. You can also freeze the bars for longer storage. Just be sure to let them cool completely before wrapping them tightly and freezing.
Engagement Features
I encourage you to try this Peaches and Cream Bars recipe the next time you’re looking for an easy and delicious dessert to share. It’s a great recipe for beginner cooks because it uses simple ingredients and is straightforward to make. Plus, it’s sure to impress everyone who tries it!
If you give this recipe a try, I’d love to hear how it turned out. Drop a comment below and let me know if you added your own twist or if you ran into any challenges. Sharing your experiences and tips with others will help everyone feel more confident in the kitchen.
I hope this recipe inspires you to try your hand at baking, and I’m excited to see how your Peaches and Cream Bars turn out!