It all started one rainy afternoon when I was craving something warm, sweet, and comforting—but didn’t want to fuss over complicated techniques or a long list of ingredients. I remembered a recipe my grandmother once made during the fall: baked apples filled with something creamy and rich. That memory inspired these Cheesecake Stuffed Baked Apples, a dish that feels both indulgent and incredibly homey. It’s the kind of dessert you whip up on a quiet Sunday evening, and it fills your kitchen with the nostalgic scent of cinnamon and apples.
Print
Cheesecake Stuffed Baked Apples: A Beginner’s Guide to a Cozy Dessert Classic
Fall in love with comfort food all over again! 🍎🍰 These Cheesecake Stuffed Baked Apples are warm, creamy, and bursting with cozy flavor. ✨💛 Perfect for beginners, this simple recipe transforms everyday apples into a heavenly dessert with a rich cheesecake filling and a cinnamon-sugar finish. 🥄🔥 Easy to make, hard to resist! Serve them warm for a nostalgic, feel-good treat that’s sure to impress. 🏡🍴 Let your kitchen smell like magic! 🍁🎉
- Total Time: 45 minutes
- Yield: 4 servings 1x
Ingredients
- 4 medium-sized apples (Granny Smith or Honeycrisp are ideal)
- 8 oz cream cheese, softened to room temperature
- 1/4 cup granulated sugar (or a sugar substitute like stevia for a diabetic-friendly version)
- 1 teaspoon vanilla extract
- 1 teaspoon cinnamon (plus a pinch extra for topping)
- 1 tablespoon lemon juice
- 1/2 cup graham cracker crumbs (gluten-free if needed)
- 2 tablespoons unsalted butter, melted
Instructions
1. Preheat the oven to 375°F (190°C).
Starting with a properly preheated oven ensures that the apples cook evenly and the filling sets well.
2. Wash and core the apples.
Use a small paring knife or apple corer to carefully remove the core and seeds, creating a hollow “cup” in each apple. Leave about half an inch of the bottom intact to prevent the filling from leaking during baking.
3. Prepare the cheesecake filling.
In a medium bowl, combine the softened cream cheese, sugar, vanilla extract, and 3/4 teaspoon of cinnamon. Use a fork or spatula to mix until smooth and creamy. If using a sugar substitute, mix slowly and taste to adjust sweetness as needed.
4. Fill the apples.
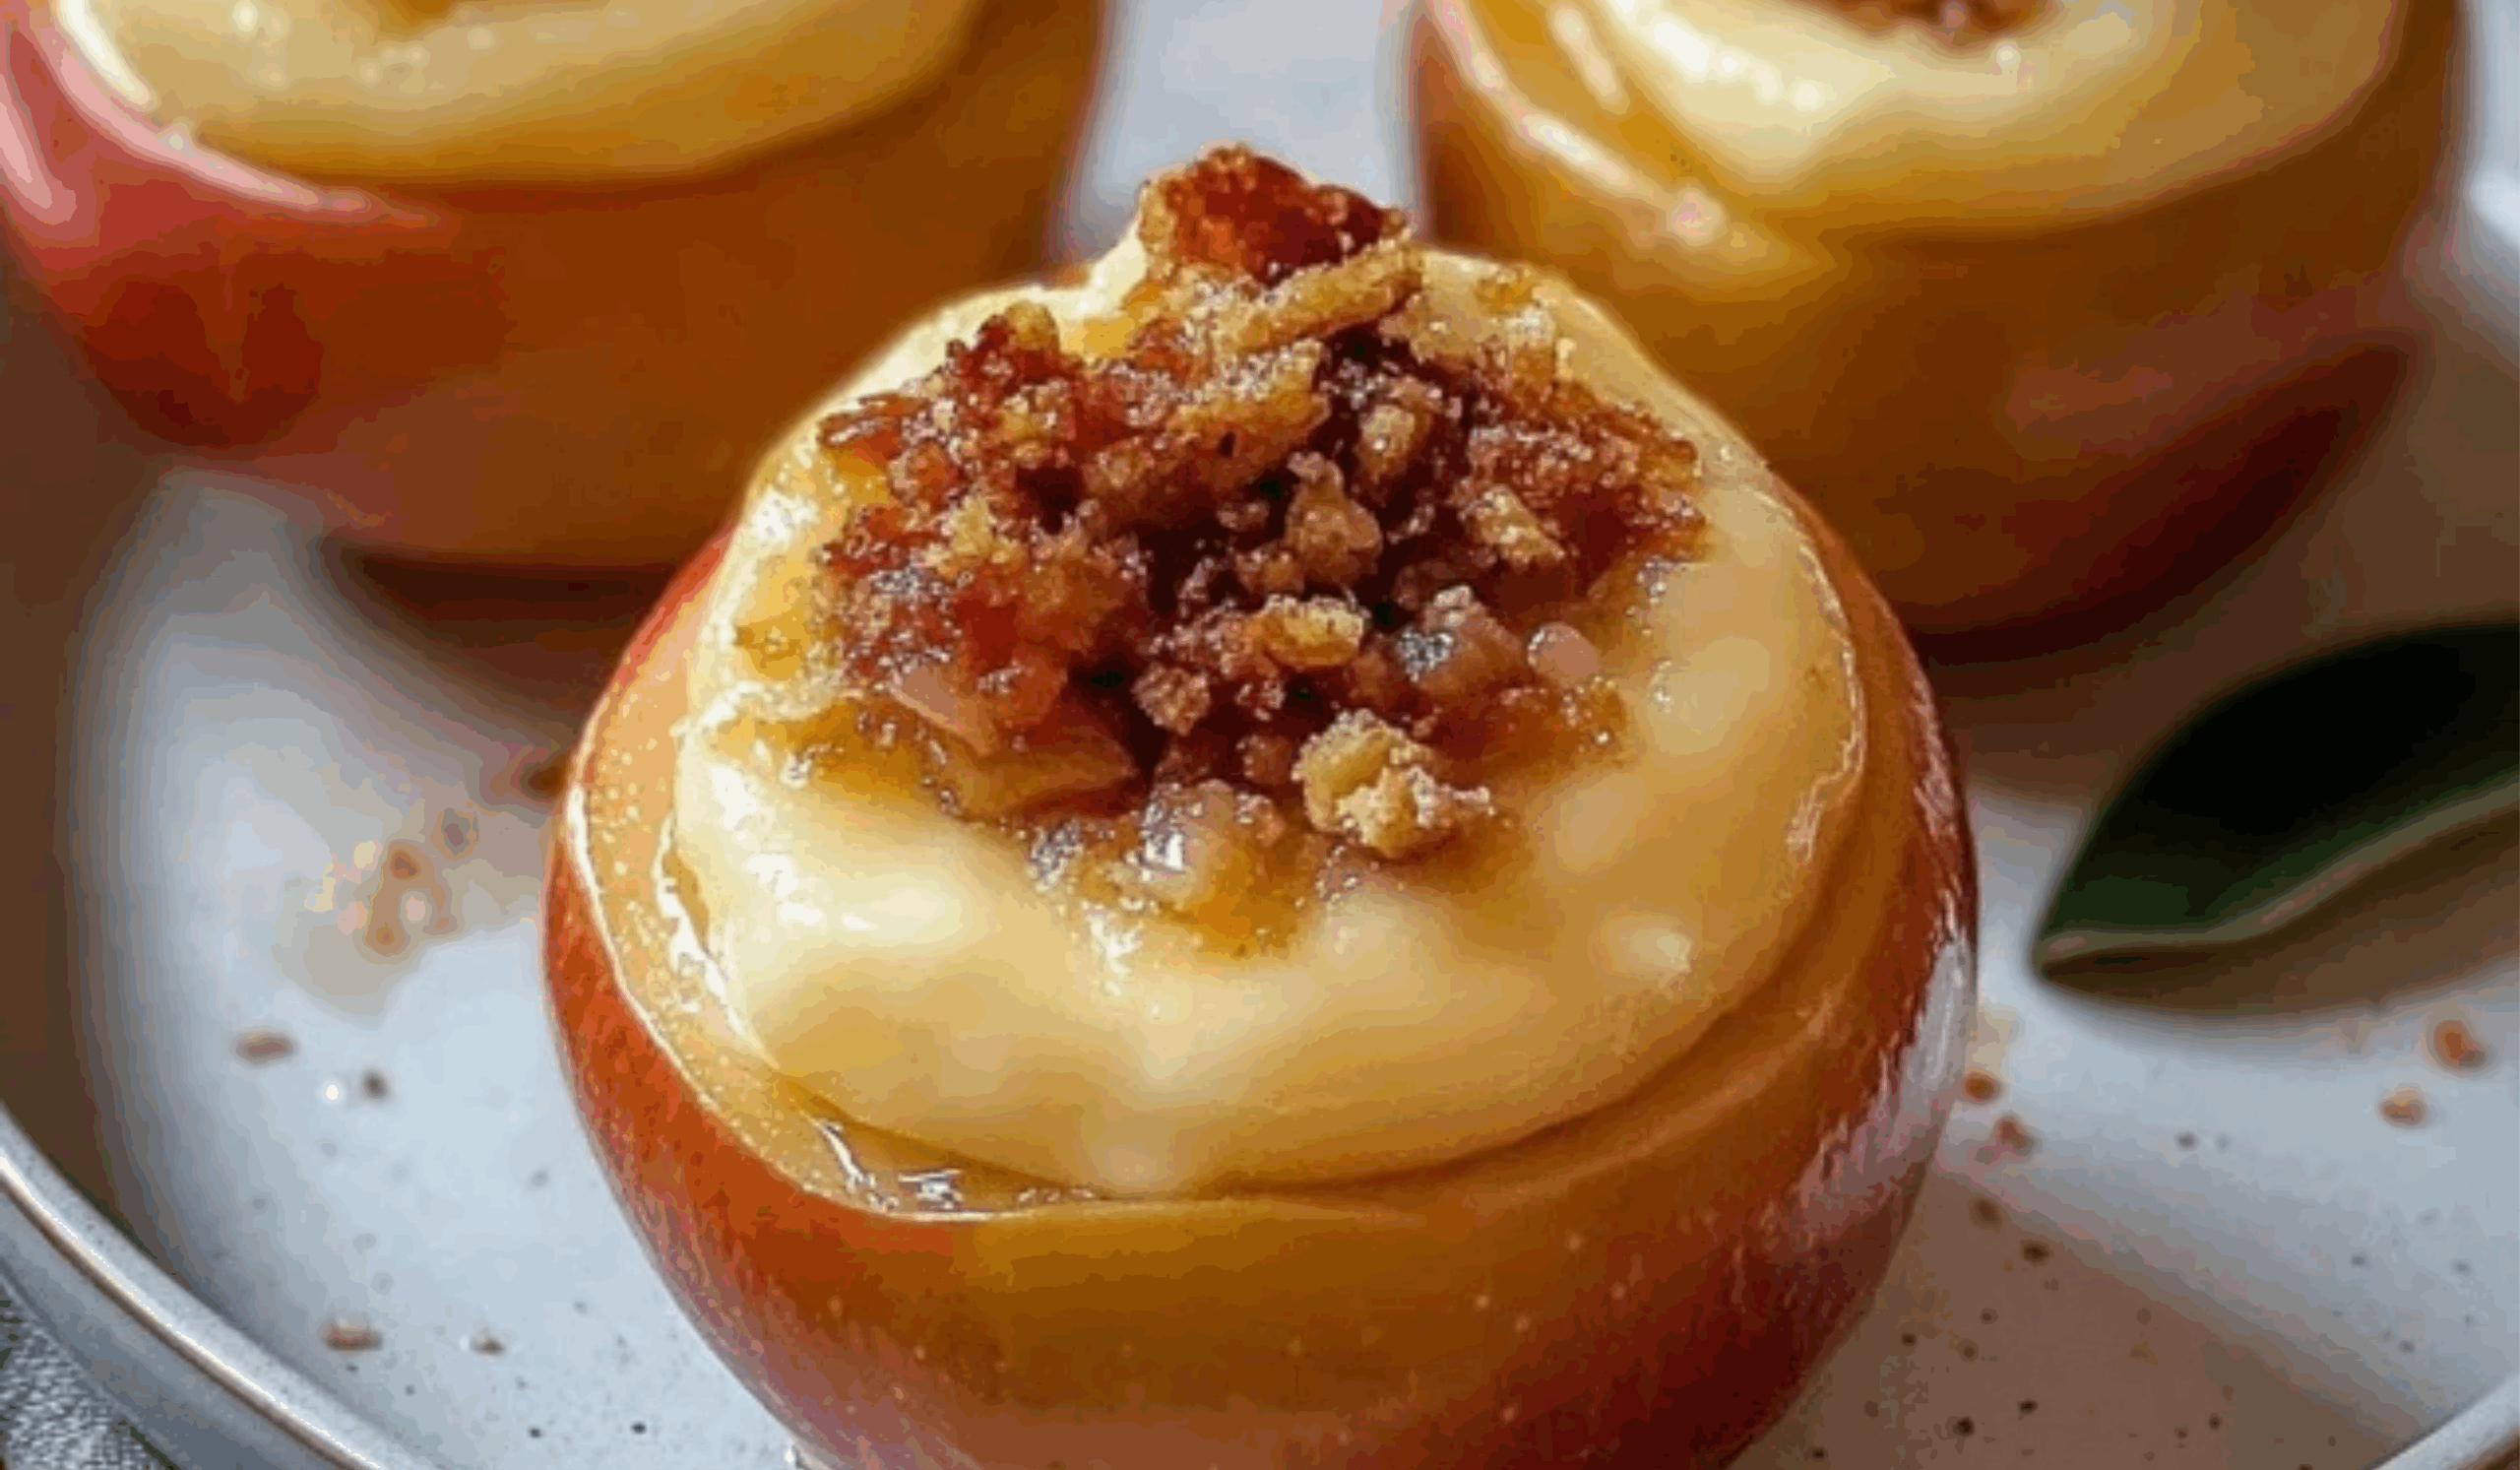
Spoon the cheesecake mixture into each hollowed-out apple, pressing down gently to fill the cavity fully. It’s okay if the filling mounds slightly over the top.
5. Make the graham cracker topping.
In a separate small bowl, stir together the graham cracker crumbs, melted butter, and a pinch of cinnamon. This mixture should resemble wet sand. Spoon it generously over the filled apples and press lightly so it adheres.
6. Place apples in a baking dish.
Arrange the apples in a snug baking dish so they support each other and stay upright. Drizzle lemon juice over the tops and around the base. This prevents browning and adds a slight brightness to balance the richness.
7. Bake for 25 to 30 minutes.
The apples are ready when they are soft but still hold their shape. Insert a toothpick into the side—if it slides in easily, they’re done. The cheesecake filling should be slightly puffed and set.
8. Let them cool before serving.
Allow the apples to rest for at least 10 minutes after baking. This helps the filling firm up and makes them easier to eat. Serve warm, at room temperature, or even chilled.
Notes
Don’t overfill.
It’s tempting to pack in as much cheesecake filling as possible, but leave a little space at the top for the graham cracker topping to sit securely.
Use a stable baking dish.
Choose a dish that holds the apples snugly. This keeps them from tipping over as they bake and helps them cook more evenly.
Check for doneness.
Every oven is different. Begin checking at the 25-minute mark. If the apples still feel firm or the filling jiggles loosely, give them a few extra minutes.
Soften cream cheese thoroughly.
Cold cream cheese will clump and resist mixing. Let it sit at room temperature for at least 30 minutes before starting, or gently microwave it in 10-second bursts until soft.
Prep efficiently.
Core all apples first, then make the filling and topping. Grouping similar tasks saves time and keeps your workspace organized.
- Prep Time: 15 minutes
- Cook Time: 30 minutes
This recipe is perfect for beginner cooks because it’s straightforward, uses simple ingredients, and teaches a few essential kitchen skills—like coring apples, mixing a filling, and baking until tender. Even better, it’s a forgiving recipe. You don’t need a mixer, fancy pans, or baking experience. Just a few pantry staples and a desire for something delicious and comforting.
Ingredients and Preparation
What’s wonderful about this recipe is its balance of simplicity and versatility. You only need a handful of ingredients, and many can be swapped or modified based on dietary needs or what you have on hand.
Ingredients (Serves 4):
- 4 medium-sized apples (Granny Smith or Honeycrisp are ideal)
- 8 oz cream cheese, softened to room temperature
- 1/4 cup granulated sugar (or a sugar substitute like stevia for a diabetic-friendly version)
- 1 teaspoon vanilla extract
- 1 teaspoon cinnamon (plus a pinch extra for topping)
- 1 tablespoon lemon juice
- 1/2 cup graham cracker crumbs (gluten-free if needed)
- 2 tablespoons unsalted butter, melted
Ingredient Notes and Alternatives:
- Apples: Firm apples are essential here. Granny Smith offers tartness that balances the sweet filling, while Honeycrisp provides natural sweetness and a juicy texture.
- Cream Cheese: You can use light cream cheese or even dairy-free alternatives made from almond or soy.
- Sugar: Feel free to substitute with coconut sugar, monk fruit sweetener, or erythritol if you’re watching your sugar intake.
- Graham Crackers: Gluten-free graham crackers or crushed oats with a bit of honey make great substitutions.
- Butter: For dairy-free or vegan variations, opt for melted coconut oil or plant-based butter.
Step-by-Step Instructions
This recipe is designed to build your confidence in the kitchen. Follow each step carefully, and you’ll have a delightful dessert that feels gourmet but is easy enough for a first-time baker.
1. Preheat the oven to 375°F (190°C).
Starting with a properly preheated oven ensures that the apples cook evenly and the filling sets well.
2. Wash and core the apples.
Use a small paring knife or apple corer to carefully remove the core and seeds, creating a hollow “cup” in each apple. Leave about half an inch of the bottom intact to prevent the filling from leaking during baking.
3. Prepare the cheesecake filling.
In a medium bowl, combine the softened cream cheese, sugar, vanilla extract, and 3/4 teaspoon of cinnamon. Use a fork or spatula to mix until smooth and creamy. If using a sugar substitute, mix slowly and taste to adjust sweetness as needed.
4. Fill the apples.
Spoon the cheesecake mixture into each hollowed-out apple, pressing down gently to fill the cavity fully. It’s okay if the filling mounds slightly over the top.
5. Make the graham cracker topping.
In a separate small bowl, stir together the graham cracker crumbs, melted butter, and a pinch of cinnamon. This mixture should resemble wet sand. Spoon it generously over the filled apples and press lightly so it adheres.
6. Place apples in a baking dish.
Arrange the apples in a snug baking dish so they support each other and stay upright. Drizzle lemon juice over the tops and around the base. This prevents browning and adds a slight brightness to balance the richness.
7. Bake for 25 to 30 minutes.
The apples are ready when they are soft but still hold their shape. Insert a toothpick into the side—if it slides in easily, they’re done. The cheesecake filling should be slightly puffed and set.
8. Let them cool before serving.
Allow the apples to rest for at least 10 minutes after baking. This helps the filling firm up and makes them easier to eat. Serve warm, at room temperature, or even chilled.
Beginner Tips and Notes
This recipe was written with beginner cooks in mind, and here are a few helpful notes to make your first try a smooth success:
Don’t overfill.
It’s tempting to pack in as much cheesecake filling as possible, but leave a little space at the top for the graham cracker topping to sit securely.
Use a stable baking dish.
Choose a dish that holds the apples snugly. This keeps them from tipping over as they bake and helps them cook more evenly.
Check for doneness.
Every oven is different. Begin checking at the 25-minute mark. If the apples still feel firm or the filling jiggles loosely, give them a few extra minutes.
Soften cream cheese thoroughly.
Cold cream cheese will clump and resist mixing. Let it sit at room temperature for at least 30 minutes before starting, or gently microwave it in 10-second bursts until soft.
Prep efficiently.
Core all apples first, then make the filling and topping. Grouping similar tasks saves time and keeps your workspace organized.
Serving Suggestions
While these cheesecake stuffed apples are absolutely delicious on their own, you can elevate them further with a few complementary additions:
With a scoop of ice cream:
Vanilla bean ice cream is a natural pairing. The cold creaminess contrasts beautifully with the warm, spiced apple and cheesecake center.
Drizzle of caramel or maple syrup:
A light drizzle adds extra indulgence and brings out the sweetness of the fruit. Warm sauces work best for this.
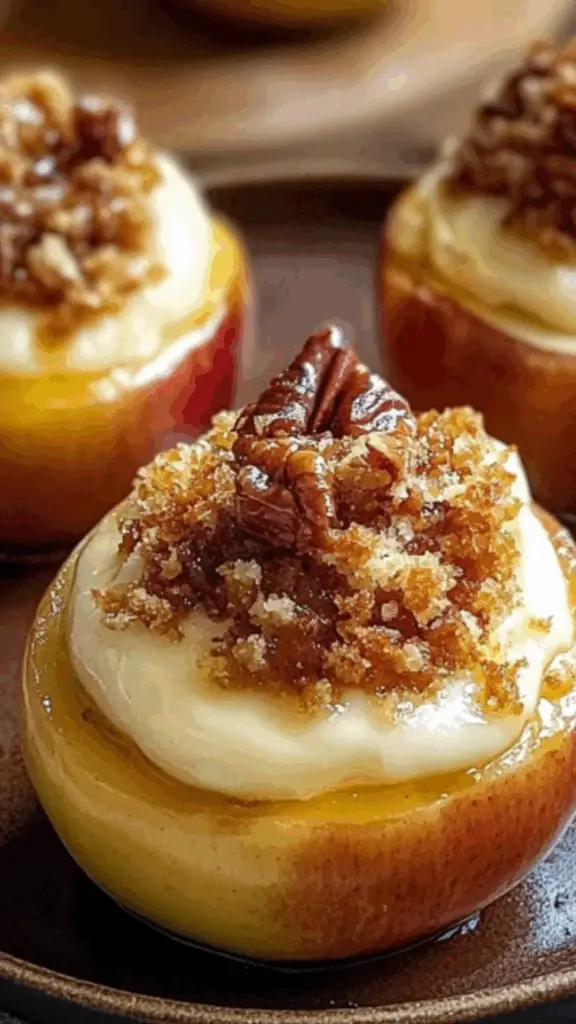
Crushed nuts or granola on top:
Add some texture by sprinkling chopped pecans, walnuts, or granola over the baked apples just before serving.
On a breakfast table:
Cut a stuffed apple in half and serve it with Greek yogurt and a drizzle of honey for a sweet brunch dish.
Storage Tips:
- Refrigeration: Store leftovers in an airtight container in the fridge for up to 3 days.
- Reheating: Microwave for 30 seconds or warm in a 300°F (150°C) oven until heated through.
- Freezing not recommended: The cream cheese filling may become grainy when thawed, so enjoy fresh if possible.
Engagement Features: Encouragement for First-Time Cooks
Trying a new recipe can feel intimidating, especially if you’re new to baking. But here’s the beauty of this dish—it doesn’t demand perfection. Even if the filling cracks a little or your apples are slightly overbaked, they’ll still taste amazing. Every bite delivers creamy cheesecake flavor wrapped in a tender, spiced apple shell.
Think of this recipe as an introduction to baking success. It teaches you how to mix a basic filling, how to bake fruit, and how to experiment with textures and toppings. Once you’ve made it once, you’ll likely start imagining other variations—maybe adding chopped raisins, a pinch of nutmeg, or even cocoa powder to the filling.
So take a deep breath, tie on your apron, and get started. And when you do, I’d love to hear how it turns out. Did you add a twist of your own? Did your family love it? Share your experience, and let this be the first of many homemade desserts you master with confidence.